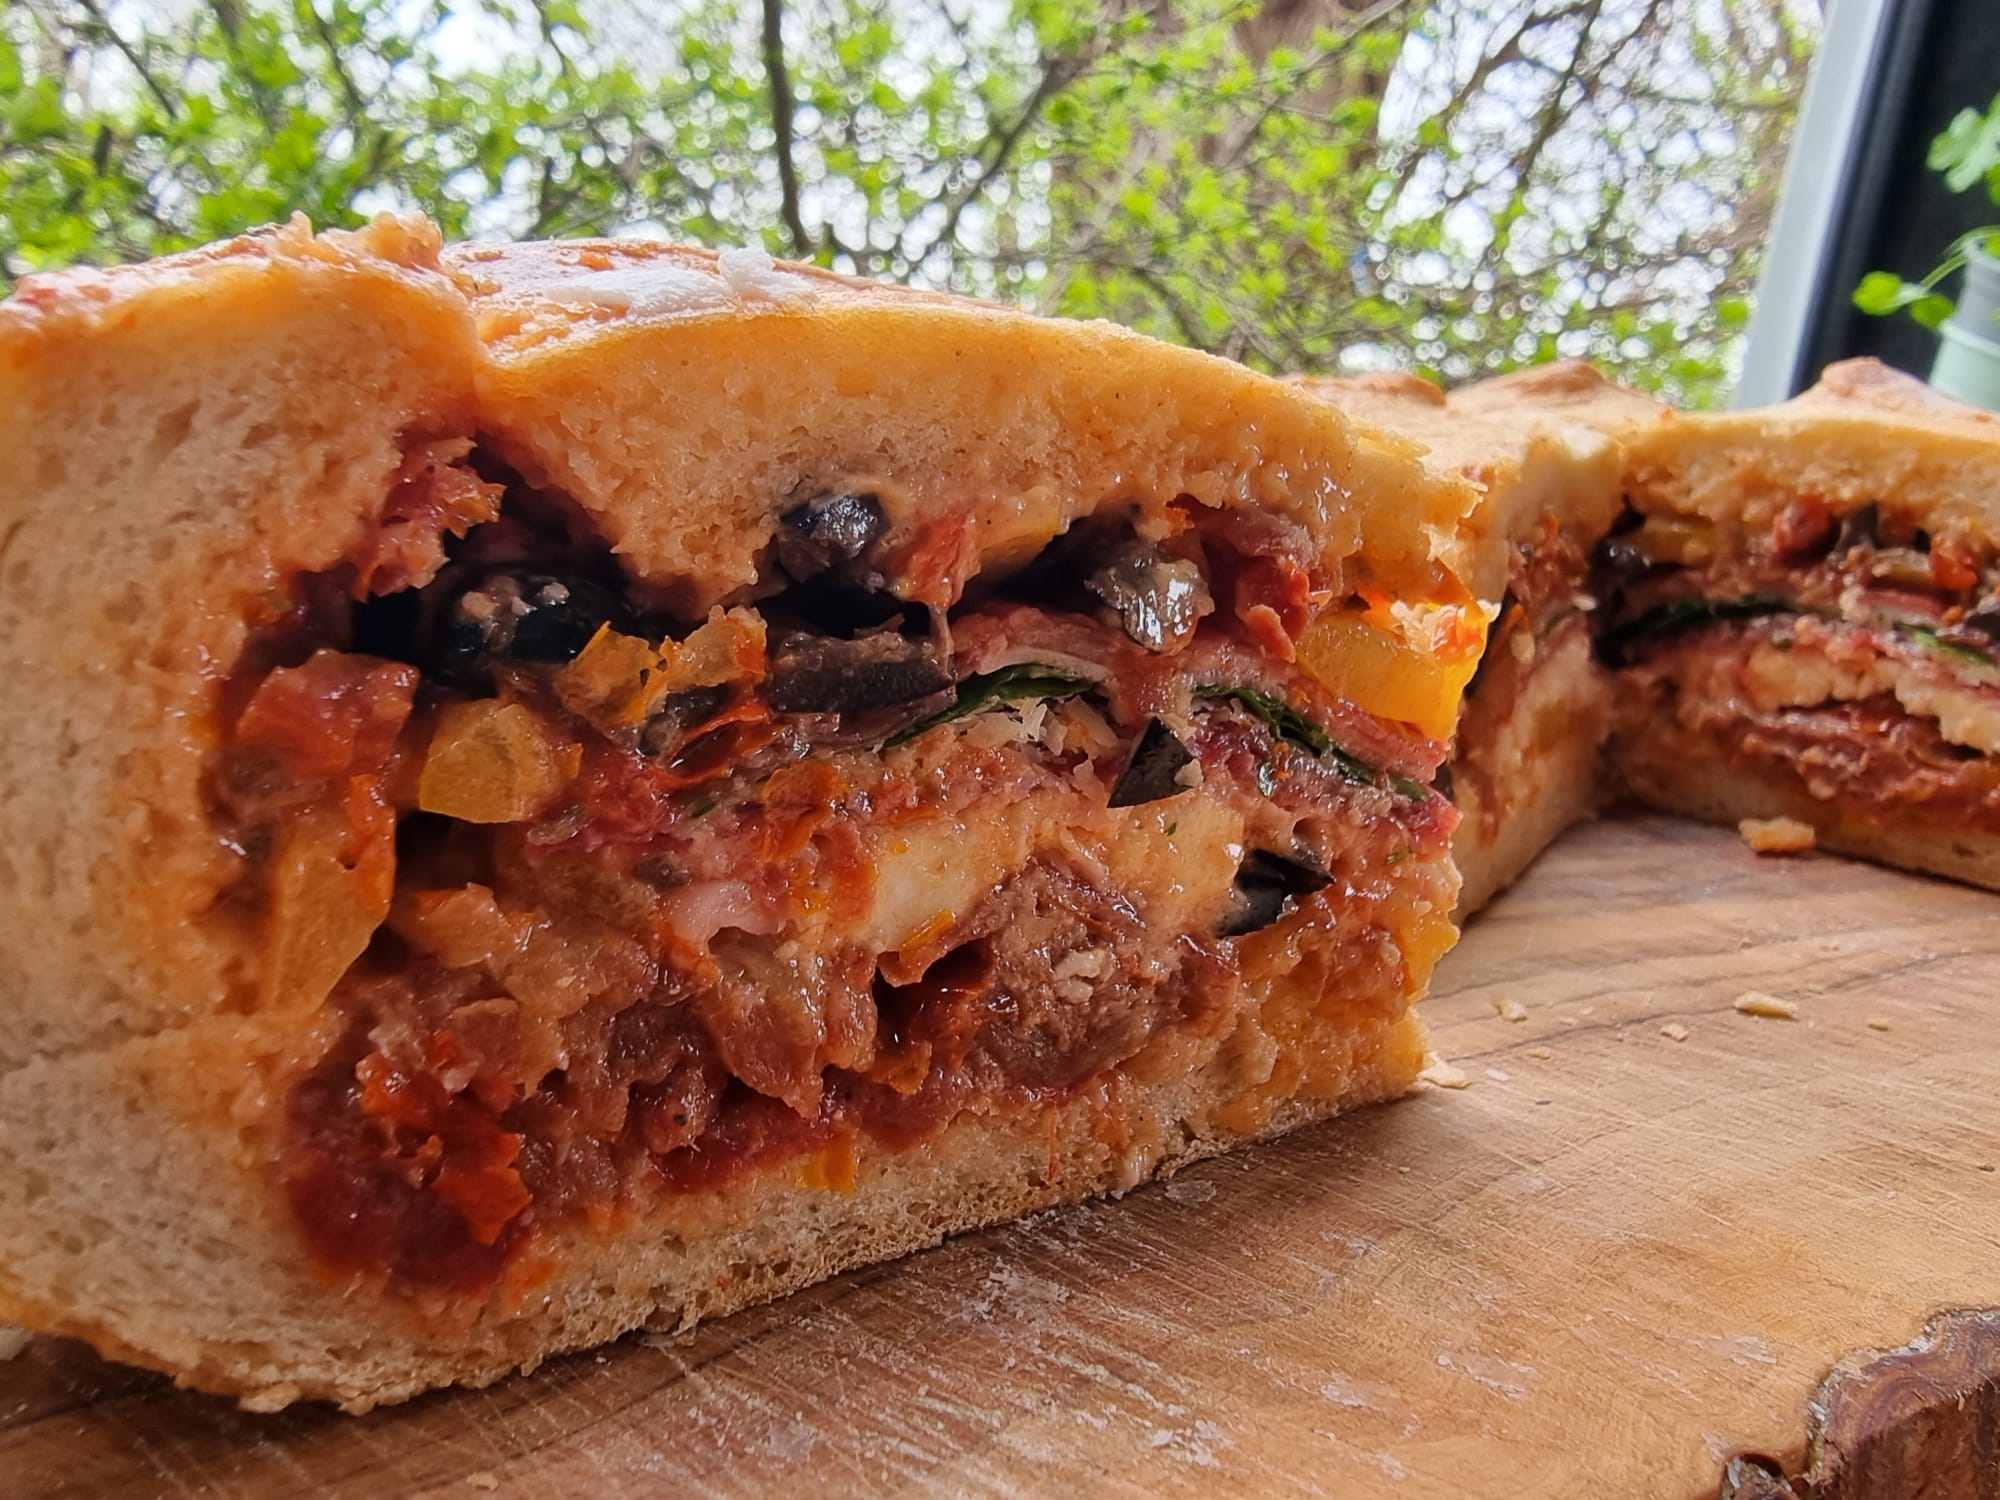
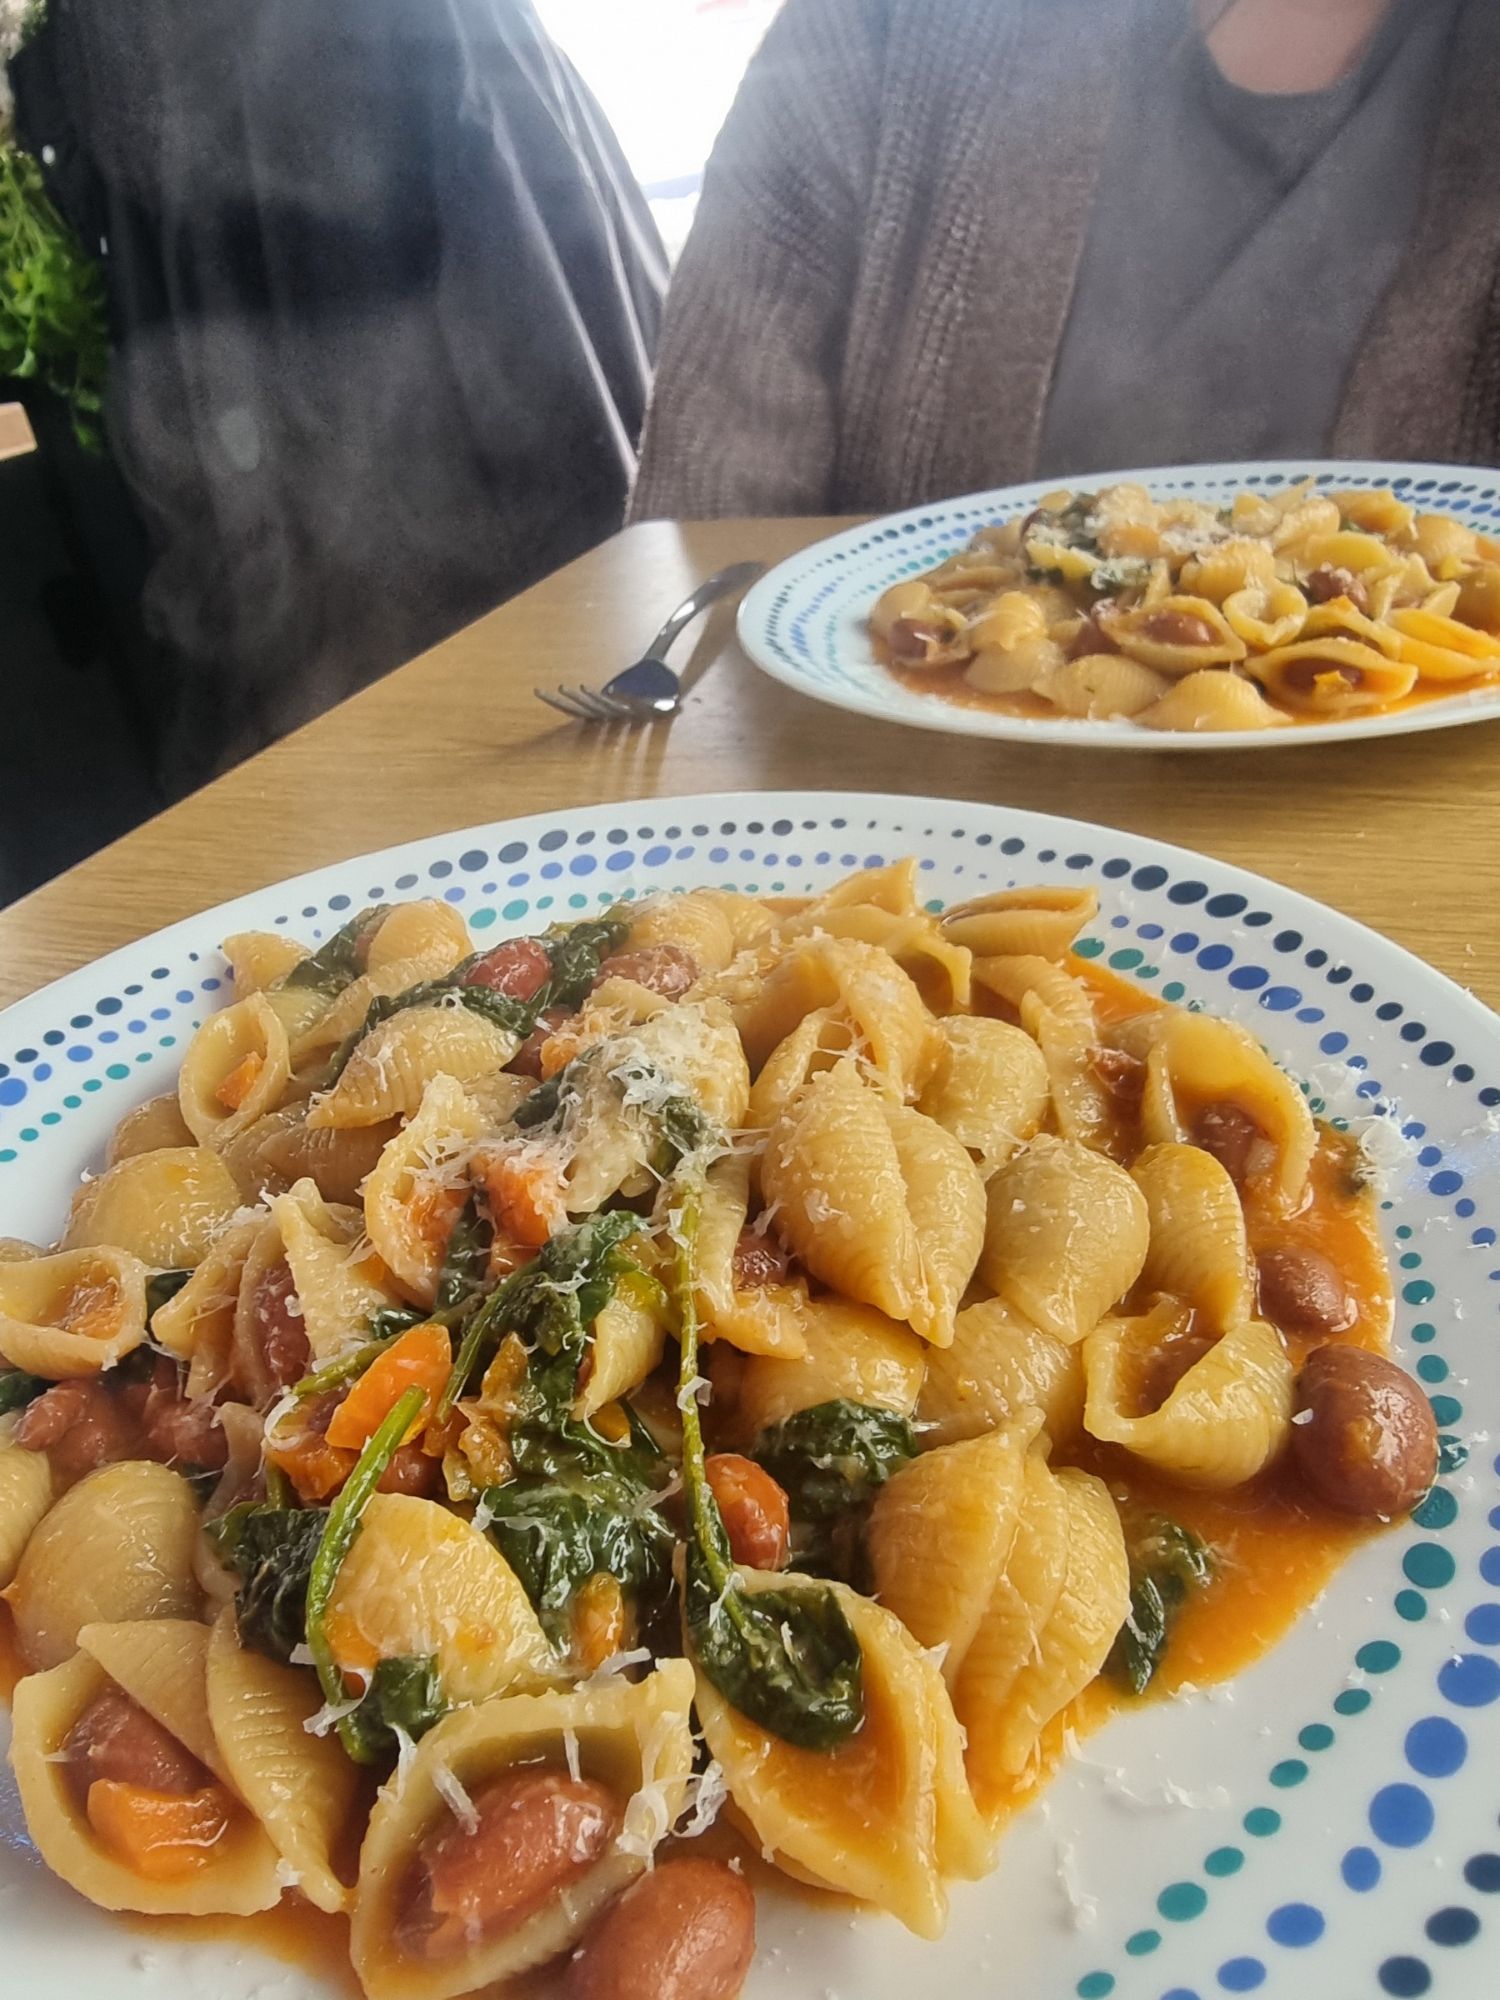
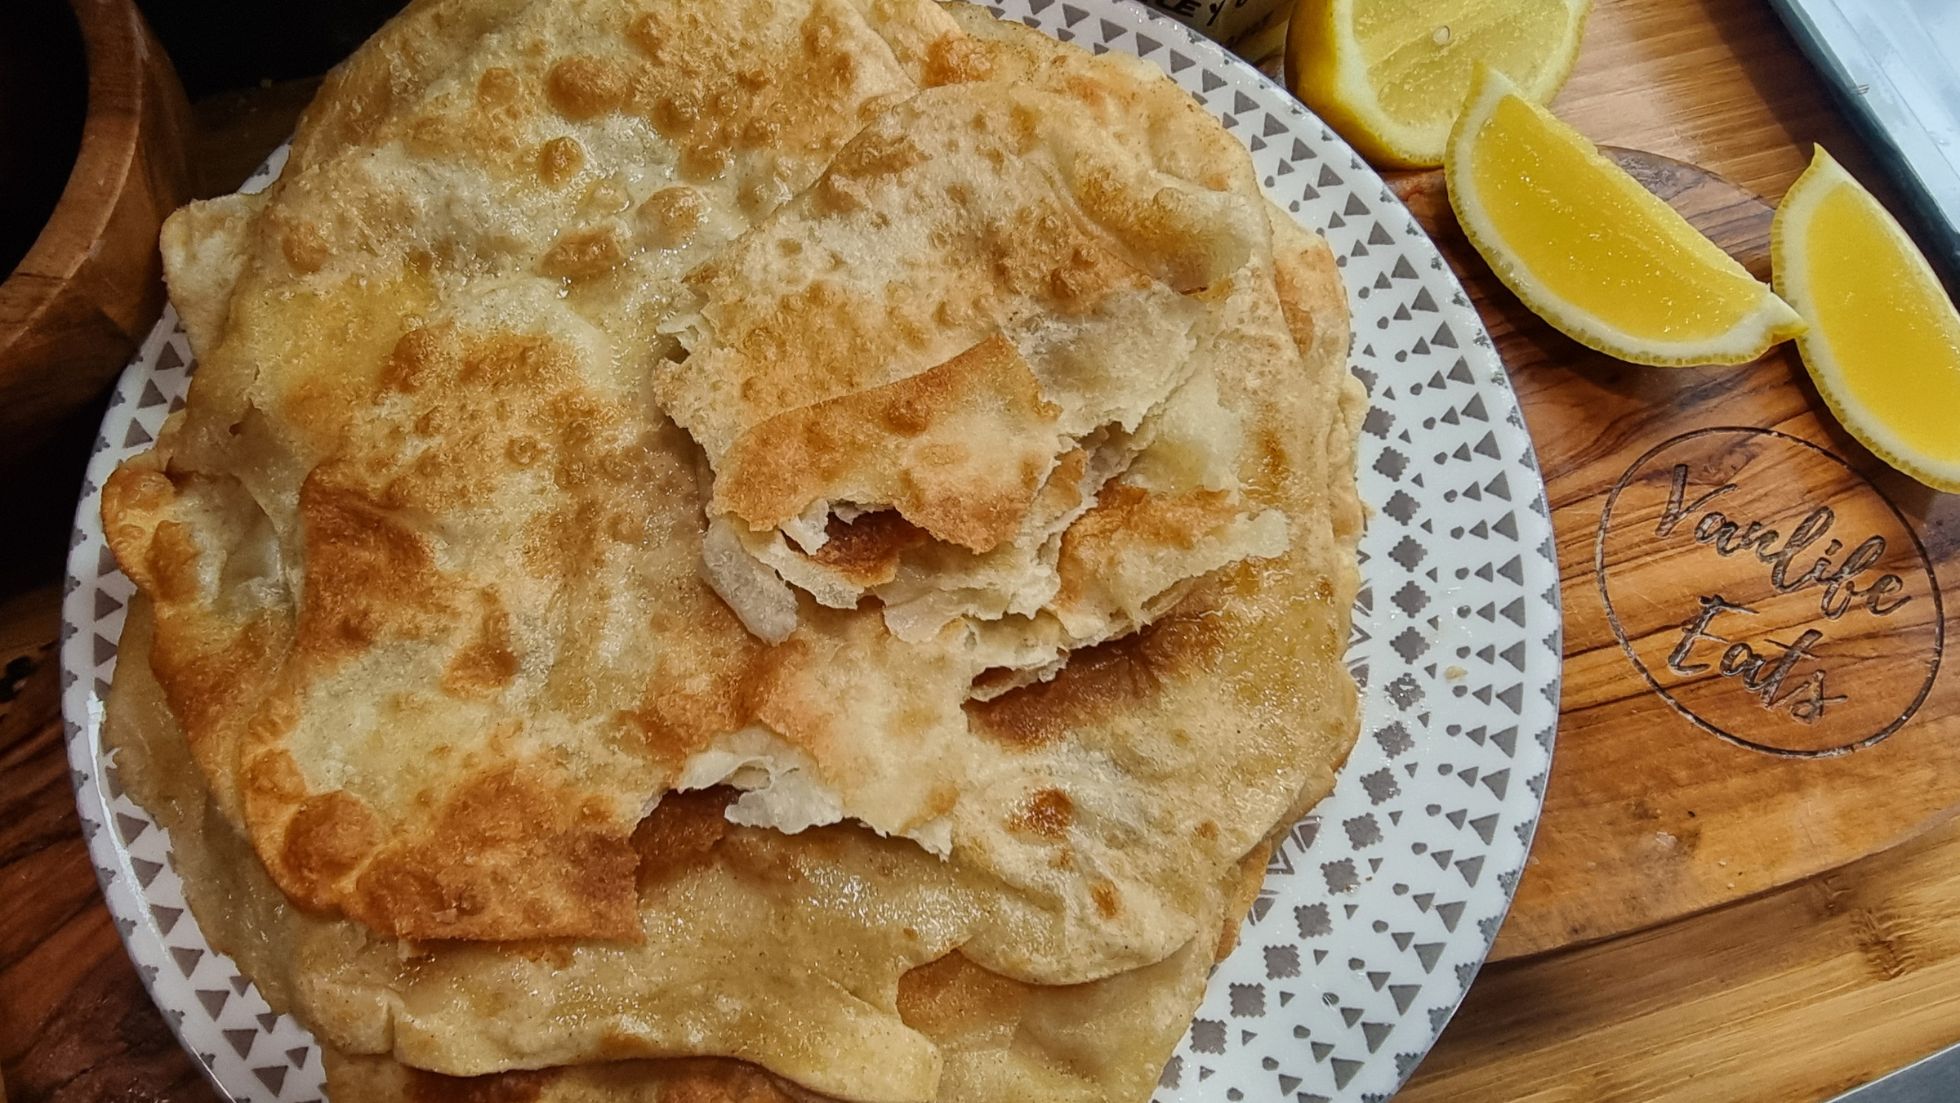
This recipe for Nantucket Cranberry Pie is so easy and so good. This is a delicious light sponge, full of juicy cranberries, crunchy pecans and a crisp sugary crust. What’s not to love?! There are many variations of Nantucket cranberry pie online, some using walnuts rather than the pecans I like to use in my recipe. One thing is for certain though MeShell’s Diner nantucket cranberry pie is the best. Best of all it’s great to cook in any campervan or motorhome.
This is cooked in a conventional oven in our motorhome, but could definitely be baked in the Omnia Stove top oven too!
MeShell’s Diner Nantucket Cranberry Pie
amerimanx_travels
Vegetarian
Is it a cake? Is it a pie?
Regardless what you call it..it’s delish!
This light, tart, and sweet pudding is a tasty alternative to any Christmas dessert.
Measurements in US cups
Another meal from MeShell’s diner, this time butter pecan fudge. The buttered pecans give this fudge a bit of texture as well as a whole lot of flavour. Yummy! Check out more of our recipes here.
MeShell’s Diner Easy Butter Pecan Fudge
amerimanx_travels
Vegetarian
Easy fudge recipe to make without the need for candy thermometer.
Delicious buttery fudge, which can be adapted to loads of different ingredients.
Cup amounts are American cup measurements. Please Google for UK equivalents.
Make sure pecans are toasted, cooled, and chopped before starting the fudge cooking process. Also, make sure powered (Icing) sugar has been sifted and measured out prior to beginning.
Toast the two cups of pecans with two tablespoons of butter for five minutes and set aside. Once cooled, chop up. Set aside about 2 Tbsp.
In a large saucepan, add one cup of butter and melt on medium-high heat.
After the butter melts, add the granulated sugar and brown sugar and mix well.
Add the heavy whipping cream, salt, and vanilla extract and mix well.
Turn the temperature to medium-high to high heat and bring the mixture to a boil, stirring occasionally. Once the mixture starts to boil, start a timer for four minutes. Stir occasionally while it cooks.
When the timer reaches four minutes, take the fudge off of the burner, add the powdered sugar, and mix well.
Finally, add the two cups of chopped pecans and stir.
Pour the fudge into a parchment lined baking pan, sprinkle the two tablespoons of chopped pecans on top, and allow it to set up for at least three hours.
Wondering what gift to get a vanlifer in your life this Christmas? We’ve got you covered with this list of essential vanlife Christmas gifts. No need to worry about saving the gift receipt for any of these Christmas goodies. All the gifts on this list are sure to make any vanlifer happy this Christmas and are absolute vanlife essentials.
We have included options for all budgets, and are things that we love to use in our own van so can fully recommend them to you.
This article does contain affiliate links. Vanlife Eats is a hobby of ours and using these affiliate links helps to cover the running costs of our website with no extra charge to you. Thanks in advance for your support.
Essential Vanlife Christmas Gifts for under £20
These essential gifts are perfect for filling the stocking of a vanlifer you love this Christmas. If food heavily features in your vanlife travels then you are going to want to check these out.
Cooking Cosy
In these tough times with energy costs going up, you may just want this gift yourself! The Cooking Cosy is a little hat for your pans. It means you can bring your food to the boil then leave it to continue to cook under the cosy. This allows you to save on gas, so not only a vanlife essential but also in the home if you do vanlife part-time. You can buy your cooking cosy here.
Stove top toaster
If you follow our Instagram you may have seen us talking about this next little gadget. We had many people joining the dotty toast club! Toast is something we both love with a good cup of tea. It’s not the easiest thing to make in a van with no grill though. Then we discovered this little gem! An absolute bargain at around £6. This stove top toaster makes a great stocking filler and means you can toast bread on the hob. Super quick and super easy – get the butter at the ready. Buy yours here.
Global WakeCup
You can’t have toast without a mug of tea! That’s why the next item on our essential vanlife Christmas gift list is a good mug. These Global WakeCup’s are our favourite mugs to use in the van. They come with lids making them easy to drink from while on the road, plus their pretty van friendly and you know they won’t break when travelling. We hang ours by the handles on hooks so they don’t even take up room in the cupboards. The stainless steel interior makes them super easy to clean. These are made from sustainable bamboo & biodegradable, making them eco-friendly. If that doesn’t give you a halo then this will. The company donate 10% of their profits to The Marine Conservation Society *ding – halo incoming* it’s the gift that keeps giving. You can get your hands on one for £20, or they offer a personalisation service for a little more. Find them here.
The Cornish Tea company cream tea
What do you get the person who has everything? Food of course. Not just any food though, only one of the finest things to come out of Cornwall. This cream tea sets from The Cornish Tea Company are perfect. They come through the post so you don’t even need to wrap them. To keep the Christmas harmony and avoid any arguments, don’t ask whether cream or jam is first…
These boxes are already a bargain at £20, but last time we checked our exclusive discount to get 15% off still worked, just enter VANLIFEEATS2022 at checkout. Even more of a bargain, but seriously.. cream or jam first? Answer here.
Yellow lids – Stretchy lids & straws
If your looking for stocking fillers that are good for the environment and your pocket, then look no further. These stretchy lids from Yellow Lids are fab, they are perfect for vanlife, and helping reduce food waste. They mean you can cover cans, or bowls of leftovers etc with these spill proof lids. This company realise it is unrealistic to completely stop single plastic use, so they have teamed with ReSea Project and have committed to remove plastic from rivers & oceans with every purchase. They also sell these fab straws which are great for avoiding plastic straws, or worse… the paper ones that disintegrate in your mouth! With them being under £10 each they are definite vanlife essentials!
Essential Vanlife Christmas Gifts for under £35
These gifts are a little bit more expensive so great for a present a little bigger than a stocking filler. They are still under £35 though, so good for those of us with a budget in mind.
Camping Soul Food cookbook
If you have tried all the recipes on here, then this cookbook could be just the vanlife essential for you this Christmas. We love this cookbook, it has such a unique feature. Each recipe has a QR code so you can enjoy the accompanying playlist while you cook a delicious vanlife meal! You can buy it right here!
Ridgemonkey sandwich toaster
The ridgemonkey is something we use regularly in our van. When we first bought one (as we thought every van kitchen seemed to have one!) we were surprised by how small it was. We bought the Compact XL sandwich toaster. Due to this we hardly used it for a long time. Then we discovered it’s true potential!! We use it so much now, we have made omelettes, hotpots, brownies and all sorts of delicious things in ours. A great present for a solo vanlifer as you can cook perfect portion sizes for one person. Coming in at around £27 it’s worth every penny. You can see all the details and buy here.
Ridgemonkey cutlery set
If you wanted to add a little extra with your ridgemonkey gift then these cutlery sets are great! They come in individual sets so ideal for solo vanlife. The quality of them feels amazing, the fact they pack away into a little pouch makes them travel friendly too. You can take them along on walks, picnics and adventures. These are under £15 and you can get them here.
Zyliss Easy Pull
This next one is a definite favourite gadget of Mark’s. The Zyliss Easy Pull has been a game changer for us. It is a manual food chopper/slicer. I (Sophie) am terrible at chopping vegetables, they tend to fly everywhere. So this keeps everything contained nicely, stops the tears caused by onions and is powered by muscle power. If you fancy giving this to a vanlifer in your life, then click here.
Stove top Kettle
There’s not many better sounds in life than the whistle of a kettle. Our kettle is an absolute essential in our van kitchen. We couldn’t be without it or our morning cuppa. This 2.5l is the perfect size for us and fits on the hob perfectly. They come in lots of different colours but this one fits in with our van so well. You can grab one for a gift here.
Enamel serving tray
This was the vanlife gift we didn’t realise was an essential until we got one. It helps keep our kitchen clean, as we put peelings and food waste on it making it easier to put in the bin. Mark regularly uses it to make fresh pasta and keep flour explosions to a minimum. Plus you can actually use it as a serving tray. They can be completely personalised and are £25, get yours from Duncan Stewart gifts here.
Essential vanlife gifts for under £75
If you are looking for a more extravagant gift, then look no further. These vanlife gifts are all under £75 but are something we use regularly in our van and 100% recommend them after putting them to the test!
Omnia Stove top oven
Coming up first is something we use in our van regularly. We tend to use it for baking cakes, bread, pies and have found it really useful. Although it isn’t something we use every day it is definitely something we recommend. The Omnia starter pack comes in at £66.99 which contains the Stove top oven as well as a silicone mould. We definitely suggest using the mould when making cakes in particular to ensure they don’t stick. You can purchase a starter pack here.
Wonderbag
Next up on the list is a different kind of oven! The wonderbag is a thermal non-electric slow cooker. For those worried about increasing energy costs this may be a good Christmas gift. It can be used for houselife as well as vanlife. You use it by starting off the cooking process then placing the pan in the wonderbag. It needs to be a good thick pan that will hold the heat well. The oven keeps it warm and carries on the cooking process. We have made stews in ours and even some beef which was cooked to perfection. It can also be used to keep things cool, so is multipurpose. It is quite large so if space is limited in the van it may not be the best option. Or do what we do and use it for storage or as a cushion. You can see the different colours available here.
FlavorStone Pan
This pan is a great vanlife essential, even if it’s not a Christmas gift. This is a multi-purpose pan which makes it great for vanlife. You can fry, deep fry and even steam in it. It has a removable handle for storage too. It is a definite essential in our van kitchen. For £70 it reduces the need for lots of pans in the van, which take up space & money. You can find it here.
Gifts to blow the budget! (but they’re worth it)
These gifts are budget busters, but we can guarantee they are ALL worth it. You can always treat yourself this Christmas.
Winnerwell woodburner stove
Woodburner stoves may not seem the most compatible gift for vanlife – but they are. Not only do they keep you warm sitting outside the van of an evening, you can cook on them too, and they look pretty impressive. Starting from £249 you can add whichever kit and accessories you want onto that. We have the Woodlander large Stove, we love it. It always draws lots of attention & comments whenever we have it set up. If you use code VANLIFEEATS at checkout you get 10% off!! Check them out here.
Vanlife Eats Big Picnic tickets
This is a gift for yourself as well as others! Tickets to the Vanlife Eats Big Picnic 2023! Each year just gets better & better. Tickets are £69 per adult, with a wide variety of unique demonstrations and workshops it really is not to be missed. If you can’t make the whweekend then worry not, this year there are day tickets! You can buy tickets right here, we’ll see you there!
Cobb bbq
If you love a bbq, then you will love taking a Cobb on the road with you! We have even cooked a whole chicken on ours, and it was cooked to absolute perfection. Priced around £160, it means you can have a bbq wherever you are. The amazing design means the bottom doesn’t get hot so you can safely have it on camping tables! Get yours here!
Savernake Knives
Any good chef knows how important a good knife is. We were lucky enough to collaborate with the amazing Savernake Knives! If you enter this secret part of the website then you can save 10% off our exclusive design. You just need to enter the password vanlifeknife to access the collection. The knives start at £152 with our discount and they will sharpen them every year for free and have a lifetime guarantee, so definitely an investment!
Thanks for looking through our list of essential vanlife gifts, we hope you have found something for the vanlifer in your life. Plus make the most of the exclusive discount codes. If you want to share the festive cheer and buy us a gift, we would love if you could buy us a coffee to help support the running costs of our website.
We wish you a Merry Christmas, and a happy, healthy & prosperous New Year.
This festive vegan gingerbread cake made in the Omnia is perfect for Christmas. Full of the wonderful flavour of Christmas, gingerbread with lots of homemade gooey jam in the middle. Chocolate and nuts, it really has it all! This recipe was entered by @team_ateem for van bake off 2022 and was very popular on our public vote. If you saw it and wanted to give it a try, this is all you need to know.
This recipe uses plum jam lovingly made by Justyna’s Mum, you could mix it up with different flavour jams if you wanted to.
Vegan Gingerbread Cake
@team_ateem
Vegan
This was the winning entry for the final week of Van Bake Off 22. Absolutely breathtaking, it will definitely impress any guests you may have in your van.
MeShell’s diner cornbread is a very versatile recipe, and so easy to make – even in a van! In fact I even made an award winning version in the van at the Vanlife Eats Big Picnic this year! It can be made savory or sweet with the addition of honey. It’s a great accompaniment to stews, soups and chili. I use it as a topping for my Tamale Pie recipe.
For this cornbread recipe you will need to source Corn/Maize Meal. Do not confuse Corn Meal with Corn Flour, here’s an article to help clear up which is which! I’ve found course and fine Maize Meal in Holland & Barretts. Buy both and combine. I have also found Maize Meal in Europe as well.
This cornbread recipe also calls for Buttermilk. If you can’t source buttermilk. Measure out 1 â…“ cups of milk and add either a tablespoon of lemon juice or vinegar to turn the milk. Stir and leave for about 15mins. Enjoy!
If you want to see more of our recipes, check out our profile here!
MeShell’s Diner Cornbread
amerimanx_travels
Vegetarian
A very versatile dish, adding your favourite flavours can make it savoury or sweet. It's a great accompaniment to may different van meals!
Course Baking, Brunch, Dinner, Lunch, Other, Side Dish
Servings 6people
Diet Vegetarian
Equipment
Oven
Mixing bowls
Measuring spoons
Measuring cups or scales
Whisk
Cast iron skillet/baking dish
Ingredients
1cupcorn flour 155grmaize meal
1cupplain flour 155gr
1 ½teaspoonbaking powder
½teaspoonbaking soda
½teaspoonsalt
1 â…“cupsbuttermilk 340ml
3tablespoonsof melted butter
2large eggs
Instructions
Preheat oven to gas mark 5/190f
In a mixing bowl measure out all dry ingredients, stir to combine.
In another mixing bowl measure out buttermilk, add eggs and melted butter. Whisk to combine.
Slowly start pouring wet ingredients into dry ingredients, whisking to combine.
Once all incorporated, pour mixture into a cast iron skillet if you have one. If not, pour into a baking dish.
Place in hot oven and bake. You can test if the cornbread is completely cooked by inserting a knife into the bread. If it comes out clean cornbread is done. Should be golden brown on top.
Notes
Other ingredients can be added to the wet base mixture.Such as whole kernel corn or grated Cheddar. I’ve made Jalapeño Cheddar Cornbread before.To make a sweet cornbread add 3 tablespoons of honey or brown sugar.
This french onion and apple grilled cheese is the perfect mix of sweet & savoury. It’s a perfect recipe for the van too as you only need one pan. Looking for more recipes? Check out our profile & recipes here
Want to make your own apple sauce? This recipe from BBC good food shows you how to make it with 3 ingredients!
French Onion & Apple Grilled Cheese
MatsonLife
Meat Based
A sweet and savory twist to the classic grilled cheese sandwich that is perfect for fall. Pan fried until the cheese is melty and the bread is crisp! Vegetarian? Leave out the ham.
5 from 1 vote
10 Ingredients or less – No water – One-pan – Solo travel
One of my favourite places to park up in the van is down by the coast. When I came across a local seafood shack selling catch of the day I couldn’t help being drawn to the fresh lobster. How decadent would it be to cook lobster in a campervan. I had to do it because I’m a total show off at times.
Lobster Thermidor in a Coconut Sweet Chilli Bisque
Pescatarian
I was parked up by the coast and the local fresh seafood shack was selling fresh lobster. Here is what I made in the van during storm Nicole!
5 from 1 vote
Less washing-up – One-pan – Quick cook – Stove top meal
1Lobster Live if you are brave or if precooked reduce cooking time by 10 minutes
200gCoconut MilkFull Fat
1Lemon
2tbspSweet Chilli SauceThe bottled type (Blue Dragon)
1tspCayenne Pepper
1tbspParsleyFresh or Dried
1tspSalt
1cupWater
1tspGarlic Granules
1cupChedder Cheese
1tbspTomato PastePuree
Instructions
Preheat your skillet pan to a medium/high heat. We love to use our Jean Patrique Whatever Pan for this recipe.
Cut your lobster in half from the top of the head to tail. Do this quickly and firmly using a large sharp knife. Afterwards cut off the arms and legs.… (I'm waiting for the comments to come in below)
Place the lobster meat side down and place the other parts of the lobster in the pan around it. Cook meat side down for 5 minutes. (3 minutes if using a pre cooked lobster) The meat should start to go golden brown. Turn the lobster (and claws etc.) over so it is shell side down.
Pour in around the lobster the cup of water, half the tin of coconut milk, the garlic granules, tomato paste, cayenne pepper and sweet chilli sauce. Season the lobster and bisque with salt and then squeeze half the lemon over the meat. Bring it to the boil and then let simmer for 5 minutes
Grate the cheese over the top of the meat and sprinkle parsley over everything in the pan.
When the cheese has melted you are ready to serve it up in a bowl with a wedge of lemon.
Notes
Serve it in a large bowl with the lobster sitting on top and the bisque surrounding it. Don’t forget to crack open the claws for the delicious meat inside.Â
This recipe of French Toast with berry compote is great for cooking outside or in a van. The perfect fuel for hiking or biking. We serve ours with chicken sausage for extra protein and yumminess! Otherwise it is a great vegetarian meal. You could definitely mix it up and use any type of bread or even waffles for the french toast part!
Berry Compote is pretty easy to make in the van too. Here’s how we make ours, simmer some fresh berries with a bit of sugar on a pot for 15-20 minutes until to your desired consistency.
Alternatively here’s a really simple recipe for a berry compote that can be made on the stove top in minutes, and only needs 3 ingredients!
French Toast topped with Berry Compote with a side of Chicken Breakfast Sausage
MatsonLife
Meat Based
This easy recipe works with many types of bread. We used Trader Joes’ Maple Streusel Bread. This tender, fluffy and indulgent recipe comes together so quickly and you can serve it with a side of breakfast sausage for a sweet and salty flavor.
We topped ours with a homemade Berry Compote. Simmer some fresh berries with a bit of sugar on a pot for 15-20 minutes until to your desired consistency. Enjoy!
This recipe for Rigatoni all vodka is one of our featured vanlifers favourite meals to eat in their bus Sweet Bea. Read their feature here.
Vodka sauce, at its base, is a tomato and cream sauce laced with a bit of red pepper and a splash of vodka. It is more of an Italian-American dish than proper Italian, though it did originate in the old country.
That origin is somewhat debated, though the story that makes the most sense to me, and one that I have read many times, has to do with simple economics. Back in the 1970s, vodka distillers were attempting to get their product to take hold in Italy. In addition to the typical advertising, they sought out the somewhat unusual path of trying to get chefs to use it in the kitchen. While this advertising route seems strange to me, it may have been what led to pasta alla vodka, which has quickly become one of my personal favorite meals to cook.
But the question stands, particularly if it was all a marketing ploy, does the vodka actually add anything to the sauce? The evidence appears to say yes. At low concentrations, alcohol increases the perception of aroma, so the splash of vodka serves to just bump that flavor meter up a notch. This is part of the reason why wine is often used in cooking. Additionally, the alcohol serves as an emulsifier, helping to keep the mixture of tomato and cream silky smooth.
Anecdotally, I have forgotten to add the vodka when making this dish in the past and not realized until I tasted the final product and found it a touch lackluster. I certainly didn’t think that splash of liquor would make much of a difference, but there you go.
Rigatoni alla vodka
@the.buslife.kitchen
Vegetarian
This delicious pasta dish is a great vegetarian meal. Perfect for cooking in a tiny home and super tasty!
Start water for pasta in a pot and add a liberal quantity of salt. When boiling, toss the rigatoni in. In the meantime, start work on the sauce.
Add olive oil to a dutch oven over medium heat. Chop shallots and garlic very finely and add to the pan with oil. Cook until browning at the edges, 5 or 6 minutes. Once the shallots begin to brown, add the tomato paste and red pepper. Cook this until the paste darkens slightly and sticks to the bottom.
Deglaze the pan with the vodka. Be sure to scrape the bottom of any dark burned bits. As this is boiling, scoop ¼ cup of the pasta water into a bowl and add ¾ cup heavy cream. The pasta water brings the cream up to temperature so that it will not scald when added to the hot pan.
Reduce the heat to low and slowly stir the cream in. Once the cream is in, add half the grated parmesan a bit at a time while stirring, allowing it to melt into the mix. Then add another half cup of pasta water a bit at a time, stirring the whole time. This thins the sauce. If you’d like the sauce a bit thinner, you can keep adding water a bit at a time, but probably no more than another quarter cup.
Serve the pasta topped with the remaining parmesan cheese, a few cranks of black pepper, and a bit of chopped fresh basil.
Meet featured vanlifers Andy & Ayana of The Buslife Kitchen. Cookbook author, jeweller, chef to fellow nomads and living buslife full-time. Andy and Ayana live full time in their bus Sweet Bea with their gorgeous puggle Tori.
More about these featured vanlifers
Vanlife or Buslife was something this pair discussed on their very first date, and they realised they shared this idea of lifestyle and adventure.
“We both love travel and adventure, and wanted to live a simpler life with more time to focus on the things we really care about. Living small and nomadic means we can work less and enjoy more“
Shortly after meeting the pair bought a bus and the conversion began. The bus was used for helping to transport disabled people. After converting it, they have been living in Sweet Bea for the last 2 years. One of their favourite features of the bus is the roof deck. What an amazing spot to sit and watch the sunset or watch the stars together.
Ayana is a silversmith who makes jewellery on the road. The pair really enjoy foraging and so it’s natural this love reaches into Ayana’s jewellery making too. She quite often sets flowers and plants they find on foraging trips into resin for jewellery.
As well as foraging Andy enjoys hunting and fishing and enjoys creating recipes with what he catches. Living buslife and meeting fellow nomads on their travels, he began to cook for them. That is how The Buslife Kitchen came about…
The Buslife Kitchen
After cooking for fellow nomads on the road on their buslife adventures, Andy decided to share these delicious recipes with others. As writing is another passion of his, he decided to write a cookbook. Living in the bus gave him the time and opportunity to write his first cookbook, The Buslife Kitchen. The cookbook features 107 recipes from 15 different cuisines, and aims to bring gourmet meals into tiny homes everywhere. The recipes are designed and cooked in the kitchen on the bus and so is perfectly suited to those whose home has 4 wheels. All recipes are designed to be made on a stove top, ideal for those of us who don’t have ovens! You can purchase the cookbook right here The Buslife Kitchen.
Adventures of featured vanlifers Andy & Ayana
Their favourite place to be is parked up in the forest. They park up on public lands as much as possible, but have been known to park on friends driveways when needed. Having said that, travel and adventure was what the pair were seeking and what better adventure than joining the circus! During a pretty bad breakdown of the bus Ayana was offered the job of a Nanny with a travelling circus. This pair swapped buslife in the forest for a more urban adventure travelling around different cities and seeing what they have to offer. After a year of this, nature was calling them and they headed back on their buslife adventure.
As much as they love travelling together, they both have their own favourite places they have visited. For Ayana, her favourite place so far has been nestled amongst the pinyon and juniper tress in the Red Rock desert Sedona, Arizona. They spent several weeks there enjoying many of the free camping spots.
Andy prefers to be closer to water, so his favourite spot so far has been Telephone Cove in Nevada. Free camping right on the beachfront with crystal clear waters, buslife at it’s best. Their ultimate dream would be driving the bus to Alaska so make sure to follow their socials and keep an eye on their travels (links at the bottom of the page).
There are many ups and downs when living in a bus full-time. As with any vehicle they can break down from time-to-time. 6 months after being on the road they were driving through the desert. When Andy looked in the mirror he noticed motor oil down the side of the bus. They immediately stopped and were lucky enough to be close to a town and were towed to a garage. Being stranded without a vehicle is one thing but when it’s also your home it has extra implications. Luckily, the mechanic worked his wonders and they were back on the road a day later.
As well as lows there are so many highs when living in a bus full-time. The ever changing scene out the window, visiting new places, experiencing a more simple lifestyle to name a few. The community is an amazingly supportive one, and one of the couple’s highlights so far involved fellow nomads. They decided to have a small thanksgiving feast with fellow nomads, with Andy doing the cooking! Which was no mean feat in a bus with no oven. There is little they like more than setting the table for friends and enjoying a good meal together. We can’t agree more and love the way food can bring joy and people together!
Sometimes life reminds you why being a nomad and having the ability to up and leave is a good thing! Andy and Ayana were visiting a warm spring in California when they met some of the locals. A group of older people enjoying the nudist lifestyle. This in itself wasn’t an issue, but their incessant talk of their ‘group’ activities made for uncomfortable listening. Many characters were encountered, including Beach ball Bob and his wife. Beach ball Bob, called this because he resembled, you guessed it, a beach ball. When Bob had a little too much to drink he would recite his escapades from high school. Primarily the time he blew up a trash can at school. While regaling everyone with this story Bob’s wife would disappear into the bushes with the masseuse. He actually turned out to be a trucker, who was on good terms with all the wives in the group! So unfortunately the trip to the hot spring didn’t last too long before Andy & Ayana were on their travels once more
The kitchen in the Bus
With The Buslife Kitchen cookbook being written, designed and photographed in the bus, you may imagine a large sprawling kitchen. The bus has a 3 burner propane stove, and a large 78l fridge. As you would expect with an enthusiastic chef there is a full spice rack and pantry. Good quality cookware is also a must. A fair chunk of their storage in the kitchen is reserved for their cast iron cookware and kitchen gadgets. Their favourite kitchen gadget is their immersion blender, a great multi purpose gadget. Not only can it be used as a blender, but also as a whisk, food processor, and milk frother.
When designing the layout of the bus, the kitchen was an important aspect. They knew they would want to make many amazing meals in there so it was a very important part of the build. It was essential for them to have a large enough fridge for their ingredients, as well as a good solid worktop. As with many vans not having an oven can mean a different way of cooking. This took a while to adjust to, the first time Andy attempted to roast a bird on the stove he burnt the base for the gravy. Ever the professional though, he pulled it back and made a delicious gravy in the end.
The couple try to eat a varied diet from a range of cuisines, and limit their meat consumption so make a lot of vegetarian meals. One of their favourite meals to make in the bus is sushi, something vanlifers shy away from. Sticking to vegetarian sushi means there is no need to find fresh fish on the road. It is easy enough to make but feels very luxurious!
Advice from our featured vanlifers
When we asked featured vanlifers Ayana & Andy what advice they had for anyone considering vanlife or buslife, this is what they said….
“Do it. You only go around once, and nothing is guaranteed. Don’t spend your time living by anyone else’s rules”
Where to find our featured vanlifers.
You can find our featured vanlifers on their socials below. If you can’t wait to get your hands on their cookbook then you can find one of their recipes right here. Rigatoni alla vodka, enjoy!
This Baked Pumpkin Soup was a well deserved winner for Halloween week on Van Bake off! Actually baking a pumpkin in your van and making soup is so amazing. If you aren’t lucky enough to have an oven maybe you could try it on the bbq or open fire.
Soup is such a great autumnal meal, and using seasonal ingredients such as pumpkin helps keep it interesting.
Baked Pumpkin Soup
amerimanx_travels
Meat Based, Vegetarian
Nothing says Autumn more than a pumpkin and baked pumpkin soup is a great way to welcome all the wonderful sights and smells of the Autumnal season.
Light a fire, throw some cosy pj’s on, curl up with a good book or movie and enjoy this cheesy cream feel good soup.
With a few ingredient adjustments, this recipe could be made very vegan inclusive.
Salt and pepper to taste to taste. White pepper works well too
50mlvegetable or chicken stock
100gGruyèreEmmantal or Cheddar
Chilli flakes – if desiredto taste
Instructions
Preheat oven to 180c/fan oven 160c/gas mark 4
Wash the pumpkin, and with a sharp, sturdy (serrated) knife cut a reasonable size hole in the top of the pumpkin (ideally keeping the stalk attached to the lid and with a cut angled to allow the lid to sit back into top of pumpkin). With a strong spoon, scoop out the seeds and stringy flesh until inside is clean. Discard the insides.
Combine cream, stock, nutmeg, cheese, salt and pepper (chilli flakes if wanted) inside pumpkin, and replace lid.
Pat dry outside of pumpkin, brush with olive oil to coat outside of pumpkin.
Place in a shallow baking dish. Pop into oven and bake for 25 minutes. Remove from oven, take off lid (CAUTION – inside will be steaming) poke fork into pumpkin flesh to check for tenderness. If not done, replace lid and put back into oven, checking every 10 mins until pumpkin flesh is fork tender.
There are 2 ways to combine pumpkin into the cream mixture.
1. Start scooping flesh inside pumpkin, mashing and stiring to combine until everything is incorporated, or
2. Remove all liquid from pumpkin, place in saucepan. Start scooping and removing cooked pumpkin flesh, adding to cream mixture, mashing and stiring until everything is combined. Reheat until bubbling, ladle into bowls and sprinkle with additional cheese.
We love brownies, and we decided to add some of our favourite chocolate too to make Mint aero brownies.
We really fancied brownies in the van, without an oven we thought that chocolate goodness may be out of our reach. However, we have seen lots of different things being made in a sandwich toaster recently. So thought we would give brownies a shot. Deciding which chocolate to add was a tricky one and so we decided on mint aero brownies. These can be made with any type of chocolate and we have since made these brownies with mars bars & terry’s chocolate orange. Which one would you try?
Delicious! When cooking in a sandwich toaster, the ones without ridges are best, such as the ridgemonkey. This recipe would need to be doubled if making in a conventional oven.
Mint Aero Brownies
Vegetarian
These aero mint brownies are ideal for when you want a quick chocolate cake fix. The best bit is that you can use any of your favourite chocolate bars. We did these in our sandwich toaster on the hob! Great for any vanlifers without an oven – or even those with one.
5 from 1 vote
10 Ingredients or less – 30 minute meal – Family friendly – One-pan – Stove top meal
If you are the proud owner of an Omnia oven – you need to know these tips!
We have had our Omnia for a while after seeing it on various vanlife accounts on social media. We knew we had to try one. We have never had an oven in the van, which had truly limited my (Sophie) baking, which may have been good for our waistlines but not so good for our greedy taste buds. When we saw the Omnia oven we looked into it and ordered ourselves one. They are fairly expensive, but ours has been well used and loved for a good couple of years now. It has taken a beating but it still does the job perfectly, so for us, well worth the investment (We have gone through a couple of the silicone Omnia moulds though – although that’s a whole different story!). After a couple of years using it we wanted to share our top tips with you!
What is an Omnia oven?
The Omnia is a stove top oven. Originally created in Sweden for kitchens on boats it has taken vanlife by storm. It takes up much less room in the van than an oven and means you can enjoy some of those meals you may have thought were off limits! If you want to see more information about the Omnia and how it works then you can read our article here. To describe it briefly the Omnia oven sits on a hob. It can be used on most types of heat source including bbq’s, but can not be used on an induction hob. The heat from the hob heats the bottom of the pan and passes through the ‘hole’ in the middle. When the heat hits the lid it bounces back in to heat the top of the pan. This ensures a nice even heat throughout.
Omnia oven tip number 1
Hot stuff!
This Omnia tip definitely needs to be at number one! Man – these things get H-O-T, hot!!! Think Nelly needing to take off all his clothes hot! So this first tip is a bit of a safety warning. When using the Omnia it will become very hot. This includes the lid and handle, so please be careful when handling.
We always use a tea towel to hold the handle when taking the lid off (I say we – but Mark has asbestos fingers so usually manages without!). Also be careful where you put the lid after taking it off as you wouldn’t want to burn your van worktops. If using the silicone mould this becomes super hot too.
It is definitely not an unusual occurrence for the smell of singed hair to lingering in our van when using the Omnia. It’s cheaper than waxing! Seriously though if using it be very careful about the heat coming up through the centre when the lid is off. Don’t say we didn’t warn you!
Omnia oven tip number 2
Low and slow
Being as the Omnia is on the hob it’s very easy to get a burnt bottom! The first few cakes I made had more than a dark tinge to the bottom where I had the heat too high. The tip when cooking with an Omnia is to cook over a low/medium heat. This means the heat will be more evenly distributed and won’t get too hot at the bottom. Sometimes this means you have to cook things for a little longer than you would in a conventional oven.
It can be tricky to get the balance and does take some getting used to. You can use a thermometer if you would like to monitor the temperature until you get used to the best level of heat to use. We have never used the thermometer in our Omnia oven and feel happy getting the right balance with the heat, but that may not work for everyone. If in doubt, low and slow is the way to go!
This leads us on to tip number 3…
Omnia oven tip number3
No peeking!
Like we said before, cooking in an Omnia oven requires a bit of a knack. Trusting the Omnia to work its magic and not being able to see how it’s coming along definitely puts your willpower to the test!
It’s important when using the Omnia oven to have a bit of faith. It can be tricky when you can’t see what’s happening while cooking. Especially if you are playing around with the heat to get the right temperature. You may have slightly more faith is using a thermometer so you can at least see the temperature is correct. As I said before – we have never used one so can’t account for it’s accuracy.
As with a conventional oven if you open it, the heat escapes and so it goes without saying this happens with the Omnia too. While it may get back up to temperature pretty quickly it does mean you may end up with a sunken cake – nobody wants that!
So as difficult as it is, top tip number three is not to peek in at your goodies baking away. We have tried to peek through the holes. Mark is convinced he can see in through the holes using a torchlight – me, not so much. So stick with trusting the process – which usually works – and if you do need to take a peek try to lift the lid only slightly and be quick!
Omnia oven tip number 4
Use the mould!
The main staples we cook in the Omnia oven are bread and cakes. As with most metal tins, when cooking in them, things can get stuck. So Omnia top tip number 4 is to use the mould. When we initially purchased the Omnia oven, we purchased the oven alone. We weren’t sure how we were going to get along with it and didn’t want to buy all the bits of kit that go alongside it if we didn’t like it. This was a bit of a rookie mistake.
Trying to line a round tin with a hole in the middle with baking paper is no easy feat! Not impossible but certainly not something I wanted to be doing everytime I used the Omnia – or ever again for that matter! Not only was it a nightmare to fit in, the edges got stuck into the side of the cake pulling chunks off when removed.
It is probably best to have 2 moulds if you can afford it, one for sweet and one for savoury….. we’ll come onto that later.
Using the mould has 2 purposes. Firstly, it will stop your delicious baked goods from getting stuck to the Omnia oven. Secondly it holds heat really well. This means whatever you are cooking will continue to cook even after the heat is off. We appreciate this can be a bad thing as well as good! Due to this when using, I personally take my cakes off the heat slightly before I need to and leave it in the pan and mould to continue cooking. Remove the lid though – nobody likes a sweaty cake. Plus this saves on gas!
Omnia oven tip number 5
To heat or not to heat?
This next tip for using your Omnia oven is a contentious one. We have seen many a discussion about whether to pre-heat your Omnia oven or not. Just as you would pre-heat a conventional oven, some argue that it would be beneficial to pre-heat your Omnia oven also. We have tried with and without and didn’t notice a massive amount of difference to be honest.
When making cakes in particular pre-heating the oven can be crucial to the rise, texture & taste of the cake as explained here by Betty Crocker. In our experience we quite often pre-heat the oven for a few minutes before. They get hot very quickly. If we don’t pre-heat the Omnia then we turn the heat up high for a few minutes to get the heat in quickly and help the cake to rise. Just remember to turn it down for the rest of the cooking so you don’t get a burnt bottom!
Being as there are mixed opinions about this let us know in the comments if you pre-heat your Omnia or not.
Bonus tips
As the Omnia oven increases in popularity more and more products are becoming available. If cooking a savoury meal then these split liners may come in handy!
There are rumours that if you want to avoid a burnt bottom then you can sit the liner on top of the wire rack. Some say this helps ensure the bottom of the cake doesn’t get too hot and burn. We haven’t tried this one so if you try it let us know.
This third bonus tip comes from experience! Just imagine your lovely other half – who is now banned from using the Omnia – used the Omnia. Imagine said other half cooked a fish pie, yes you read that correctly – FISH PIE in your beloved Omnia Oven. Imagine getting ready to bake a cake in your precious Omnia, open the lid and boom, the whiff of fish hits you. I tried all sorts of things to try and get the smell out of the mould. Trying to get out of the dog house, the lovely other half was moments away from purchasing a new one when I found this awesome tip on the internet. Warm the mould up, this then opens the pores of it. Washing it with warm soapy water then means you can clean it more effectively. This works with all high grade silicone products – Omnia mould saved.
This would probably be a good time to mention why we are on our second Omnia mould. Mark decided to use the Omnia (before the fish pie incident!) he placed the liner in between the base and the oven. This resulted in a melted mould and silicone all over the hob! Not a great experience.
Still not convinced an Ominia oven is for you, or looking for a different option? Check out our article detailing oven ideas for vanlife here!
We hope you enjoyed reading these top tips for using an Omnia oven. Make sure to check out our Omnia recipes, and add your own too!
If you are looking to buy your very own Omnia oven, we recommend purchasing from the amazing Brown Bird & Company
Please note : this article contains affiliate links. These incur you no extra charges on your purchases but provides us with a small commission to cover the running costs of the website. Thank you
This delicious recipe of chilaquiles was our winner for Van Bake off’s Mexican week. Chilaquiles is a great breakfast dish. Using pre-made salsa is a great tip for making chilaquiles more quickly. Making it a great vanlife recipe for any campervan.
This recipe was submitted by @amerimanx_travels for mexican week in van bake off.
Chilaquiles
amerimanx_travels
Vegetarian
Chilaquiles is a traditional Mexican breakfast dish.
The word chilaquiles comes from the Nahuatl language, meaning chilis and greens. A traditional dish served in Mexico, the recipe hit the United States in 1898 when featured in The Spanish Cookbook, by Encarnación Pinedo.
It’s a way of using up old stale Tortillas and left over salsa. The beauty of chilaquiles is they are completely customizable. Serve with a scrambled ,fried egg on top, or with cheese, shredded chicken, refried bean or roasted veggies — the options are endless. Because it’s so versatile, this dish is the perfect opportunity to use up any leftovers found in the fridge. The dish can be adapted for Vegans, Vegetarians or meat eaters alike.
I suggest using Salsa Verde (green salsa) with chicken and Salsa Rioja (red salsa) with beef. I used Old El Paso Street Food Corn Tortillas. Old stale tortillas crisps are a good substitute.
5 from 1 vote
10 Ingredients or less – Family friendly – Stove top meal
Fry the tortillas. Heat 1/4 cup oil in a large skillet over medium-high heat until shimmering. Add about a quarter of the tortilla wedges and cook, flipping once, until lightly brown and crisp.
Drain the tortilla chips. Drain the freshly fried tortilla chips on a paper towel-lined baking sheet. Sprinkle lightly with salt. Repeat this process until all tortillas are fried, adding more oil if needed.
For the salsa
Heat 2 teaspoons oil in a large skillet over medium-high heat until shimmering. Add the salsa and cook, stirring occasionally, until slightly thickened, 5 to 10 minutes (the consistency of the salsa will vary depending on the size and juiciness of the tomatoes). Add additional broth to thin out the salsa, if needed. Taste and season with salt as needed.
Add the tortilla chips to the salsa and stir carefully to coat the chips. Cook until the tortillas are heated through, about 3 minutes. Taste and season with salt as needed.
Serve warm. Serve warm garnished with avocado or guacamole, crema, queso fresco, and/or fried eggs, if desired.
Notes
Use vegan toppings to easily convert this dish to be vegan.
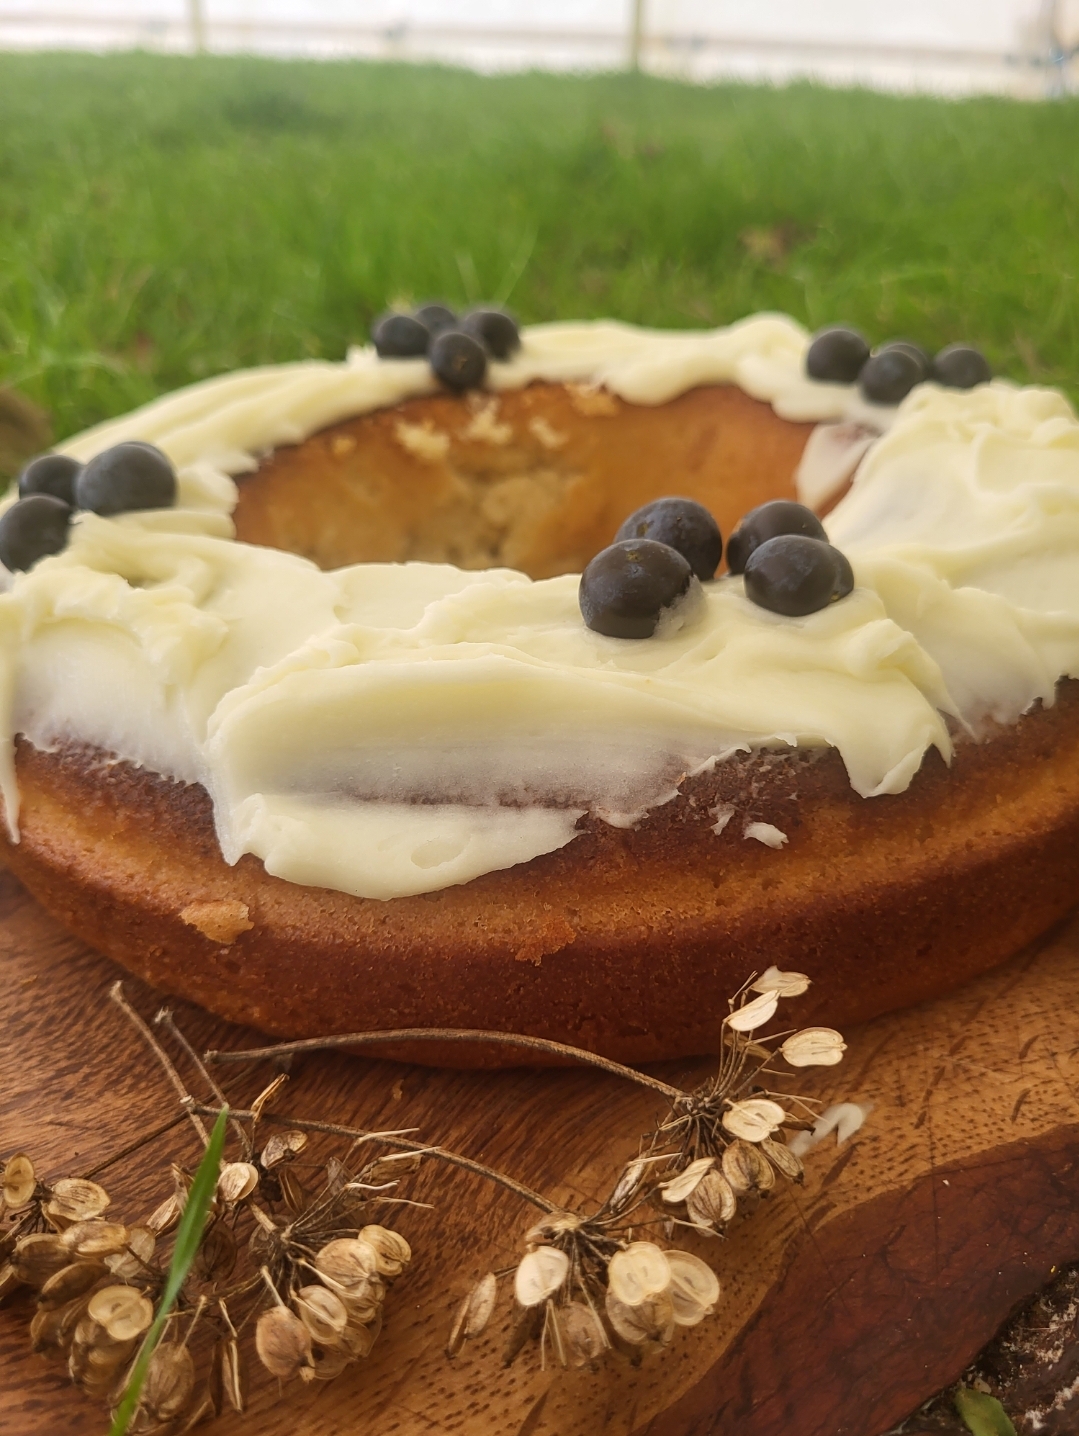
This Omnia blueberry cake went down an absolute treat in our campervan. This recipe is ideal if you are a blueberry fan, and a great recipe for any campervan. For Mark’s birthday I wanted to try baking something different to a traditional birthday cake. We had been looking online at seasonal produce and saw bilberries. I then saw a recipe for a bilberry upside down cake and really wanted to try it. We went to a few different shops and couldn’t find any, I didn’t have the time to forage any either (although it’s the right time of year for it!) So I had to settle on blueberry upside down cake instead.
Luckily Mark had a humongous punnet of blueberries in the fridge, they were taking up so much space and needed using up – got to use up those leftovers and space is at a premium in a campervan fridge! So I decided to try a blueberry upside down cake – in the Omnia of course. With not having an oven in our van, the Omnia comes in handy. I love the round cakes we make in it, you can make them into a real feature.
So there you go, I used Mark’s blueberry stash to make his own birthday cake – he didn’t mind when he tasted it though.This recipe would work well with other fruit too. Don’t forget to rate it and leave a review if you try it
Omnia Blueberry Upside Down Cake
Vegetarian
This Omnia blueberry upside down cake has a slightly dense texture which is complimented really well by the juicy blueberries. This recipe is easy prep and you can prepare the cake mixture while the blueberry topping is cooking to save time!
This awesome pear and ginger mochi cake was crowned star baker in cake week in the Van Bake Off 2022. This creation was entered by Yarrow of @thevvessell such a great flavour combination and gluten free!
There are a couple of variations to the recipe so be sure to read to the bottom!
Pear and Ginger Mochi Cake
@thevessel
Vegetarian
Mochi cake is a Japanese rice cake. Pear & ginger is such a classic combo and super tasty! This recipe can either be made in a square tin or bundt style tin.
1cup Milk(I tend to use mixture of coconut milk & whole milk)
2Eggs
1/2cupBrown Sugar
1/2cupSugarwhite (or organic white)
1cupSweet white rice flour
1tspBaking powder
1tbspFresh ginger rootfinely grated
1tbspMolasses
1/2tspCinnamon
1tspSalt
Instructions
Pre-heat the oven to 350F/175C/Gas mark 3
Butter cake pan – Use parchment paper if using the square tin
Layer pears on the bottom of the buttered tin. Sprinkle the pears with 1 tbsp of the brown sugar. Drizzle 1 tbsp of the browned butter on the pears.
Mix the eggs, milk and both sugars with a whisk.
Mix the baking powder with the rice flour. Add half of this mixture to the batter and whisk in. Whisk in the remainder of the flour.
Add the remaining ingredients, whisking well,
Pour the batter over the pears in the tin.
Bake for 40 minutes until the centre is set and firm.
Cool for 10-20 minutes. Loosen the edges with a knife point and carefully invert onto a plate. Enjoy as is or with fresh cream.
Notes
Alternatives
Add pears to the top of the batter – some of the pieces will sink. Sprinkle them with brown sugar. Lessen the butter to 1/4 cup
Ginger spice version. Omit the pears. Increase the cinnamon to 1 tsp. Add nutmeg, all spice, cardamom and/or powdered ginger to your taste. Lessen the butter to 1/4 cup
Super ginger version. Add minced, candied ginger to the batter. Lessen the butter to 1/4 cup
Recipe by Yarrow Rubin (@thevessel)Inspired by Vanlife Eats, Bob’s Red Mill butter mochi cake recipe and Joan Gates’ Pear Upside cake recipe.
Yoghurt flatbreads are a perfect vanlife recipe, and ideal for making in a campervan or any small kitchen!
Ash Butler, author of The Small Kitchen Cook (@thesmallkitchencookbook) makes these yoghurt flatbreads all the time. They are super affordable, full of protein from the yoghurt, contain very few ingredients and are quick to make as the resting time is minimal. Eat them with curries, meat from the barbeque, or on their own with dips and dukkah. Use them to replace store-bought wraps and fill them with your favourite sandwich ingredients. Check out more recipes in Ash’s book – exploringedenbooks.co
This super easy and quick recipe is a favourite from the author of this vanlife cookbook! Flatbreads are super versatile and can go with so many different dishes!
5 from 2 votes
5 ingredients or less – Family friendly – Quick cook – Stove top meal
6tspOlive oil or butter for pan fryingabout 1 teaspoon for each
sprinkleDukkah
Instructions
Combine the flour, yoghurt and salt in a small bowl and stir it to combine. Lightly flour the bench or a chopping board and bring the dough together until you reach a non-sticky and smooth dough. This will only take a minute. You don’t need to knead this flatbread.
Place the dough back in the bowl with a little flour in the bottom.
I have found that it’s easier to roll out these breads once the dough has had a little time to rest, either in the fridge or in a cool place in your small kitchen. It doesn’t need much rest time; around 20 minutes is fine.
Once the dough has rested, divide it into six equal parts. Form them into balls and then roll them out with a rolling pin or a floured wine bottle (or any other glass bottle you have handy.
Next, place your frypan on medium heat and add a small splash of oil or butter – just enough to lightly grease the pan. Cook the dough until golden on both sides – it should only take a couple of minutes. Wrap the breads in a clean dish towel to keep them warm as you cook.
These are best served immediately, sprinkled with dukkah.
Notes
This recipe can be easily adapted to be vegan by substituting the yoghurt for vegan yoghurt.This recipe can also be adapted to be gluten free by substituting the flour for a gluten free option such as rice flour
This Peanut Butter Cookie recipe was the star baker winner for biscuit week on Van Bake Off 22! Meshell of @americanx_travels is obviously on a roll, as she was a Van Bake Off winner at the Vanlife Eats Big Picnic this year too!
Peanut butter cookies are a great thing to make in your van, super tasty and easy to make. These cookies will go down perfectly with a cup of tea!
Easy Peanut Butter Biscuits
amerimanx_travels
Vegetarian
Soft out of the oven, crispy when cooled. Perfect with a cup of tea or coffee for elevenses, or paired with a slice or two of crisp apple for a great afternoon snack. Easy recipe to make with basic ingredients. Recipe can be halved to make a smaller amount.
In a large mixing bowl cream softened butter, add peanut butter
Mix well. Add granulated sugar and brown sugar, baking soda, and salt. Stir until combined, scraping sides of the bowl occasionally.
Add in egg and vanilla until combined. Stir in as much of the flour as you can with a spoon or spatula. Stir in any remaining flour. Cover and refrigerate dough about 1 hour or until easy to handle. Place about ¼ cup granulated sugar in a plate.
Cover and refrigerate dough for about 1 hour or until easy to handle. Place about ¼ cup granulated sugar on a plate.
Use teaspoon to measure out a ball of dough. Roll in a ball, place on baking tray. Slightly wet a fork, dip prongs into sugar, then make a criss cross pattern on biscuit, mashing dough as you do. Repeat with rest of dough.
Bake on gas mark 6 for 10 to 15 minutes or until golden brown
This apple and honey cake is perfect for the autumn. It’s a cake with the taste of an apple crumble. We made this as our entry for the Van Bake Off competition which is back this year. If you like baking be sure to enter.
This cake was made even more special to us as we used some honey given to us by our lovely friends Carl and Sally-Anne of @motorhominglife. The honey was produced by their bees in Portugal and they kindly bought some to the UK for us to try.
If you are cooking in a conventional oven, then you can bake this in a 20cm round tin at Gas mark 4
Apple & Honey Cake
Vanlife Eats
Vegetarian
As delicious as this honey is we have been saving it for a special occasion! This honey was given to us by our friends Carl & Sally-Anne and was produced by their bees in Portugal. As lovely as it is to eat straight out the jar I knew I needed to make a cake with it, so here it is. Apple & honey cake.
5 from 2 votes
10 Ingredients or less – No water – Stove top meal
Cube the butter and mix it with the flour to create a breadcrumb texture
Stir in the sugar
Add in the milk and egg and mix thoroughly together
Peel & chop 2 of the apples and stir them through the mixture
Stir through 2 tablespoons of the honey
Pour into the silicone mould, the mixture will be quite thick
Slice the remaining apple and place around the top of the cake. Drizzle with some extra honey
Cook over a low flame for 35-40 minutes
Leave in the mould to cool as it may break if you remove it while hot. Drizzle the last tablespoon of honey over the top (or more if you love it as much as us!)
Once cooled, it is ready to cut and serve. Although it is super tasty when still warm
Notes
This recipe can also be made in a 20cm cake tin and be baked in a conventional oven at Gas Mark 4. The timings will be similar.
A quick classic recipe to make in your campervan and its just bursting with flavour! In less than 30 minutes and with the use of just the one pan you can have one of the tastiest dinners we’ve ever made.
Tuscan Chicken
Meat Based
A classic Italian Chicken dish that is perfect for cooking in your campervan. When we made and ate this we both said it was one of the tastiest things we have ever eaten.
Heat the olive oil in a skillet pan and add the chicken mini fillets. Instantly season generously with salt. Fry in the pan for about 6 minutes until the chicken turns slightly golden on both sides. Do not over cook as it will go chewy, break a fillet in half to ensure its cooked.Remove the chicken from the pan when cooked.
Its time to make the Alfredo Sauce in the same pan so lower the heat to a very low gentle heat.Add the 2tbsp of Butter and the pot (300ml) of Creme Fraiche and give it a good mix. Add the 100g (half a block) of Parmigiano Reggiano. Again give it a good mix.
When the sauce is all melted and smooth, add the chopped Sun-dried Tomatoes.
Return the chicken to the pan and turn up the flame to a medium heat. Simmer and not boil for about 10 minutes.
Add the chopped fresh Spinach to the pan and mix it all in. Add the lid to the pan.
Once the Spinach has wilted remove the lid and throw in some fresh Parsley and give it a good stir.
We use cookies to ensure that we give you the best experience on our website. If you continue to use this site you are consenting to these cookies.OkPrivacy policy