Home Blog Page 3

Miss Kiff

Featured vanlifer Tasha Kiff aka Miss Kiff, shares the amazing support of the vanlife community and the support offered by fellow vanlifers. This is a wonderful feature of the vanlife community coming together to help support Tasha build her van Luna for full time vanlife while living in there!

How did Miss Kiff become a vanlifer?

As with many vanlifers Tasha found herself living full time in a van due to homelessness. In Tasha’s case she sadly lost her Mother and within less than a month, she had to leave her uni accommodation. Although many would worry in this situation, Tasha felt excitement. She had been watching Nic Roams on YouTube and had to begun to manifest getting a van and living vanlife.

Knowing she had to find somewhere to live, Tasha made the decision to look for a small van, she had a very limited budget and felt this would be more manageable for not only her handiwork skills but also her funds. With this in mind, she found a Vauxhall Vivaro for sale only 15 minutes down the road, and within her budget. Fate! She used half her tuition fee money to buy it. It was an empty van, and on her first night she had no option to sleep on the floor on top of a broken Ikea cupboard. Being due at work in 48 hours time, Tasha didn’t have long to make her van more comfortable. During this time she managed to get the van insulated and a floor down, and at 2am one morning a friend helped her screw her bed into place.

View from the van doors Miss Kiff

Converting a van with little experience, few tools and nowhere to complete the work is a massive challenge as Tasha experienced. Luck was on Tasha’s side once more and her friend no longer able to make the Vanlife Eats big picnic gifted Tasha her ticket. This helped Tasha to meet some amazing members of the vanlife community who would go on to help her continue with her van build.

The van build

Having seen some vanlifers on YouTube Tasha had a sense of the community, but she had no idea just how supportive they would be. She met several vanlifers at the big picnic who put in place support to help with her van build. Simon, Tom, Darren and Liam the Terrible were some of the community who offered support initially.

Miss Kiff's van

After trading tips and advice, when the event finished Tasha headed up north where Liam helped show her how to drill into metal, and how to complete her roof. From there Tasha headed to the Peak district. This is where she painted her ceiling, and added some curtains.

Darren had previously told Tasha about the South central van build meets. These are events when the community come together and exchange help and support. It’s a fantastic way to get jobs completed on your van and help others. Everyone in the community has different skills and being able to share these with one another really demonstrates the great sense of community. At this meet up the van got the addition of some tongue and groove, as well as a solar panel and charge controller. From there the van build continued with the diesel heater installation on the Isle of Wight and the electrics completed at Stonehenge. Luna had cupboards installed in the Brecon beacons, and a kitchen cupboard added while on a campsite in Swindon. Slowly vanlifer Miss Kiff is making the van more homely although it is still not yet fully complete – as with many vans!

Tash-Kiff-and-van

Vanlife adventures

Over a year later, feeling happy with her home on wheels, Tasha feels very proud of what she has achieved. She says the van feels cosy, has a homely feel and she absolutely loves it. Living vanlife has opened up many opportunities, not only to be a part of an amazing community, but also to see some incredible places and enjoy them in a way that isn’t possible for others.

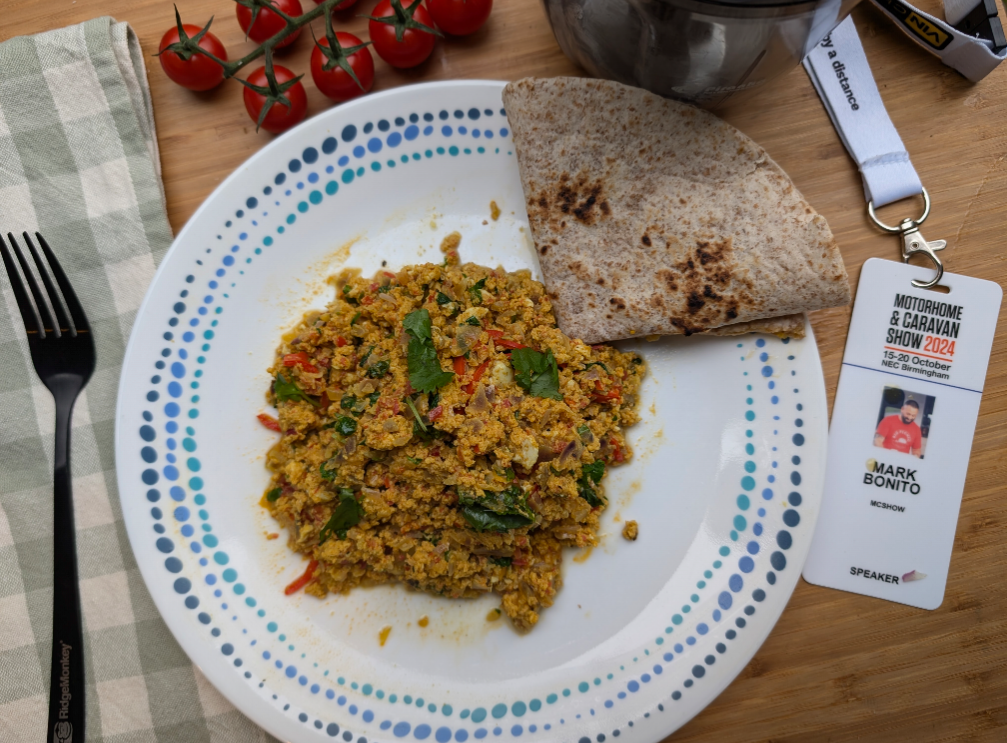
A highlight for Tasha so far has been spending New Years eve in the Brecon beacons, including a cold water swimming session in 3 degrees 🥶. Obviously not afraid of the cold, Tasha also scaled Pen Y fan in -8 degrees Celsius. Of course she also adds the Vanlife eats big picnic to one of her highlights, where she fully submerged into the sense of community. She also learnt one of her new regular go to meals in the van of one pan Turkish eggs from The vanlife cookbook.

Black bean nachos

There are more exciting adventures ahead, Tasha has managed to get seasonal work on a beautiful campsite. It is at this campsite that she plans to run some wellness retreats for vanlifers you can find out more on her Instagram @kiffcampoutretreats. After this she plans on heading to Scotland, and next year a 3 month trip exploring food, champagne and vineyards in France.

Not all adventure

With the good often comes the bad, in this case it is no different. It’s time for some vanlife reality. As a solo female vanlifer, life on the road can sometimes be scary. Tasha spent 7 months stealth camping in Cardiff which overall she enjoyed. However, being in a big city can sometimes be intimidating when in a van on your own and she said she often spent nights unable to sleep in ‘fight or flight’ mode.

There have been difficult times in winter where she has found it too cold to get to sleep, but one of the most difficult times is losing her van, even though it was brief. As with many vanlifers, if your van needs repairs, it often means you have nowhere to stay. Unfortunately this happened to Tasha and she ended up being without a van or home for 3 weeks. One of her tips for fellow vanlifers is to make sure you put aside some money for accommodation, for if/when this happens.

Miss-kiff-park-up

On a brighter note, if you end up sitting with Tasha round a campfire, be sure to ask her about the time she got back to the van slightly worse for wear with a full bladder…..

Luna the van

Tasha loves the van and the cosy feeling she has in there, there’s a definite sense of pride and achievement when she describes it. As time goes on she is realising things that work well and things that could be better. As with any tiny home, space is crucial, and so Tash will be making some improvements with the cupboards in her van for more space. Organisation is also key, and having little boxes to be able to organise teas, nuts, oils etc has been a game changer for her. Having a portable hob means Tasha can cook inside or outside if the weather is good and the mood takes her.

Tasha loves a van kitchen gadget and has an Omnia, a blender for perfect lattes and smoothies, plus she’s planning on getting an electric oven. All of this is made possible by her 300w inverter, she says it’s one thing she can’t live without.

Beautiful vanlife park up

Tasha loves to cook in her van and often makes protein pancakes, ramen and of course the turkish one pan eggs. Obviously she loves to make her black bean nachos, the recipe can be found here. Sometimes cooking can impact on her other hobbies though, and she once ended up with her podcast mic covered in pancake batter. Miss Kiff’s podcast provides truthful experiences about her life on the road which you can find on Spotify, it’s called My Van Life Perspective Podcast‘.

If you would like to hear more about Tasha’s vanlife experiences, and living in a van full-time while converting it, then you are in luck. She is currently writing an ebook all about her experiences, and it will be available very soon.

Miss Kiff vanlife perspective podcast

Advice for fellow vanlifers

Do it! Life is too short to wonder, it’s tougher than it looks. Van Community is Everything! Start trusting strangers (the right ones of course), go to van festivals to meet like minded people. Even if you have no skill or resources it can be done. The first year will be testing you to the limit, take your van to a mechanic before you start converting it. And get a reliable mechanic!

Website: www.misskiff.co

Instagram: instagram.com/misskiff_

YouTube:

Want to be featured on
vanlifeeats.com?

To apply for a featured post on vanlifeeats.com simply follow this link and fill out the application form. We promote all featured van lifers across all our social media networks, we send out a “featured Van Lifer” sticker for your van as well as awarding you a prestigious badge for your profile on our website.

Vegan black bean nachos

0

This vegan black bean nacho recipe is a favourite of featured vanlifer Miss Kiff. You can read her feature, right here. Packed full of different flavours, and a delicious kick, we’re sure it will be being made by vanlifers worldwide.

This is one of my favourite things to make in the van, black bean nachos brings an authentic mexican flavour, and is great to share. This recipe is vegan but you could use feta rather than the vegan version should you not want this dish to be vegan. This recipe calls for harissa to give it a delicious kick! If you want to make your own there is a really simple recipe right here at the Holy cow vegan website.

Black bean nachos

Black bean nachos

@misskiff_
Vegan
Smokey black beans with a hint of spice complemented with a citrus tangy guacamole and refreshing herbs, tomatoes and feta served on a crunchy tortilla chip to leave your mouth watering for more. A budget dish to enjoy alone or serve a group.
5 from 1 vote
30 minute meal – Family friendly
Prep Time 5 minutes
Cook Time 15 minutes
Cooling time 5 minutes
Total Time 25 minutes
Course Dinner, Lunch
Servings 2
Diet Vegan

Equipment

Ingredients
  

For the black bean pate

  • 2 tsp Coconut oil
  • 1 Onion
  • 3 Garlic cloves
  • 1 can Black beans
  • 1 Vegetable stock cube
  • 2 Chillis (chopped)
  • 2 tbsp Harissa
  • 1 tbsp Smoked paprika
  • 250 mls Water

For the guacamole

  • 2 Avocado
  • 1/2 Lemon
  • 1 handful Coriander
  • 2 Garlic cloves Chopped
  • Salt & pepper to taste

To serve

  • 1 bag tortilla chips
  • 100 g vegan feta
  • 4 Tomatoes chopped
  • 1 handful Spinach
  • Coriander to garnish
  • 1/2 Lemon to garnish

Instructions
 

For the black bean pate

  • Take a pan and add 2 teaspoons of coconut oil add 1 onion 🧅 and 3 cloves garlic let than turn golden brown for 2-3mins.
    Black bean nacho prep
  • Reduce heat and add 1 can of black beans (with the sauce in can) add 1 veg stock cube, add 2 chopped chillies, 2 tablespoons harissa, and 1 table spoon smoked paprika. Add 250ml water – let this simmer and reduce for 10mins. You want the liquid to start looking like a gravy texture.
  • Once your beans have finished let this cool for 5mins and then blend this together if it’s too thick add some hot water to make into a pate form.
  • Whilst this is simmering you can start off your guacamole 🥑

For the guacamole

  • Use 2 avocados mush in a bowl.
    Black bean nacho ingredients
  • Add half a lemon, bunch of coriander (if you love coriander add a palm full if you are not keen then half a palm) chop chop chop add to avocado,
  • Slice 2 gloves garlic (you can use as little or much as you like – I love garlic) – mix together add a pinch of salt and pepper. If you need to add more lemon 🍋 ( if the avo is too thick)

To serve

  • Add to a plate some tortilla chips, add beans, guacamole, feta and chopped Tomato, coriander and I like to add some spinach finish with dash of lemon.
  • And enjoy! You tastebuds will be satisfied
    eating black bean nachos

Nutrition

Calories: 1532kcalCarbohydrates: 186gProtein: 39gFat: 79gSaturated Fat: 19gPolyunsaturated Fat: 22gMonounsaturated Fat: 31gTrans Fat: 0.1gCholesterol: 45mgSodium: 1679mgPotassium: 2875mgFiber: 41gSugar: 18gVitamin A: 6375IUVitamin C: 161mgCalcium: 571mgIron: 9mg
Keyword 30 minute meal, dairy free, Easy, fresh, sharing, Simple, vegan
Tried this recipe?Let us know how it was!

Vanlife soup mix

0

This vanlife soup mix is a great vanlife hack! This dried soup mix can be used in many different recipes. Store this in an airtight container and it will keep well for a good few weeks. This soup mix is really useful for solo vanlifers as you can use as much or little of the mixture to make up your recipe, being as it stores so well and can be used in a variety of recipes. Check out more of our recipes here, or our instagram here.

Vanlife soup mix

Vanlife soup mix

amerimanx_travels
Meat Based, Pescatarian, Vegan, Vegetarian
This is a dried mix that stores well in a cupboard for awhile. Very few ingredients but hugely versatile, so can be adapted to LOADS of recipes.
5 from 1 vote
10 Ingredients or less – Family friendly – No fridge – Prep ahead – Quick cook – Solo travel
Prep Time 10 minutes
Total Time 10 minutes
Course Dinner, Lunch, Main Course, Soup
Servings 4 people
Diet Meat Based, Pescatarian, Vegan, Vegetarian

Equipment

Ingredients
  

  • 1 cup non-fat dried milk
  • 3/4 cup cornflour
  • ¼ cup dried bouillon/equivalent crumbled stock cubes use your preference chicken, beef, vegetable
  • 4 tablespoons freeze dried minced onions
  • 1 teaspoon dried basil
  • 1 teaspoon dried thyme
  • 1 teaspoon ground black pepper

Instructions
 

  • Mix all together and store in a air tight container.
  • For the equivalent of one can of condensed cream soup, mix ⅓ cup dry mix with 1 ¼ cup water. Cook until thick. Then add anything you like to soup, ie, mushrooms, chicken or brocoli and cheddar cheese. Can be used as a base for a variety of recipes.
  • Such as elbow macaroni, cheddar cheese and this soup, which make a quick Mac and Cheese

Nutrition

Calories: 228kcalCarbohydrates: 43gProtein: 12gFat: 0.4gSaturated Fat: 0.2gPolyunsaturated Fat: 0.04gMonounsaturated Fat: 0.1gCholesterol: 6mgSodium: 234mgPotassium: 671mgFiber: 1gSugar: 19gVitamin A: 712IUVitamin C: 6mgCalcium: 430mgIron: 1mg
Keyword Easy, no cook, quick, Simple, soup
Tried this recipe?Let us know how it was!

How to bake in a van

Have you ever wondered how to bake in a van?

Baking in a van comes with some challenges, the lack of available space can mean you sometimes have to get creative. Baking in a van isn’t as difficult as it may seem initially, cakes, bread and pies are definitely on the menu in our van!

lemon drizzle Omnia

How to bake in a van without scales

Baking requires exact measurements, it can be a very exact science, but it is possible to bake in a van without scales. It doesn’t really pay off to guess measurements when baking, especially with cakes and biscuits. One misjudged measurement can make a massive different in how your bake turns out, affecting taste and texture.

When I first started baking in the van, I had no idea how to bake in there without scales. I would take the electronic scales from the house with me and measure ingredients. Slowly I converted to measuring cups and have found it so much easier.

Collapsible measuring cups

It can take a while to get used to making the change to cups, and it can be quite daunting. It is however, so much easier to do in the van and at home! We use collapsible measuring cups in the van. It helps save space as we can either collapse them flat and have them in a drawer or hang them on a hook on the wall.

There are however some things you need to be mindful of when measuring in cups for baking. Cups are based on volume rather than weight, this means the transfer from weight to cups is not uniform across all ingredients. E.g. 125g of flour is 1 cup, yet 175g brown sugar is 1 cup. Remember UK cups and American cups are different sizes to confuse things further. A UK metric cup measures 250ml, while the US versions are typically smaller. We have created a handy table to help you convert a number of usual ingredients required for baking in a van. The cup measurements are for 250ml cups.

Ingredient1 Cup3/4 cup2/3 cup1/2 cup1/3 cup1/4 cup
Plain flour125g94g84g73g42g37g
Wholemeal flour120g90g80g60g40g30g
Ground almonds110g83g74g55g37g27g
Cocoa powder125g94g84g73g42g37g
Granuated / caster sugar250g150g133g100g67g50g
Brown sugar175g131g117g88g58g44g
Icing sugar110g83g74g55g37g27g
Butter / margarine230g173g153g115g77g58g
Oil225g169g150g113g75g56g
Milk235g177g157g118g78g59g
Condensed milk305g227g204g151g102g76g
Cream cheese225g169g150g113g75g56g
Yoghurt245g183g164g122g82g61g
Chopped nuts125g94g84g73g43g37g
Flaked almonds100g75g67g50g34g25g
Dried fruit180g135g120g90g60g45g
Oats (uncooked)90g68g60g45g30g23g
Chocolate chips180g135g120g90g60g45g

When measuring butter it may be easier to use the markers on the side of the packet (usually in 50g increments). If the packet doesn’t have this then you can spoon the butter into the cup measure and level it off with a knife, you want to push this in to avoid and minimise any air pockets and make sure you have enough butter for the perfect bake. A great tip is to cover the cup in clingfilm first, you then can tip it out and the cup is ready to use for the next ingredient to be measured. Saves greasy water going into your grey waste in the van too! You can use the clingfilm to grease the tin or mould if needed.

If you really aren’t confident with how to bake in your van without scales, then there are some great folding scales available. These won’t take up much room in the van and will give you much more precision when baking.

vanlife Oat Pancakes

How to bake in a van without an oven

One of the other hurdles I had to overcome was how to bake in the van without an oven! I had no idea this was even possible. This is where our stove top oven, the Omnia came in handy. We have plenty of articles about the Omnia, whether it’s worth it, and tips for using it. It works on the stove top with it’s unique design meaning the heat is pretty evenly distributed. The bottom can get very hot though, so it’s important to cook low and slow to avoid a burnt bottom.

This gadget makes it quite easy to bake in the van, it packs away neatly and is stored in a cupboard when not in use. We have baked cakes, bread, pizza, muffins, pies, lasagne and a lot more in ours. Even a roast dinner at one point. It definitely makes baking in a van without an oven a possibility, even if you do end up with ring shaped cakes and loaves.

cheddar onion loaf

There are other options to the Omnia. Be creative when baking in a van without an oven! We have seen cheesecakes made in an instant pot and pineapple cakes cooked in a slow cooker. We often make flatbreads and pizzas in a pan on the hob and they taste amazing. It is possible to get your bread fix without an oven.

The other gadget we have used for baking in the van is our ridgemonkey. We bought the Compact Xl sandwich toaster, and originally used it only for toasting sandwiches. Since then our eyes have been opened up to the possibilities and we bake in it quite often. We have baked the pre-made croissants and pain au chocolat, pizza pinwheels and even made brownies.

If you have a pan then your bread fix is never too far away. When craving bread we often want a quick fix for those carby cravings. The flatbread recipes, provide a great option to have delicious bread in the van without the need for an oven.

Although it initially seems baking without an oven in the van is impossible, there are options out there.

aero mint brownies

How to bake outside the van!

Remember, one of the joys of being in a van is that you can have an ever changing kitchen view. Cooking outdoors is a great way to get involved in nature. If on a campsite, it’s a great way to keep an eye on the kids and cook dinner at the same time.

Baking on an open fire is possible! Just be sure to be responsible if building a fire in the great outdoors. Damper loaves are great to cook on the fire, and satisfies that crunchy, doughy bread craving.

garlic damper

Baking in a van with an oven

If you have an oven in your van it may seem like plain sailing when baking. Certainly, it may be easier than stove top baking, but there may be some limitations. As when using a hob you need to keep an eye on your gas levels, nobody wants a half baked cake!

Remember all ovens have their own little quirks, hot spots, cold spot. Get to learn the best place to bake your goodies. Unfortunately the slope can affect us all, so make sure you are parked levelly if you want a uniform looking bake.

Keep ventilation in mind if using an oven, be sure to ventilate your van well to ensure the van doesn’t get too hot. It’s a great idea to invest in some silicone bake-wear. It can be folded flat for storage, is light-weight and easy to clean.

Maple pecan pie bars

Extra tips for how to bake in a van

Ingredients

If you are part-time in your van, consider weighing your dry ingredients at home. You can store them in a Ziploc bag. This will keep them fresh and secure – no flour spillages. When ready to bake you can simply tip the ingredients in and mix in your wet ingredients.

Vanlife baking

One of the differences between baking in a house and a van is the levelness of the hob or oven. It can sometimes be difficult to see before you start baking whether you are on a slope. Be prepared that some of your bakes may be slightly uneven. It all adds to the character, and they will still taste amazing.

Omnia vegan victoria sponge

Tidy pan, happy van

Baking in a tiny space can get messy. It is so important to clean as you go to avoid a caked on mess (pardon the pun!). Washing up isn’t always easy in a van, so washing up sooner rather than later can help. It is also the perfect excuse to lick the spoon and bowl clean, less mixture to go in your water waste!

The proof is in the rising

If baking bread it will need proving time. Take into account the temperature in your van proving bread. If it’s a nice sunny day we leave ours in the window in the sunshine, but there have been times we have had it near the diesel heater to get the perfect rise.

Smells be gone!

If you use silicone baking products in your van you may have noticed, they can cling onto smells. To get rid of this heat up the silicone mould, this opens up the pores. Then wash with warm soapy water, once dried, your will be free to bake again. No risk of any unwelcome whiffs.

Practice makes perfect

Finally, remember to go easy on yourself! If you aren’t used to baking in a van it can take some getting used to. If your bakes don’t always come out perfect in the van, it doesn’t matter.

campervan omnia pizza

Please note this article contains affiliate links. Any items purchased via these links, will be at no extra charge to you. We will gain a very small commission which helps to cover the running costs of the website. Thank you

International Vanlife Cooking Day June 21st

0

Vanlife has become a popular lifestyle choice for adventure seekers and travel enthusiasts. It offers the freedom to explore different places while having the comforts of home on wheels. One aspect that adds excitement to the vanlife experience is cooking on the go. International Vanlife Cooking Day celebrates the creativity and culinary skills of vanlifers from around the world. Celebrate International Vanlife Cooking Day with us and vanlifers across the globe to enjoy this unique celebration.

What is International Vanlife Cooking Day?

International Vanlife Cooking Day is a global celebration that takes place on June 21st every year. It is a day dedicated to embracing the joy of cooking delicious meals while living the vanlife.

Vanlife is not just about traveling; it’s a way of life that encourages self-sufficiency and creativity. Cooking in a van presents unique challenges and opportunities. International Vanlife Cooking Day highlights the resourcefulness of vanlifers who create mouthwatering dishes with limited kitchen space and equipment. It showcases the diverse culinary skills of individuals who have a passion and love for cooking on the road.

Vanlifers, travel and adventure seekers as well as van dwellers around the world come together to share their favorite recipes, cooking tips, and culinary adventures on social media platforms using the hashtag #VanlifeCookingDay and tagging the main sponsor of this event Vanlife Eats.

How to Participate in International Vanlife Cooking Day

1. Cook your favourite food

Before hitting the road, plan your menu for International Vanlife Cooking Day. Consider the available cooking facilities in your van and choose recipes that are easy to prepare with minimal ingredients. Opt for dishes that reflect your personal taste and the local flavors of your destination.

2. Find a Scenic Location

One of the joys of vanlife cooking is the ability to enjoy stunning landscapes while preparing meals. Choose a scenic location for International Vanlife Cooking Day, such as a picturesque beach, serene forest, or breathtaking mountain range. Cooking amidst nature adds an extra element of tranquility to the experience.

3. Embrace Local Ingredients

Make your International Vanlife Cooking Day memorable by incorporating local ingredients into your recipes. Visit farmers’ markets, roadside stands, or local grocery stores to source fresh produce, spices, and other regional delicacies. Experimenting with local flavors will elevate your culinary creations and provide an authentic taste of the area.

4. Document and Share Your Vanlife Cooking Experience

Capture the essence of International Vanlife Cooking Day by documenting your cooking adventures. Take photos and videos of your cooking process, the beautiful surroundings, and the final plated dishes. Share your experiences on social media using the hashtag #VanlifeCookingDay, inspiring and connecting with the global vanlife community.

Dont forget to tag @vanlife_eats on Instagram

To find inspiration dont forget to browse our collection of vanlife recipes here

Outdoor Cooking Techniques & Tips

As Vanlifers and hybrid campsite weekend warriors we are passionate about outdoor cooking and the amazing experiences it brings to the whole family as well as friends. 

We have been meaning to write an article about outdoor cooking methods for a while where we can delve into various outdoor cooking methods, explore the unique benefits, techniques, and delicious recipes. 

From BBQ to smoking, we’ll equip you with the knowledge you need to elevate your culinary skills and create memorable meals. Get ready to embark on a Vanlife Eats culinary adventure in the great outdoors!

BBQ Grilling

Outdoor BBQ cooking is a cherished tradition, bringing friends and family together to enjoy delicious grilled meals and the joy of cooking in the open air. With a wide range of BBQ cooking methods, you can create succulent meats, flavourful vegetables, and even grilled desserts. Let’s explore some popular outdoor BBQ cooking techniques that will help you master the art of grilling.

Direct Grilling

Direct grilling is a straightforward and widely used BBQ cooking method. It involves placing the food directly over the heat source, typically hot charcoal or gas burners. This technique is ideal for smaller, thinner cuts of meat, such as steaks, burgers, sausages, and skewered kebabs. The direct heat sears the exterior, creating those coveted grill marks and sealing in the juices for mouthwatering results.

Indirect Grilling

Indirect grilling is a technique that involves cooking food away from the direct heat source. In this method, you place the food on the grill grates next to, rather than directly over, the heat. This creates a gentler cooking environment, allowing for slower, more even cooking. Indirect grilling is perfect for larger cuts of meat, such as whole chickens, roasts, or ribs. It provides the opportunity to infuse smoky flavours and achieve tender, juicy results.

Smoking

Smoking is a BBQ cooking method that adds a distinct and irresistible smoky flavour to your food. It involves slow-cooking over low, indirect heat using wood chips or chunks, which release aromatic smoke. This method is commonly used for foods like ribs, briskets, or whole fish. The extended cooking time allows the smoke to penetrate the food, infusing it with a rich and smoky taste.

Rotisserie Cooking

Rotisserie cooking involves skewering the food on a rotating spit, which is then placed over the heat source. The constant rotation ensures even cooking and basting as the natural juices continuously coat the meat. Rotisserie cooking is excellent for larger cuts of meat, such as whole chickens, turkeys, or roasts. It delivers succulent, tender results with a crispy and flavourful exterior.

Grilling with Planks

Grilling with planks is a unique BBQ cooking method that imparts a delightful smoky and woody flavour to fish, meats, and vegetables. Soak wooden planks, such as cedar or maple, in water, and place them directly on the grill grates. Then, arrange the food on top of the planks and cook with the grill lid closed. This method is particularly popular for grilling salmon and other seafood, creating a moist and flavourful result.

Searing

Searing is a technique used to achieve a caramelised crust and locking in the juices of your food. It involves cooking food over high heat for a short period, usually at the beginning or end of the grilling process. Searing is commonly used for steaks, chops, or burgers, creating a delectable outer crust while maintaining a tender and juicy interior.

Gas Burners

A portable gas stove is a convenient and versatile option for outdoor cooking. Whether you’re camping, hiking, or enjoying a picnic, a portable gas stove allows you to prepare hot meals wherever you go. Here’s a guide on using a portable gas stove effectively for your outdoor culinary adventures.

Choosing a Portable Gas Stove

When selecting a portable gas stove, consider factors such as size, weight, and fuel type. Opt for a compact and lightweight stove that is easy to carry and transport. Gas stoves usually run on butane or propane, so choose a stove compatible with the fuel canisters available in your area.

Setting Up the Stove

Start by finding a stable and level surface to place your portable gas stove. Ensure the area is well-ventilated and away from flammable materials. Follow the manufacturer’s instructions for assembling the stove, attaching the gas canister securely, and connecting the fuel line. Check for any gas leaks by applying a soapy water solution to the connections and looking for bubbles.

Igniting the Stove

Most portable gas stoves have a built-in ignition system, making it easy to start the flame. Turn the gas control knob to the “ignite” or “start” position and press the ignition button. If your stove doesn’t have an ignition system, use a long-reach lighter or match to light the burner. Keep your face and hands clear of the stove while igniting it.

Regulating the Flame

Once the stove is ignited, adjust the flame to the desired heat level. Gas stoves usually have a control knob that allows you to increase or decrease the flame intensity. For simmering or gentle heat, turn the knob to the lowest setting. For higher heat, turn it up gradually until you reach the desired temperature. Remember to monitor the flame and make adjustments as needed throughout the cooking process.

Cooking on the Stove

Portable gas stoves offer a range of cooking options. You can use a variety of cookware, including pots, pans, and griddles. Ensure that the cookware is compatible with the stove and fits securely on the burner. Cook your meals as you would on a regular stove, whether it’s boiling water, frying, sautéing, or simmering. Follow your recipes and adjust cooking times and temperatures accordingly.

Safety Precautions

When using a portable gas stove, always prioritise safety. Never leave the stove unattended while it’s in use. Keep flammable materials away from the stove and ensure there is sufficient ventilation. If using the stove indoors, make sure the area is well-ventilated and follow any guidelines or restrictions regarding indoor cooking. After use, allow the stove to cool down completely before disassembling or storing it.

Wood Burner Cooking

Using a wood burner for outdoor cooking can elevate your culinary experience to new heights. Our favourite brand is Winnerwell, who offer a wood burner specifically designed for cooking purposes. With its tall chimney, this wood burner effectively directs smoke away from the cooking area, ensuring a clean and enjoyable environment. Let’s explore the unique features and benefits of this method and how to cook with a cast iron skillet pan on the base of the burner.

best outdoor cooking stove

The Wood Burner

The wood burner is a reliable and efficient outdoor cooking appliance. Its durable construction and thoughtful design make it perfect for camping trips, backyard gatherings, or any outdoor adventure. The tall chimney provides excellent ventilation, reducing the amount of smoke that comes into contact with your food while maintaining a controlled fire.

Setting Up the Wood Burner

Begin by selecting a safe and stable location for your wood burner. Place it on a non-flammable surface, ensuring it is away from any objects that could catch fire. Assemble the wood burner according to the manufacturer’s instructions, making sure the chimney is securely attached. Once set up, gather dry, seasoned firewood to fuel your cooking fire.

Preparing the Cast Iron Skillet

A cast iron skillet is an ideal cooking tool for wood burner cooking due to its excellent heat retention and even distribution. Before using the skillet, make sure it is properly seasoned by applying a thin layer of oil and heating it on the wood burner until it smokes. This process creates a natural non-stick surface and enhances the skillet’s longevity.

Cooking on the Wood Burner

Once the wood burner is set up and the skillet is seasoned, you’re ready to start cooking. Begin by building a fire in the burner using small pieces of firewood or kindling. As the fire burns, adjust the airflow through the chimney to control the heat intensity. Place the cast iron skillet directly on the base of the burner, allowing it to heat gradually.

Mastering Wood Burner Recipes

With the wood burner and cast iron skillet ready, you can cook a wide range of dishes. Sear succulent steaks, grill vegetables, sauté stir-fries, or prepare flavourful stews. The versatility of the wood burner allows you to experiment with different cooking techniques and enjoy the unique smoky flavours that come from cooking over a wood fire.

Safety Considerations

While wood burner cooking offers a delightful experience, it’s important to prioritise safety. Ensure that the wood burner is placed on a stable surface, away from flammable materials and any potential fire hazards. Monitor the fire closely, and never leave it unattended. Once you have finished cooking, allow the wood burner to cool completely before disassembling or storing it.

Smoking

Smoking is an ancient outdoor cooking method that imparts rich, smoky flavors to a variety of ingredients. From meats to vegetables, this slow and low technique transforms ordinary ingredients into culinary masterpieces.

Types of Smokers

Explore different types of smokers, including:

  • Offset Smokers: These traditional smokers feature a firebox attached to the cooking chamber, allowing for precise temperature control.
  • Electric Smokers: Ideal for beginners, electric smokers offer convenience and simplicity, requiring minimal attention.
  • Pellet Smokers: These innovative smokers utilise wood pellets to create a consistent smoke, infusing the food with robust flavours.

Fire Pit Cooking

Fire pit cooking adds a touch of rustic charm to outdoor dining, allowing you to enjoy the warmth and ambiance of a crackling fire while preparing delicious meals. Whether you’re camping, hosting a backyard gathering, or simply enjoying a cosy evening, fire pit cooking offers a unique culinary experience. Let’s delve into the world of fire pit cooking and explore how to make the most of this versatile method.

firepit-cooking

Choosing a Fire Pit

Selecting the right fire pit is essential for successful fire pit cooking. Consider the size, material, and design that best suits your needs. Opt for a fire pit that is sturdy, heat-resistant, and has a removable grill grate or cooking surface. This will enable you to cook directly over the fire, creating those delightful smoky flavours.

Setting Up the Fire Pit:

Before starting your fire pit cooking adventure, find a safe and suitable location for your fire pit. Ensure that it’s placed on a non-flammable surface, away from overhanging branches or any combustible materials. Clear the area of debris to minimize fire hazards. Follow the manufacturer’s instructions for assembling and positioning the fire pit securely.

Building the Fire

To start cooking, you’ll need to build a fire within the fire pit. Use small, dry kindling to create a base, and gradually add larger pieces of firewood on top. Arrange the wood in a teepee or log cabin style to promote airflow and efficient burning. Consider using hardwoods such as oak or maple for a longer and more consistent heat source.

Cooking Techniques

Fire pit cooking offers various techniques to suit your culinary desires. Direct grilling involves placing food directly over the open flames or hot coals. This method is ideal for cooking burgers, sausages, kebabs, or corn on the cob. For indirect cooking, create separate zones within the fire pit by moving the coals to one side. This allows for slower, more controlled cooking, perfect for roasting chicken, pork loin, or vegetables.

Cooking Equipment

To facilitate fire pit cooking, certain equipment is essential. Invest in a sturdy grill grate or cooking surface that fits securely over the fire pit. This provides a stable platform for your food and allows for easy flipping and turning. Long-handled tongs, spatulas, and heat-resistant gloves are also valuable tools to handle and manoeuvre the food safely.

Safety Precautions

While enjoying the beauty of fire pit cooking, it’s crucial to prioritize safety. Never leave the fire pit unattended, especially when children or pets are present. Keep a fire extinguisher or water source nearby to address any unexpected flare-ups. Allow the fire to burn down completely before extinguishing it with water or sand. Remember to dispose of the ashes properly once they have cooled.

Exploring Other Outdoor Cooking Techniques

In addition to the popular methods discussed earlier, there are various other outdoor cooking techniques that allow you to expand your culinary repertoire and create delectable dishes. Here are a few notable techniques to consider:

Dutch Oven Cooking

Dutch oven cooking involves using a heavy cast iron pot with a tight-fitting lid. This versatile piece of cookware is placed directly over hot coals or a campfire. It’s perfect for slow-cooked stews, hearty soups, and even baking bread or desserts. The Dutch oven’s ability to distribute heat evenly produces mouth watering flavours and tender results.

Open Flame Grilling

Open flame grilling is a traditional cooking technique where food is cooked directly over an open flame. Whether using a campfire grill grate or a simple grill rack, this method imparts a distinct smoky flavour to meats, vegetables, and even fruits. Adjust the heat by manipulating the distance between the food and the flames to achieve the desired level of doneness.

Spit Roasting

Spit roasting involves skewering meat or poultry on a long rod and rotating it slowly over an open fire. This technique allows the meat to cook evenly and bastes it with its own juices, resulting in succulent and flavourful dishes. Whether you’re roasting a whole chicken, a leg of lamb, or even a rotisserie-style barbecue, spit roasting delivers impressive results.

Foil Packet Cooking

Foil packet cooking is a convenient and versatile method that involves wrapping food in aluminium foil and placing it directly on hot coals or a grill. This technique is ideal for cooking delicate fish, marinated vegetables, or even individual portions of lasagne. The foil creates a sealed environment, locking in moisture and flavours while simplifying clean-up.#

Campfire Skewering

Campfire skewering is a classic technique for cooking kebabs or skewered foods over an open flame. Simply thread marinated meats, vegetables, or even fruits onto skewers and position them near the heat source. This method offers endless possibilities for creative flavour combinations and allows for an interactive dining experience.

Solar Cooking

Harnessing the power of the sun, solar cooking utilises specially designed cookers that trap and convert sunlight into heat. These cookers are perfect for slow-cooking dishes, such as stews, rice, or even baking. Solar cooking is not only energy-efficient but also a sustainable and eco-friendly method of outdoor cooking.

Pizza Ovens

Using a pizza oven for outdoor cooking is a delightful culinary experience that elevates homemade pizzas to new heights. The dedicated oven, typically fuelled by wood, creates intense heat, infusing the pizzas with a distinct smoky flavour and achieving a crispy, charred crust. The process involves carefully stretching the dough, adding flavourful toppings, and swiftly placing the pizza into the preheated oven. With rapid cooking and even heat distribution, the pizzas emerge perfectly cooked, with bubbly cheese and irresistible aromas. Whether hosting a gathering or enjoying a family meal, cooking pizzas in a pizza oven adds a touch of authenticity and creates memorable outdoor dining moments.

Our pizza oven of choice is the Ooni Koda 12 it is compact enough to hide in the boot of your van and it connects easily to a butane or propane gas cannister. Pizzas in 60 seconds means hungry mouths are satisified pretty quick!

Outdoor cooking methods offer a delightful blend of tradition, adventure, and mouth-watering flavours. From the sizzle of the grill to the slow dance of the smoker and the crackle of the campfire, each method presents unique opportunities for culinary creativity. Armed with this comprehensive guide, you are ready to take on the great outdoors and create culinary masterpieces that will tantalise taste buds and leave lasting memories. Happy cooking!

Remember to check out vanlifeeats.com for more tips, tricks, and delectable recipes to elevate your outdoor cooking adventures. Let’s set your taste buds on fire with the ultimate culinary journey!

I faced death in the van! Now this is my new vanlife routine

Those that know me well have heard me continuously moan about this but the majority of these people are not vanlifers, least of all full time vanlifers. It has been on my mind that living full time in a van comes with a danger that in 2020 came and bit me on the… well just about everywhere! And I am now living with the consequences. 

Full time Vanlife isn’t for everyone but it’s an awesome fit for those who want to live life out of the box and break away from some of life’s restrictions.  For others vanlife could be a forced option due to financial situations and housing problems. Well for me it was the latter of the two, and in my head I invented vanlife.  Having little option forced me to move into my 8 seater caravelle and make it a little home for a while until I found my feet. Little did I know I would find peace and tranquility being parked up in the wild.  I learnt to enjoy my own company once again and rediscovered myself. 

As more and more options unfolded I decided that I didn’t want to part with my home on wheels. I may not have been living the instagram picture but I loved having my own space.  A man cave on wheels! 

Now for the doom and gloom!  

Enjoying your own space can be dangerous!   In January 2020 I became ill in the back of my converted ambulance.  Breathing problems, coughing up gloop and extreme fatigue. After a few days of texting Sophie saying I’m ok but I have lost my voice so I couldn’t talk or visit, I did realise I had never been this ill before but I was locked away in my bed in my van. I can sleep it off and power through it. 

After a week I was bad! Really really bad! So I called the UK medical helpline 111.  “Call an ambulance!” they insisted.  But I didn’t live anywhere! In Fact I lived in an ambulance! I couldn’t call an ambulance out to an ambulance!  I decided I would ask my brother to pick me up and take me to A&E. 

The junior doctor I saw said I would be fine after a course of antibiotics so it was back to the van with some meds.  I was not ok!  The week that followed was dark!  I was drifting in and out of consciousness, often unable to sit up to reach water and I was sending the occasional message to Sophie saying I’m fine!  At times I felt suffocated by the darkness looming over me and it was hard to breath and I was constantly coughing up gloop. 

After this week (2 weeks of hell) I was slowly recovering and able to get back on my feet. 

After week 3 I felt much better and decided I wanted to get out and about so I booked in with a doctor.  After the consultation with the GP she told me my oxygen levels were incredibly low and I needed to go to hospital.  Being a stubborn vanlifer I said no and pretty much ran away! 

After week 4 I was returning to my normal self or so I thought!  A new way of dealing with life was about to unfold! 

What was wrong with me? 

Pneumonia, probably COVID but the big issue was my lack of seeking help, professional help as well as help from loved ones thus causing further damage to my health.  Being so stubborn and thinking I can deal with it myself could have left me dead.  Pretty sure those black dark shapes looming over me was the end getting closer. 

The following years after this trauma were not the end either.  I have been left with widespread body pains, chronic fatigue and disability in various body parts. This all seems to come and go and the pains and disabilities vary in strength and the location of my body. I have lost 2 jobs due to intense pains and lack of actually being a decent worker. 

I have been in and out of hospital multiple times a year and I have been scanned literally from head to toe and the final conclusion is that I have a condition called Fibromyalgia and ME.  Apparently the trauma I went through made my brain develop and release a chemical into my body that affects my nervous system.  Irreversible apparently but lets see! 

Doctors and consultants have told me it’s now a case of learning to live with it and not to work, not to exercise and to live on pills that take me to happy land.  This can NOT be my life from now on!  I have tried a variety of holistic treatments but I am yet to find anything that has any lasting effect. 

Recently I have been receiving a lot of pain in my hands which is making a lot of daily tasks quite challenging and even cooking is proving hard to do!! My main hobby and passion!! I also have constant pain in my chest that often buckles me to the ground! This is why I have been inactive on social media a lot recently.  I will find a way of dealing with it and having a positive mind is the way forward. 

This has all changed my outlook on how I spend time alone in the van and also just how much time I can actually even look after myself alone. 

Health and support

As a qualified nutritionist and personal trainer I am pushing myself into a healthier lifestyle.  This has been hard because I put my hands up and admit I went through some horrible depressive mood swings where crap food and alcohol seemed to be worthwhile as well as hiding away from everyone.

Right now I am on it and I feel I could do with some motivation from all the amazing and lovely people in the vanlife community so I will be posting some content about keeping fit and making healthier lifestyle changes that promote vanlife living. 

Please share your thoughts, views and comments below so I know what direction to take this. 

Vanlifers could be in danger!

My main reason for sharing this is that I feel deeply concerned that there are other people living in vans with a similar mind that I “had” or worse still some people who may not have people to call for help. 

We live in vans because we are either out having an amazing time travelling the world or we are at home in our vans enjoying freedom and our own space. 

Please please please, if you get ill or feel unwell, make sure you check in regularly with friends, even social media friends or go seek medical help before it gets to a level where permanent damage can occur. 

Liam the terrible set up a great group for supporting one another, here is the link: 

https://www.facebook.com/groups/supportvanlifers/

MeShell from AmeriManx Travels has also created a support group on Facebook:

https://www.facebook.com/groups/514436790746475/

A healthy lifestyle will only promote your vanlife experience!

BBQ Herb and Spice Rubs | Become a BBQ Master!

Barbecue (BBQ) is more than just grilling meat—it’s an art form, a tradition, and a way to bring people together. One essential aspect of achieving mouthwatering BBQ flavors is the use of herb and spice rubs. These rubs add depth, complexity, and a unique twist to your grilled masterpieces. In this article, we’ll explore the world of BBQ herb and spice rubs, learning how to create your own custom blends that will take your BBQ game to new heights.

Introduction

BBQ herb and spice rubs are dry blends of herbs, spices, and other flavorings that are applied to meat before grilling. They help create a delicious crust on the outside of the meat while infusing it with layers of flavor. By making your own rubs, you can tailor the taste to your preferences and experiment with various combinations to create signature flavors.

The Importance of BBQ Herb and Spice Rubs

BBQ herb and spice rubs play a crucial role in elevating the taste of grilled meat. They enhance the natural flavors, add complexity, and provide a personalized touch to your BBQ creations. Whether you’re grilling chicken, beef, pork, or even vegetables, a well-crafted rub can transform an ordinary dish into a culinary delight.

Understanding Flavor Profiles

Before diving into the world of BBQ rubs, it’s essential to understand the different flavor profiles and the kind of taste they impart to your meat.

Sweet and Smoky Rubs
Sweet and smoky rubs are popular choices for BBQ enthusiasts. These rubs often feature a combination of brown sugar, paprika, cumin, and other spices that add a sweet and rich flavor to your meat. The smokiness comes from ingredients like smoked paprika or chipotle powder, lending a distinct BBQ aroma.

Spicy and Heat Rubs
If you enjoy a bit of heat and a fiery kick in your BBQ dishes, spicy and heat rubs are the way to go. These rubs typically incorporate ingredients such as chili powder, cayenne pepper, black pepper, and various spices that deliver a tantalizing heat to your meat. They add a bold and zesty flavor that will satisfy spice lovers.

Tangy and Citrusy Rubs
For those seeking a tangy and refreshing twist to their BBQ, tangy and citrusy rubs are an excellent choice. These rubs often feature ingredients like citrus zest, lemon pepper, vinegar, and herbs such as thyme or rosemary. They provide a bright and lively flavor profile that pairs well with poultry or seafood, bringing a burst of freshness to your grill.

Essential Ingredients for BBQ Rubs

To create delicious and well-balanced BBQ herb and spice rubs, it’s crucial to have a collection of essential ingredients. These ingredients form the foundation of your rub and contribute to its overall flavor. Here are some key ingredients to consider:

Salt and Sugar
Salt is a fundamental component of any BBQ rub, as it helps to season the meat and enhance its natural flavors. Sugar, on the other hand, adds a touch of sweetness and aids in caramelization, creating a desirable crust on the grilled meat.

Paprika and Chili Powder
Paprika and chili powder provide the base flavors for many BBQ rubs. They contribute earthy, smoky, and slightly sweet notes to the rub, setting the stage for a delicious BBQ experience.

Garlic and Onion Powder
Garlic and onion powder add depth and savory undertones to your rub. They bring out the natural umami flavors in the meat and work harmoniously with other spices and herbs.

Black Pepper and Cayenne Pepper
Black pepper and cayenne pepper provide a gentle heat and a peppery kick to your rub. They add complexity and dimension to the overall flavor profile, complementing the other ingredients.

Herbs and Spices
Herbs and spices are where you can truly get creative and add a personal touch to your BBQ rubs. Some popular choices include thyme, rosemary, oregano, cumin, coriander, and mustard powder. These ingredients lend unique aromas and flavors, making your rubs stand out.

Optional Additions
Depending on your preference, you can incorporate additional ingredients to customize your rubs. This could include ingredients like smoked paprika for a deeper smoky flavor, dried herbs like basil or parsley, or even a hint of cinnamon for a surprising twist.

Creating Your Custom BBQ Rub Recipe

Now that you have an understanding of the flavor profiles and essential ingredients, it’s time to create your own custom BBQ rub recipe. Here are some steps to guide you through the process:

Selecting a Base Flavor
Start by selecting a base flavor that aligns with your taste preferences and the type of meat you’ll be grilling. Determine whether you want a sweet, spicy, tangy, or a combination of flavors to be the dominant note in your rub.

Balancing the Flavors
Once you’ve chosen a base flavor, it’s crucial to balance the other components of your rub. Consider the intensity of each ingredient and how they interact with one another. Aim for a well-rounded blend that showcases a harmonious marriage of flavors.

Experimenting with Ingredients
Don’t be afraid to experiment with different herbs, spices, and additional ingredients. Start with small quantities and adjust as you go, noting the impact of each addition on the overall taste. Keep a record of your experiments, noting the ratios and combinations that yield the best results.

Considering Dietary Restrictions
When creating your custom BBQ rub, it’s essential to consider any dietary restrictions or preferences. If you or your guests have allergies or follow specific diets, such as gluten-free or vegan, be mindful of the ingredients you include in your rub. There are plenty of alternatives available that can still deliver fantastic flavors without compromising anyone’s dietary needs.

Preparing and Applying the Rub

Once you have your custom BBQ rub recipe ready, it’s time to prepare and apply it to your meat. Follow these steps for the best results:

Preparing the Meat
Before applying the rub, ensure that the meat is clean and properly trimmed. Pat it dry with a paper towel to remove excess moisture, allowing the rub to adhere better. This step ensures even seasoning and promotes better flavor penetration.

Applying the Rub
Generously coat the meat with your custom BBQ rub, making sure to cover all sides. Use your hands to massage the rub into the meat, ensuring that it adheres well and penetrates the surface. For larger cuts of meat, consider using a rub shaker or a brush to evenly distribute the seasoning.

Resting Time
After applying the rub, allow the meat to rest for some time before grilling. This resting period allows the flavors to meld together and enhances the overall taste. Depending on the type and size of the meat, a rest of 30 minutes to a few hours in the refrigerator is ideal.

Storing and Shelf Life of BBQ Rubs

Proper storage of your homemade BBQ rubs is crucial to maintain their freshness and flavor. Here are some guidelines to follow:

Proper Storage Containers
Store your BBQ rubs in airtight containers that are moisture-resistant. Mason jars, spice jars, or vacuum-sealed bags are excellent options. Make sure to label the containers with the rub’s name and date of creation for easy identification.

Shelf Life Guidelines
While the exact shelf life may vary depending on the ingredients used, most BBQ rubs can be stored for up to six months to a year. However, for optimal flavor and potency, it’s best to use the rubs within the first few months.

Signs of Spoilage
Always check for signs of spoilage before using your BBQ rubs. If you notice any unusual smells, changes in color or texture, or the presence of mold, it’s best to discard the rub and make a fresh batch.

Enhancing BBQ Flavor with Rubs

BBQ rubs can be used in different ways to enhance the flavor of your grilled dishes. Consider these options:

Dry Rubs vs. Wet Rubs
Dry rubs are applied directly to the meat’s surface, forming a flavorful crust during grilling. Wet rubs, on the other hand, incorporate liquid ingredients like oil or vinegar to create a paste-like consistency. They provide both flavor and moisture to the meat. Experiment with both methods to find what works best for your preferences.

Marinating vs. Dry Rubs
While rubs are typically applied directly before grilling, you can also marinate the meat with the rub in advance. Marinating allows the flavors to penetrate deeper, resulting in a more pronounced taste. For marinating, use a wet rub or combine a dry rub with a liquid component like citrus juice or soy sauce.

Pairing Rubs with Different Meats
Different meats lend themselves to different flavors. Consider the characteristics of

the meat you’re grilling and choose rubs that complement their natural flavors. For example:

Chicken: Tangy and citrusy rubs work well with chicken, enhancing its delicate taste. Consider incorporating herbs like thyme or rosemary for added depth.
Beef: Rich and bold flavors pair nicely with beef. Spicy and heat rubs, along with smoky elements like paprika and cayenne pepper, create a perfect match.
Pork: Sweet and smoky rubs complement the natural sweetness of pork. Brown sugar, paprika, and a hint of cinnamon can create a mouthwatering crust.
Seafood: Light and refreshing rubs are ideal for seafood. Citrusy flavors, herbs like dill or parsley, and a touch of black pepper can elevate the taste of fish or shrimp.

Tips and Tricks for Perfect BBQ Rubs

To master the art of creating exceptional BBQ rubs, consider these tips and tricks:

Experiment and Adjust
Don’t be afraid to experiment with different ingredient combinations and proportions. Taste and adjust along the way until you find the perfect balance that suits your palate.

Keep a Rub Recipe Journal
Maintain a rub recipe journal where you can record your successful blends and adjustments. This allows you to recreate your favorite rubs and make improvements over time.

Use Fresh Ingredients
Freshness is key when it comes to spices and herbs. Use high-quality, fresh ingredients to ensure the best flavors in your rubs.

Don’t Overpower the Meat
While you want your rub to impart flavor, be mindful not to overpower the natural taste of the meat. The rub should enhance, not dominate, the overall dish.

Let the Rub Rest
Allow the seasoned meat to rest for a short period before grilling. This allows the flavors to meld together and ensures even distribution.

Become a BBQ rub Master!

Making your own unique BBQ herb and spice rubs is an exciting way to elevate your grilling game. With a variety of flavors, ingredients, and combinations to explore, you can create custom blends that suit your taste preferences and make your BBQ dishes stand out. By following the steps outlined in this article and experimenting with different flavors, you’ll be well on your way to becoming a BBQ rub master.

Get ready to impress your family and friends with tantalizing flavors and mouthwatering grilled creations!

BBQ Advice…

How long should I let the rub sit on the meat before grilling?
It is recommended to let the rub sit on the meat for at least 30 minutes to a few hours. This allows the flavors to penetrate the meat and enhances the overall taste.

Can I use BBQ rubs for vegetarian or vegan dishes?
Absolutely! BBQ rubs can add flavor to grilled vegetables, tofu, or plant-based meat substitutes. Choose ingredients that align with your dietary preferences and enjoy deliciously seasoned dishes.

Can I use the same rub for different types of meat?
While you can use the same rub for different meats, consider the flavor profiles and how they complement each type. It’s often more enjoyable to tailor the rubs to the specific meat you’re grilling.

Where can I find high-quality spices and herbs for making my own rubs?
Most supermarkets have an excellent variety of herbs and spices.

Can I adjust the level of spiciness in my BBQ rub?
Absolutely! You have complete control over the spiciness of your BBQ rub. Increase or decrease the amount of spicy ingredients like chili powder or cayenne pepper to suit your heat tolerance.

Can I use BBQ rubs for oven-roasted dishes?
Yes, BBQ rubs can be used for oven-roasted dishes as well. Simply apply the rub to the meat before roasting and let the flavors infuse during the cooking process.

How should I store leftover BBQ rubs?
Store leftover BBQ rubs in airtight containers in a cool, dry place away from direct sunlight. This helps to preserve their flavors and prolong their shelf life.

Can I use BBQ rubs for other cooking methods, such as pan-searing or slow cooking?
Absolutely! BBQ rubs can enhance the flavors of various cooking methods. Adjust the quantity of the rub according to the size of the dish and cooking technique.

Get ready to embark on a flavor-filled journey with your homemade BBQ herb and spice rubs. Explore different combinations, make adjustments to suit your taste, and enjoy the satisfaction of creating unique and delicious dishes that will impress your family and friends.

Remember, the key to a successful BBQ rub is creativity, experimentation, and a passion for mouthwatering flavors. So fire up the grill, embrace the sizzle, and indulge in the tantalizing tastes of your very own BBQ creations.

Camper Vibe

If you haven’t heard of our latest featured vanlifers, Camper Vibe, where have you been? Camper Vibe is made up of Emily, the one with the snacks. Louise, the one always wearing a hat – although rumour has it there is a video out there somewhere of her minus the hat. There is also their gorgeous dog AJ and beautiful cat Summer. Last but not least, their van, a Citroen Relay named Fanny.

Emily and Louise document their travels for everyone to see with weekly uploads to YouTube. With amazing video and editing skills, plus their unmistakable love and affection for one another, their Sunday uploads are always highly anticipated. Links to all of Camper Vibe’s social media pages are at the bottom of this article, in case you aren’t already following them.

From camplife to vanlife

When featured vanlifers Emily and Louise met they shared a love for camping. It’s evident in their videos to see that the Camper Vibe girls love being outdoors, and love nature. Emily is often seen leading the way on hikes and exciting walks, while Louise is often on the search for a red squirrel or seals. Her patience usually paying off with breathtaking wildlife photographs.

6 months after they met they both quit their jobs, packed what little belongings they had into the back of Louise’s Fiat Punto. They headed off to Newquay with their dog Wilson and the first home they shared together was a tent. They found jobs, saved for a deposit and got a studio flat. They didn’t like being stationary for long though, and this was the first of many moves and rash decisions. They have moved from Cornwall and Northumberland and a few places in between. They still loved to camp, and Louise quite often goes for a solo camping adventure in woods and forests now, occasionally Emily joins her too.

So why vanlife? The couple’s dog AJ, a beautiful husky, soon put a halt to their camplife with his love of nature, although it wasn’t a photo he was after. Emily was so worried about him absconding to chase a rabbit or fox in the night that she made Louise tether herself to him. What a wake up call! This prompted them to give vanlife a go. Their first van was small and basic, but at least it meant Louise wouldn’t be getting dragged through the woods at midnight. Vanlife has opened up so many opportunities for them, and definitely meant they weren’t stationary for long. For now they still have a home base, but are often off exploring in their van. Recently travelling to Norway, which is somewhere they are keen to return to.

With their first van they attended the Camp Quirky festival and saw all the incredible self builds on display. It opened their eyes to what was possible, and before the event was over Emily was already on the hunt for a new van, with big ideas for Louise to put into practice with the build. They got the van, and began the build. Emily had a well timed broken shoulder, so Louise ploughed ahead getting Fanny ready for the adventure of her life.

With budget in mind for their build they decided to use some reclaimed items in their van build. In fact 2 years ago we featured their kitchen in our article ‘7 inspirational upcycled campervan kitchens‘.

Camper vibe hits the road

With Fanny ready for adventure, the Camper Vibe gang were ready to hit the road….. but Covid happened! Eventually they set off on their travels with Summer their cat, an occasional participant initially. Their European adventure began travelling through France and Spain, until disaster struck again! They had a poorly Fanny. The van had to remain in Southern Spain while Emily, Louise and AJ made their way back to the UK. They had an epic journey back involving hire cars and taxis, and to top it all the UK had gone into it’s third lockdown making getting back in even more challenging.

Luckily they had good breakdown cover and weeks after they arrived back in the UK, so did Fanny, ready for repair. Since then they have travelled more of the UK including Wales and Scotland. In Scotland, they met a fate vanlifers dread – a flat tyre. Even though they had a well stocked van, the snack bandit (Emily) was in dire need of a chinese takeaway. Off they went into the wind and rain to get said takeaway. Then they got a flat tyre, out in the bad weather, the rain was worsening with huge puddles pooling around them. Suddenly a lorry came roaring past and drenched them both. The moral of this story, is don’t be like Emily and Louise, if you need a good meal then make a recipe from our website, no puddles involved!

They have visited some amazing scenic places. Their favourite part of vanlife is being able to explore so many different cultures and enjoy walks and hikes in nature. Emily said ‘I really think being able to experience different cultures and ways of living makes us better people as we understand and are more open to things’. Having the freedom to take your home and explore different places is definitely an amazing privilege of vanlife. One time they remember which wasn’t quite as good when parked up asleep in France. At 1am they heard someone banging on their van and went outside to find someone had shot a large party popper over them. However, with experiences like this and the breakdown, the benefits far outweigh the negatives.

Since then they have been exploring Europe again with their favourite place being Norway. This is somewhere they are planning on returning to, and this time they are going to make it to the top. Currently back in France, they are taking Louise’s Mum Joanie away with them in her van Tilly. A camper vibe convoy!

Life in the Camper Vibe van

After the repair work, the van had some modifications and is well suited to the needs of AJ who has had some mobility issues. He loves riding up front on the look out for the next hiking spot while Summer takes a much more relaxed approach to life, making the most of sunbathing. There is room for Emily to work remotely on the road. Lou focuses time on their impressive YouTube channel and her photography.

Emily tends to do the majority of cooking in the van. If you haven’t caught Louise on any of her solo adventures, she tends to stick to no cook meals or pot noodles. They often have similar meals, but Emily is vegetarian while Louise isn’t. One of Emily’s favourite features of the van kitchen is the oven. She acknowledges it’s is not an absolute necessity in a van but she loves it, and uses it for storage when not in use. So it’s multi-purpose too! This leads us on to some advice they gave before. When converting a van, it’s a good idea to look round other vans, speak to van owners and then use this knowledge to work out the best option for you in your van. If you want a van kitchen with an oven, then do it!

Emily’s favourite kitchen gadget is the wok. It’s a great size for cooking for 2 and stores easily for travelling. Their van has got plenty of storage which was important to them. This means there’s plenty of space for the all important snack cupboard, which always seems pretty well stocked! Their recipe for Emily’s favourite meal, vegetarian jambalaya, can be found here.

Camper Vibe advice for vanlifers

It’s great for the vanlife community to share experiences and advice with one another. Here is the advice that Louise and Emily would offer to any potential vanlifers…

“Try out different vans before you are set on getting one, go and look in as many as you can and maybe hire a couple for a few nights to give it a try”

Instagram

Facebook

YouTube

Would you like to be our next featured vanlifers? Click below

Want to be featured on
vanlifeeats.com?

To apply for a featured post on vanlifeeats.com simply follow this link and fill out the application form. We promote all featured van lifers across all our social media networks, we send out a “featured Van Lifer” sticker for your van as well as awarding you a prestigious badge for your profile on our website.

Vegetarian Jambalaya

0

This vegetarian jambalaya is a favourite vanlife meal for Emily from Camper Vibe, our featured vanlifers. You can read their feature here. The jambalaya originates from Loiusiana, it is said the dish comes from a fusion of different cuisines and cultures. What better dish for vanlifers than one that brings communities together?!

Best of all this vegetarian jambalaya can be as mild or spicy as you like it, and can include whatever veg you like, a great way for using up leftovers. Rice stores well in a van so can be a great option for meals like this. If you’re travelling solo you can eat the leftovers the next day, or if like Lou and Emily, one eats meat and one doesn’t then you can always add any meat separately.

Vegetarian jambalaya campervibe

Vegetarian Jambalaya

@campervibe
Vegetarian
A classic cajun inspired dish originating from Louisiana. This is enough for 2 people and sometimes unless I’m hungry there is some left over for lunch the next day
5 from 1 vote
Less washing-up – One-pan – Stove top meal
Prep Time 5 minutes
Cook Time 40 minutes
Total Time 45 minutes
Course Dinner
Servings 2
Diet Vegetarian

Ingredients
  

  • 1 cup long grain rice
  • 2 vegetarian chorizo sausages
  • 1 handful chick'n pieces large
  • 1 red pepper
  • 1 onion small
  • 250 g mushrooms sliced
  • 1 tin chopped tomatoes
  • 1 vegetable stock pot or cube
  • 1/2 tsp chilli powder
  • 1/2 tsp cayenne pepper

Instructions
 

  • Chop, chorizo, chick’n, pepper, onions and mushrooms up, chuck in your wok with the rice, tinned tomatoes and vegetable stock pot/cube.
  • Fill up the tin with extra water and pour that in. Pop the lid on and simmer, job pretty much done.
    camper vibe vegetarian jambalaya
  • Stir every 5 minutes or so to prevent the rice from sticking and burning.

Notes

You can also of course do this pure veg or add real chorizo and chicken to it.
It’s a great easy meal, takes around 30-40 mins to cook and is super tasty as well as filling.

Nutrition

Calories: 565kcalCarbohydrates: 88gProtein: 20gFat: 14gSaturated Fat: 8gPolyunsaturated Fat: 1gMonounsaturated Fat: 0.2gCholesterol: 66mgSodium: 367mgPotassium: 730mgFiber: 5gSugar: 8gVitamin A: 2695IUVitamin C: 100mgCalcium: 68mgIron: 3mg
Keyword dinner, Easy, one pan, rice, Simple, vegetarian
Tried this recipe?Let us know how it was!

Omnia vegan Victoria sponge

0

We made this Omnia vegan Victoria sponge for one of our talks at Campervan Campout. It’s great for get togethers or even just for family trips! A victoria sponge is such a classic cake, and it really makes every day a special occasion.

Omnia vegan victoria sponge

Omnia vegan Victoria sponge

Vegan
Perfect for sharing with fellow vanlifers on the road. The ideal vegan sponge cake for Summer. This recipe makes 2 large sponges, you will be unable to fit all the mixture into the Omnia in one go, so you need to bake each half seperately. You can halve it if you wanted a smaller cake and cut it into 2.
5 from 1 vote
10 Ingredients or less – Family friendly – Stove top meal
Prep Time 20 minutes
Cook Time 1 hour 30 minutes
Total Time 1 hour 50 minutes
Course Baking
Servings 12 servings
Diet Vegan

Equipment

Ingredients
  

  • 2 1/2 cups Self-raising flour
  • 1 1/4 tsp bicarbonate of soda
  • 1 1/4 cups caster sugar
  • 115 ml vegetable oil
  • 400 ml soy milk sweetened
  • 3 tbsp golden syrup
  • 2 tsp vanilla extract
  • 5 tbsp strawberry jam
  • 1 handful strawberries
  • 400 g vegan buttercream icing

Instructions
 

  • Put the Omnia on the hob to pre-heat without the silicone mould inside.
  • Add the flour, bicarbonate of soda and sugar into a bowl & mix through.
  • In a measuring jug add the oil, soy milk, syrup and vanilla extract and mix together.
  • Pour the mixture into the dry ingredients and mix with a fork until light and fluffy.
  • Pour half the mixture into the mould. Turn the heat up on the hob for the first 5 minutes to help the cake rise then turn it down to a low/medium heat for 40 minutes or until done. Test with a skewer or knife.
  • Leave to cool for around 15-20 minutes.Turn out carefully. Clean the mould, pour in the rest of the mixture and repeat the baking process.
  • Leave to cool for 15-20 minutes before turning it out
  • When completely cool, place one of the cakes on the plate and cover in the strawberry jam.
  • Add the butter icing, then place the other cake on top
  • There will be some icing left over, you can use this on the top if you would like. We just like to add sliced strawberries.

Notes

If you are cooking in a conventional oven these can be baked in a 9 inch cake tin. Bake on Gas mark 4, for 35-40 minutes or until done
We prefer to use the pre-made butter icing for ease in the van, but you can make your own with vegan spread, icing sugar and some vanilla extract.
*Pro tip* – If you are part-time in your van you can put the dry ingredients together in a ziploc bag ready to use in the van.

Nutrition

Calories: 373kcalCarbohydrates: 74gProtein: 4gFat: 7gSaturated Fat: 1gPolyunsaturated Fat: 3gMonounsaturated Fat: 2gSodium: 195mgPotassium: 101mgFiber: 1gSugar: 52gVitamin A: 132IUVitamin C: 7mgCalcium: 54mgIron: 1mg
Keyword 10 ingredient or less, Baking, Cake, Easy, omnia, stove top, strawberries, vegan, vegetarian
Tried this recipe?Let us know how it was!

Crumpet breakfast muffins

This meal of crumpet breakfast muffins is quick and easy to make. It can all be cooked in one pan saving on washing up. We love making these on family trips and at festivals.

The eggs crumpets just add an extra layer of deliciousness for breakfast, and we’re here for it!

Crumpet Breakfast Muffins

Meat Based
A twist on the classic breakfast muffin. Super easy to make, but super tasty. All in one pan so less washing up. What's not to love?
5 from 1 vote
30 minute meal
Prep Time 5 minutes
Cook Time 10 minutes
Total Time 15 minutes
Course Breakfast
Servings 2
Diet Meat Based

Ingredients
  

  • 4 Crumpets
  • 2 Eggs
  • 4 Bacon medallions Or rashers
  • 2 Cheese slices

Instructions
 

  • Begin by cooking your bacon.
  • While the bacon is cooking. Crack the 2 eggs into a bowl and whisk
  • Dip the crumpets in the egg, being sure to cover both sides.
  • Stack the bacon up in the pan to make room for the crumpets. Toast one side of the crumpets, turn over and add the cheese, pile on the bacon and the other crumpets.
  • Turn over to toast the other side.

Notes

You can add extra cheese, sausages, whatever you like! This great one pan breakfast meal is delicious and easy to tidy up when you’ve finished eating it!

Nutrition

Calories: 400kcalCarbohydrates: 53gProtein: 20gFat: 11gSaturated Fat: 5gPolyunsaturated Fat: 2gMonounsaturated Fat: 3gTrans Fat: 0.01gCholesterol: 177mgSodium: 770mgPotassium: 236mgFiber: 3gSugar: 0.3gVitamin A: 405IUVitamin C: 0.1mgCalcium: 228mgIron: 2mg
Keyword 5 ingredient or less
Tried this recipe?Let us know how it was!

https://www.instagram.com/reel/CgbKJ6FoQkN/?igshid=NTc4MTIwNjQ2YQ==

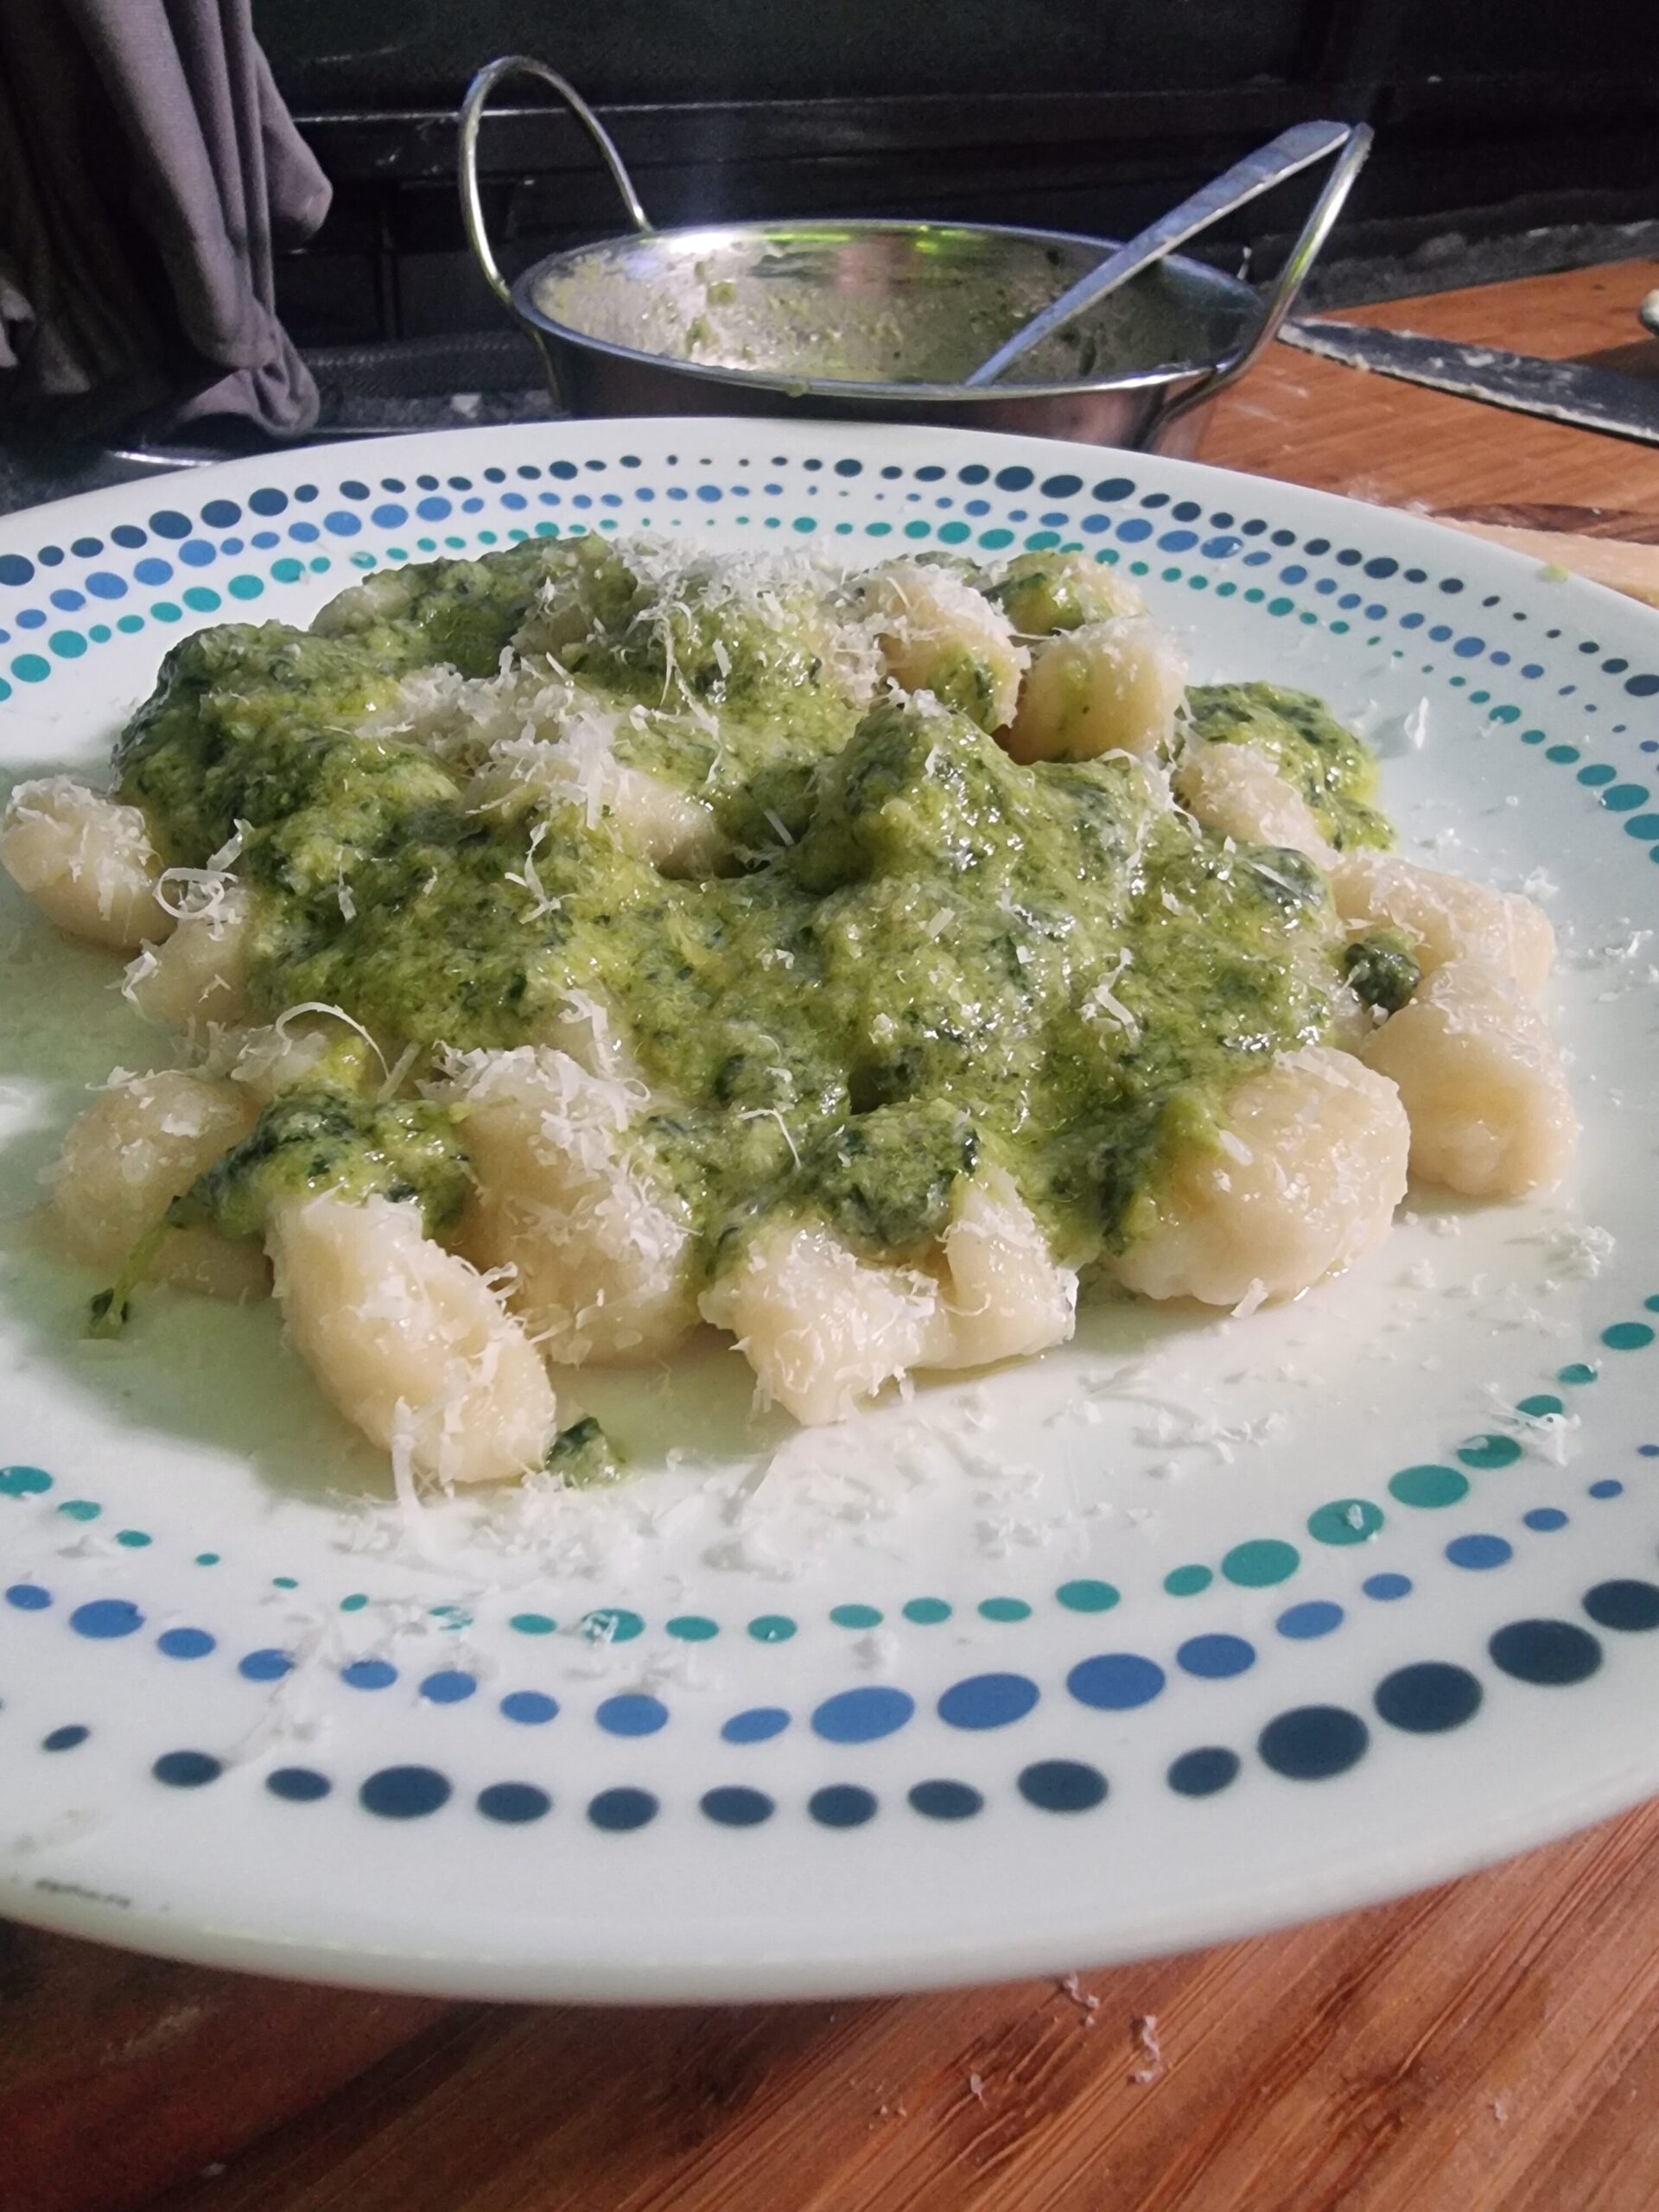
Ricotta Gnocchi (Ndunderi di Minori)

0
ricotta gnocchi

Ricotta Gnocchi – Ndunderi di Minori

Vanlife Eats
Vegetarian
This is the feast day dish of the quaint unspoiled village of Minori along the Amalfi coast.
5 from 1 vote
10 Ingredients or less – One-pan – Stove top meal
Prep Time 15 minutes
Cook Time 10 minutes
Total Time 25 minutes
Course Dinner
Servings 4 Vanlifers
Diet Vegetarian

Equipment

Ingredients
  

  • 250 g Ricotta Cheese
  • 2 Cups 00 Flour
  • 1 tsp Nutmeg
  • 1 tbsp Olive Oil
  • 1 Tin Chopped tomato
  • 1 tsp Sugar
  • 1 tbsp Tomato Puree
  • 2 Eggs
  • 50 g Parmesan Cheese
  • 1 Basil Fresh

Instructions
 

  • Combine the 250g tub of Ricotta cheese, the nutmeg, the eggs and the Parmesan Cheese to form a paste.
  • Slowly add the flour until a soft dough forms.
  • Roll into a ball and leave the dough to one side. (30 minutes is best but we don't often wait)
  • In the skillet pan add the olive oil, tin of tomatoes, the puree, the sugar and with the lid off let simmer on a very low heat.
  • Take the ball of dough and on a lightly floured tray cut it into 8 even portions.
  • Roll each portion of dough into long cylindrical strips.
  • Cut the strips into 2cm pillows.
  • Using the back of a fork and placing each pillow cut side down, using your thumb roll the pillows off the fork. This will leave you with a small dumpling with ridges and a curl. This does take practice but any old shape still works with the recipe :)
  • place the dumplings into the sauce and simmer with the lid on for 7-10 minutes.
  • Serve with some fresh basil and a sprinkle of parmesan cheese.

Nutrition

Calories: 228kcalCarbohydrates: 4gProtein: 14gFat: 17gSaturated Fat: 9gPolyunsaturated Fat: 1gMonounsaturated Fat: 7gTrans Fat: 0.01gCholesterol: 122mgSodium: 286mgPotassium: 128mgFiber: 0.2gSugar: 2gVitamin A: 521IUVitamin C: 0.5mgCalcium: 292mgIron: 1mg
Keyword 10 ingredient or less, quick and easy, quick cook
Tried this recipe?Let us know how it was!

Spaghetti alla carbonara

0

Spaghetti alla carbonara is another amazing vanlife recipe from @vwt4_furbone_. This italian recipe uses guanciale, similar to pancetta. However, rather than being cut from pork belly guanciale is cut from pork cheek. If you are unable to find this then you can substitute it for bacon, which will still be super tasty. It is quick to cook, making it great for a hungry family in the van.

Spaghetti carbonara

Spaghetti alla carbonara

@vwt4_furbone_
Meat Based
Simple and fast but super tasty! As soon as you try it you will fall in love with it. Suitable for all seasons. This recipe is Italian precisely born in Rome.!
5 from 1 vote
30 minute meal – 5 ingredients or less – Family friendly – Stove top meal
Prep Time 15 minutes
Cook Time 10 minutes
Total Time 25 minutes
Course Dinner, Lunch
Servings 4 people
Diet Meat Based

Equipment

  • pot for cooking pasta
  • pan to cook the bacon
  • bowl for mixing the ingredients

Ingredients
  

  • 350 g Spaghetti
  • 6 Egg yolks
  • black pepper to taste
  • 150 g Guanciale similar to bacon
  • 50 g Roman pecorino cheese

Instructions
 

  • Start by putting the water for the pasta on the heat.
  • -Cut the guanciale into strips about 1 cm thick, then put it in the pan and brown it, being careful not to burn it otherwise it will leave a bitter taste (about 10 minutes).
  • -Throw the pasta into the water, cooking as indicated on the package.
  • -Put the eggs (yolk) in a bowl, adding the cheese and a little pepper.
  • The compound must be a smooth cream, use a fork or even better a whisk.
  • -Set aside the bacon but do not throw away the sauce that has been created.Put the pasta in that pan and sauté it to flavor it, then remove it from the heat.
  • -Pour the component of the bowl and stir quickly so as to mix everything.
  • -Add the guanciale, mix and…
  • Eateee!!
  • Have a good dinner!

Nutrition

Calories: 728kcalCarbohydrates: 67gProtein: 24gFat: 40gSaturated Fat: 16gPolyunsaturated Fat: 2gMonounsaturated Fat: 4gCholesterol: 345mgSodium: 490mgPotassium: 235mgFiber: 3gSugar: 3gVitamin A: 441IUCalcium: 186mgIron: 2mg
Keyword dinner, Easy, easy prep, filling, pasta, Simple
Tried this recipe?Let us know how it was!

Biscoff Omnia cake

0

We love biscoff and we love our Omnia, what better combo! We recently saw a 3 ingredient biscoff cake on social media. We thought it would be ideal for vanlife with such few ingredients. We had to try it. However, it was a disaster. It looked gorgeous, but the texture was all wrong. We only bring the best recipes to you guys so this just wouldn’t do.

We went away and worked on our biscoff cake recipe, and here it is for us to share with you. This biscoff cake baked in the omnia is light, airy and delicious.

Omnia biscoff cake
Biscoff omnia cake

Biscoff Omnia cake

Vegetarian
We know, we know who can resist biscoff? If it's in a cake, resistance is futile. We have perfected this delicious biscoff cake and can't wait for you guys to try it. We baked it in our Omnia stove top oven, scroll to the notes section if baking in a conventional oven.
5 from 1 vote
Family friendly – Stove top meal
Prep Time 10 minutes
Cook Time 35 minutes
Total Time 45 minutes
Course Baking, Dessert
Servings 12
Diet Vegetarian

Equipment

Ingredients
  

For the cake

  • 3/4 cup butter / margarine (softened if using butter)
  • 3/4 cup light muscovado sugar
  • 3 eggs
  • 3/4 cup self raising flour
  • 1 tsp baking powder
  • 1 tsp vanilla extract
  • 1.5 tbsp milk
  • 200 g biscoff smooth spread half a jar

For the topping

  • 200 g biscoff smooth spread half a jar
  • 6 biscoff biscuits crumbled

Instructions
 

For the cake

  • Add the softened butter and sugar to a bowl and cream together
  • Add all 3 eggs and mix in
  • Add in the self raising flour and baking powder and mix through
  • Add the vanilla extract & milk and mix through until all combined
  • Spoon in half of the jar of biscoff and stir through
  • Pour into the silicone mold and place in the Omnia oven
  • Bake over low/medium flame for 30-35 minutes, or until a skewer is inserted and comes out clean
  • Leave to cool until it can be removed from the mold easily

For the topping

  • When the cake has cooled, melt the other half of the jar of biscoff. We did this using a metal dish over a small flame. Stir regularly
  • Pour the melted biscoff over the cake.
  • Crumble up the biscuits and sprinkle over the top
  • Enjoy with a good brew!

Notes

This can also be baked in a conventional oven in an 8 inch tin. We would suggest doubling the ingredients and baking in 2 8 inch tins if baking this way. This will provide a better looking cake that you can fill.

Nutrition

Calories: 426kcalCarbohydrates: 40gProtein: 5gFat: 27gSaturated Fat: 11gPolyunsaturated Fat: 1gMonounsaturated Fat: 4gTrans Fat: 0.5gCholesterol: 72mgSodium: 165mgPotassium: 52mgFiber: 0.3gSugar: 26gVitamin A: 421IUCalcium: 45mgIron: 1mg
Keyword Baking, biscoff, Cake, comfort food, Easy, Family friendly, omnia
Tried this recipe?Let us know how it was!

Let us know if you have tried this biscoff omnia cake, we appreciate your support

MeShell’s diner chicken tortilla casserole

1

Another classic from MeShell’s diner. This recipe for chicken tortilla casserole is full of flavour, crunch and cheese! What more could you want?! This vanlife recipe does require an oven, although we would love to see some of you try it in your Omnia! This recipe uses many ingredients which may already be in your van pantry. The majority of them such as chicken soup and tortillas have a long shelf life too meaning you can stock up on them before your adventures for this recipe.

This chicken tortilla casserole is a great mexican dish with a twist, meaning the whole family will love it. It is also a great sharing dish for mexican nights with fellow vanlife friends.

You can find more of the recipes we love to make right here.

Chicken tortilla casserole

MeShell’s Diner Chicken Tortillas Casserole

amerimanx_travels
Meat Based
Easy, low cost week day Mexican style family/couple casserole. You'll probably have the ingredients in your pantry. Recipe is easily adapted for Vegetarians. Swap the chicken for kidney or black beans and use Cream of Celery or Mushroom soup. Serve with a salad, spanish rice or refried beans. Salsa, sour cream or guacamole on the side.
4.25 from 4 votes
10 Ingredients or less – Family friendly
Prep Time 15 minutes
Cook Time 30 minutes
Total Time 45 minutes
Course Dinner
Servings 6 people
Diet Meat Based

Equipment

Ingredients
  

  • 2 cups chicken cooked and shredded either roasted or rotisserie
  • 1 can condensed cream of chicken soup
  • 1 cup sour cream
  • 1 can black beans rinsed and drained
  • 1 packet taco seasoning
  • 1 bag tortilla chips crushed
  • 250 grams shredded cheddar divided
  • 1 cup fresh tomatoes diced
  • 1 jalapeno pepper sliced
  • 2 Tablespoons cilantro chopped

Instructions
 

  • Preheat the oven to 350 degrees and prepare a 9×13 baking dish by coating with non-stick spray.
  • Set aside.
  • In a large bowl, mix together the chicken, cream of chicken soup, sour cream, black beans, taco seasoning, crushed tortillas and ½ of the cheddar cheese until fully incorporated.
  • Transfer the mixture into the prepared baking dish. Top with rest of cheddar cheese, fresh tomato, jalapeños and cilantro.
  • Bake uncovered for 30 minutes or until the chips are golden brown and the casserole is bubbly throughout.
  • Serve with additional fresh cilantro if desired.

Nutrition

Calories: 664kcalCarbohydrates: 56gProtein: 30gFat: 37gSaturated Fat: 15gPolyunsaturated Fat: 7gMonounsaturated Fat: 9gTrans Fat: 0.04gCholesterol: 100mgSodium: 1342mgPotassium: 597mgFiber: 8gSugar: 4gVitamin A: 1556IUVitamin C: 10mgCalcium: 412mgIron: 3mg
Keyword chicken, Easy, Family friendly, Mexican, oven
Tried this recipe?Let us know how it was!

Chicken & Goats Cheese in a Creamy Red Pepper Sauce

0
chicken and goats cheese in creamy red pepper sauce

Chicken and Goats Cheese in a Creamy Red Pepper Sauce

Meat Based
I made this as zero carb and full of protein. The flavor is incredible and the creamy sauce will give you the perfect excuse to drink from your bowl.
5 from 1 vote
10 Ingredients or less – One-pan – Quick cook – Stove top meal
Prep Time 5 minutes
Cook Time 20 minutes
Course Dinner
Servings 3 Vanlifers
Diet Meat Based

Equipment

  • 1 Skillet Pan We us a Jean Patrique Whatever pan
  • 1 Manual Blender We love the Zyliss blender!

Ingredients
  

  • 6 Chicken Thighs Skinless
  • 2 Red Peppers
  • 1 Garlic Clove
  • 300 ml Double Cream
  • 125 g Soft Goats Cheese
  • 1 Handful of Parsley
  • 1 tsp Paprika

Instructions
 

  • De-seed and slice your red peppers and lay them in a hot pan and cook until they soften and start to burn. Remove from the pan and leave to cool.
  • Meanwhile, season with salt and lay the 6 chicken thighs top side down in the hot pan. Keep checking these but you want to keep them topside down until they get some colour on them. This will be for around 6 minutes.
  • Take your slightly cooled pepper, a garlic clove and 300ml of double cream and place in your manual blender. Season with salt and pepper and whizz up until you have a cream smooth texture.
  • Turn your chicken thighs over, they should be nice and brown on top. Turn down the heat to a medium heat and pour in the sauce around (not on top of) the chicken.
  • Cut up your goats cheese into bite size chunks and place in the pan around the chicken and in the sauce.
  • Sprinkle over some smoked paprika and some fresh parsley.
  • Cook for about 8 minutes.
  • Enjoy!

Nutrition

Calories: 897kcalCarbohydrates: 5gProtein: 43gFat: 78gSaturated Fat: 38gPolyunsaturated Fat: 9gMonounsaturated Fat: 25gTrans Fat: 0.2gCholesterol: 329mgSodium: 673mgPotassium: 562mgFiber: 0.4gSugar: 3gVitamin A: 2273IUVitamin C: 15mgCalcium: 153mgIron: 2mg
Keyword 10 ingredient or less, chicken, keto
Tried this recipe?Let us know how it was!

MeShell’s Diner Maple Pecan Pie Bars

0

MeShell’s diner is dishing up the goods again. These maple pecan pie bars are to die for! A brilliant recipe for vanlife, campervans & motorhomes everywhere. Each slice brings the taste of a good ol’ american diner.

Maple syrup and pecans are a match made in heaven, and the flavour combo is something else. Pecan pie is such an American classic, these pie bars take it to the next level, and it will be hard to eat just one.

MeShell made this for the bake off at the Vanlife Eats Big Picnic and she was crowned a worthy winner. This recipe does require an oven and a fridge. They are great to prepare in the van and take on picnics, hikes, or treks. To be honest we could eat them all day regardless.

Maple pecan pie bars

MeShell’s Diner Maple Pecan Pie Bars

amerimanx_travels
Vegetarian
MeShell won 2nd place at Van Life Eats Big Picnic 2022, with these yummy maple pecan pie bars. Sinfully delicious
5 from 1 vote
Family friendly
Prep Time 10 minutes
Cook Time 1 hour
Chilling time 30 minutes
Total Time 1 hour 10 minutes
Course Dessert, Snacks
Servings 20 + bars
Diet Vegetarian

Equipment

Ingredients
  

For shortbread base

  • 1 cup all purpose flour
  • ½ cup unsalted butter melted
  • ¼ cup brown sugar
  • 1 teaspoon vanilla
  • ¼ teaspoon salt

For the pecan pie bar filling

  • 2 eggs beaten
  • 1 cup maple syrup or maple flavoured golden syrup
  • ½ cup brown sugar
  • 2 tablespoons heavy whipping cream
  • ¼ cup all purpose flour
  • 1 teaspoon vanilla extract
  • ½ teaspoon salt
  • 2 cups chopped pecans

Instructions
 

For the base

  • Mix together all ingredients for the crust – flour, butter, brown sugar, salt, and vanilla, until combined.
  • Line an 8×8 baking dish with parchment paper
  • Use your hands to press the mixture smoothly into the pan
  • Bake at 300 f/150c/gas mark 2 for 22-25 mins, until edges are golden and begin to brown
  • In a large bowl, mix together the pecan pie bar filling. Eggs, maple syrup, brown sugar, cream, flour, vanilla, and salt.
  • Once mixed, stir in the pecan pieces
  • When crust is done baking, pour the filling over the top.

For the filling

  • Turn the heat to 350f/177c/gas mark 4 and bake for 30-35 mins, until set and hardly jiggly. The edges should be brown.
  • Remove from oven and allow to cool completely
  • Refrigerate for 30 mins, then cut in bars
  • Refrigerate any leftovers bars
    Stack of maple syrup pecan pie bars

Nutrition

Calories: 232kcalCarbohydrates: 27gProtein: 2gFat: 13gSaturated Fat: 4gPolyunsaturated Fat: 3gMonounsaturated Fat: 6gTrans Fat: 0.2gCholesterol: 30mgSodium: 98mgPotassium: 110mgFiber: 1gSugar: 18gVitamin A: 194IUVitamin C: 0.1mgCalcium: 38mgIron: 1mg
Keyword american, hiking, intermediate, Pecans
Tried this recipe?Let us know how it was!

RidgeMonkey Chorizo & mozzarella gnocchi

0

This campervan recipe of chorizo & mozzarella gnocchi cooked in the RidgeMonkey is ideal for vanlife. A quick one pan meal with 10 ingredients, perfect for a mid week treat in the van. If you want to keep it veggie – for meat free Monday perhaps, add some smoked paprika for some smokiness and do away with the chorizo.

Amanda & Paul cook this on their vanlife adventures and we can see why it’s a favourite. Follow their adventures on Instagram here.

For now though make do with making this Ridgemonkey Chorizo and mozzarella goncchi yourself. You could even cook the gnocchi in the pan first to crisp it up before adding the tomatoes & cheese. Delicious!

Don’t forget to rate this campervan recipe and leave a review if you try it!

Mozzarella and chorizo gnocchi cooking in a ridgemonkey

Chorizo & Mozzarella Gnocchi

amandaanddarcy
Vegetarian
This campervan recipe is super quick, and doesn't need an oven. We don't even use a pan, we cook it in our ridgemonkey!
5 from 2 votes
10 Ingredients or less – 30 minute meal – One-pan – Stove top meal
Prep Time 5 minutes
Cook Time 15 minutes
Total Time 20 minutes
Course Dinner
Servings 2
Diet Vegetarian

Equipment

  • Ridge Monkey

Ingredients
  

  • 1 tsp Olive oil
  • 1 Onion
  • 1 clove Garlic
  • 100 g Chorizo diced
  • 1 tin Chopped tomatoes 400g
  • 500 g Fresh gnocchi
  • 120 g Mozzarella
  • 1 tsp Honey
  • 1 handful Basil
  • Salt & Pepper to taste

Instructions
 

  • Pop oil into pan, we used one side of our ridge monkey
  • Fry onions until translucent. Then add garlic and chorizo
  • After a few mins add the tin of tomatoes and fresh gnocchi. Tear some mozzarella and add to the pan
  • Cook for 5 minutes. Then add honey, some basil, and the salt and pepper.
  • Cook for a few more minutes
  • Add the rest of the mozzarella until warm then pop in to your bowl and enjoy.

Nutrition

Calories: 781kcalCarbohydrates: 99gProtein: 32gFat: 29gSaturated Fat: 14gPolyunsaturated Fat: 1gMonounsaturated Fat: 5gCholesterol: 79mgSodium: 1825mgPotassium: 138mgFiber: 7gSugar: 6gVitamin A: 639IUVitamin C: 5mgCalcium: 371mgIron: 10mg
Keyword dinner, Easy, italian, ridge monkey, Simple, stove top
Tried this recipe?Let us know how it was!

Mum and Son Travels

Have you ever thought about trading the school run for a full time vanlife adventure? That is exactly what featured vanlifers Mum Delanie & son Qunicy decided to do in their van Penny Pilotè. What an fabulous substitution full of amazing experiences & memories to share together!

Worth every penny…

So what made Delanie decide to venture into the world of full-time vanlife with son Quincy?

Having previously been enjoying vanlife part-time, a property falling through gave Mum Delanie a life changing opportunity. A chance to visit many amazing countries with Quincy and see what the world has to offer. She decided to look for her first ever motorohome. When looking for a motorhome Delanie knew she wanted something vintage, unusual & boxy in shape and luckily she found Penny, a Pilote City Van CV60. It must have been fate, it was definitely love at first sight. Less than a week later they were headed to somewhere Quincy was desperate to visit – Scotland.

“One day I just woke up & realised that there is more to life than existing in one corner of the world & I wanted to see more & explore more”

Delanie admits full-time vanlife took some adjustment. Getting used to the motorhome water, electrics etc. She quickly realised it isn’t all perfect instagram opportunities. Speaking of which, if you want to follow their adventures you can check them out here. Very soon their travels led them overseas to Europe.

Mum Delanie sitting on the step of her motorhome

While in Portugal they stayed in a campsite high up in the mountains. The next day they were driving down the narrow winding roads to their next location. Being fairly new to motorhoming and being on the narrow roads they were taking it quite slowly. The car behind was flashing their lights and beeping their horn, but Delanie didn’t feel comfortable going any faster. It was only when there was an oncoming car on the same side of the road that Delanie realised why the car behind had been flashing. She was driving on the wrong side of the road! Even after this hair raising experience, it was still their favourite country to visit. They loved the warmth of the people, culture and rich history. Also the tolerance to the vanlife community. Quincy shares his Mum’s sentiments and his favourite part of their journey so far has been the portugese mountains. He also has lovely memories of a beautiful, happy and colourful market in Barcelona. One of his favourite things to do is in the motorhome itself and is having dancing competitions with his Mummy in the van.

Delanie and Quincy out on a hike

The penny shaped bathroom is Delanie’s favourite feature of the motorhome. Which is just as well as she couldn’t live without the toilet in the van. She detests using public toilets, saying they give her the ick. At least having her very own throne to sit upon in Penny when nature calls means the visits to public loos are infrequent.

Penny the motorhome

Vanlife meals

If you have kids, you are most likely familiar with the call of ‘I’m huuuuuunnnnnnggggrrrry’. This is no different when living full-time in the van. Quite often the pair will eat meals that are quick to make, with pasta being a firm favourite. Easy to prepare and you can throw anything you like in to mix it up. Being a foodie means Delanie will eat most things, and enjoys trying vegan, vegetarian and meat based meals in the van. However, this self professed foodie did manage to burn a pizza in the van once – happens to us all! Plus when starting out in vanlife and getting used to cooking in a van can result in some interesting meals.

Delanie is not one for fancy gadgets in the motorhome kitchen. Her must-have kitchen gadget is a can opener. Perfect for when making her featured recipe Vegan Sweetcorn Fritters.

Delanie making her sweetcorn fritters

They have a small kitchen set-up, ideal for the mum and son duo. They are kitted out with a good size fridge & freezer, an oven/grill & a 3 burner hob. The only downside is Delanie feels there isn’t a decent amount of worktop space. However, as with any resourceful vanlifer, Delanie has a solution. She uses a chopping board over the sink to get some more space while cooking. There is also a decent sized table if more space is required.

Mum and son travels

As with any big decision, it is diffcult to know whether you have done the right thing and many a sleepless night was had. The main dilemma was whether taking Quincy out of mainstream school for a life of home schooling on the road in a motorhome was the right thing to do. On reflection now, Delanie said that aside from becoming a Mum, it was the best thing she ever did. The experiences they have had has given them an unbelievable bond, and wonderful memories to cherish. One of Delanie’s highlights so far was a breathtaking drive through the French Pyranees. That was a real pinch me moment!

“I did this! – It was freaking awesome”

The photo is taken from the side of a white motorhome. 3 alpacas are lying on the ground in a field ahead of the van

It’s not all smooth sailing! On their first voyage heading to Scotland there was a bit of a bump in the road – or on the head. The over cab bed hadn’t been tied up properly, resulting in it falling and landing on Delanie’s head while driving. Luckily it was a country road and not a motorway meaning they could pull over and tie it up. On a very early vanlife experience there was also a time Delanie drove away not realising they were still attached to the electric hook-up.

Sometimes the adventures are a lot closer to home & Delanie has enjoyed girlie nights in the motorhome with her friends – perfect! Delanie & Quincy managed to join us at the Vanlife Eats Big Picnic in 2022 and it was great to meet them and Penny in person!

Delaine and Quincy in front of the Vanlife Eats sign at the Vanlife Eats festival

Advice for fellow vanlifers

Vanlife has made me feel alive and refreshed. Being close to nature makes you realise what’s important in life. Having done this journey alone with my son has made me feel empowered and proud of myself. Just be prepared – vanlife isn’t always as glamorous as it looks on Insta!

Instagram: @mumandsontravels

Facebook: Mum And Son Travels

YouTube:

Do you travel full time with kids, or are you thinking about it check out previous featured vanlife family The Howls, who also travel full time with their children.If you are based in the UK and thinking of travelling with children and want to home school, here is some advice from GOV.UK.

If based in the US you can find some useful information here.

Some great resources listed here for those of you in Canada.

Australian vanlifers can get more information about home schooling children here.

Want to be featured on
vanlifeeats.com?

To apply for a featured post on vanlifeeats.com simply follow this link and fill out the application form. We promote all featured van lifers across all our social media networks, we send out a “featured Van Lifer” sticker for your van as well as awarding you a prestigious badge for your profile on our website.