The Ultimate Campervan Curry Base

This campervan curry lesson is a must know recipe for any vanlife curry lover. This is the magic key to unlocking over 100 Indian recipes – a robust, aromatic curry base.

Are you making the mistake of overpowering your curries with spice? The balance of spice is crucial to making your curry taste nice. Dont mask the flavour of onion, garlic, tomato and ginger with too much spice, you need to learn the balance to let every ingredient burst in layers of flavour.

This is a perfect recipe for campervan cooking and dont miss the vanlife hack!

The balance of spice – Cumin, Coriander, Turmeric, and Chilli

Let’s start with the backbone of this campervan curry base – the four essential spices: cumin, coriander, turmeric, and chilli. These aren’t just spices; they’re the layers of flavor that define many North Indian dishes.

Cumin

Cumin brings a warm, earthy tone that’s unmistakable. It’s like the bass in your favorite track – you know when it’s there, and you miss it when it’s not.

Coriander

Coriander, often used in its ground form, offers a sweet, citrusy zing. It’s like adding a fresh perspective to a familiar scene.

Turmeric

Turmeric is the unsung hero, providing a mild, bitter flavor and a vibrant yellow color. It’s like sunshine in a bottle, brightening up any dish.

Chilli

Lastly, chilli. It’s all about personal preference here. Want a mild base? Go easy. If you’re like me and love a bit of adventure, turn up the heat!

North Indian Food vs South Indian Food

Before we share the recipe, let’s understand its roots. Northern Indian cooking, where this curry base is most at home, often features thick, moderately spicy curries and a lot of breads like naans and rotis. In contrast, Southern Indian cuisine is known for its hotter, rice-based dishes with an abundance of seafood.

Naan Bread

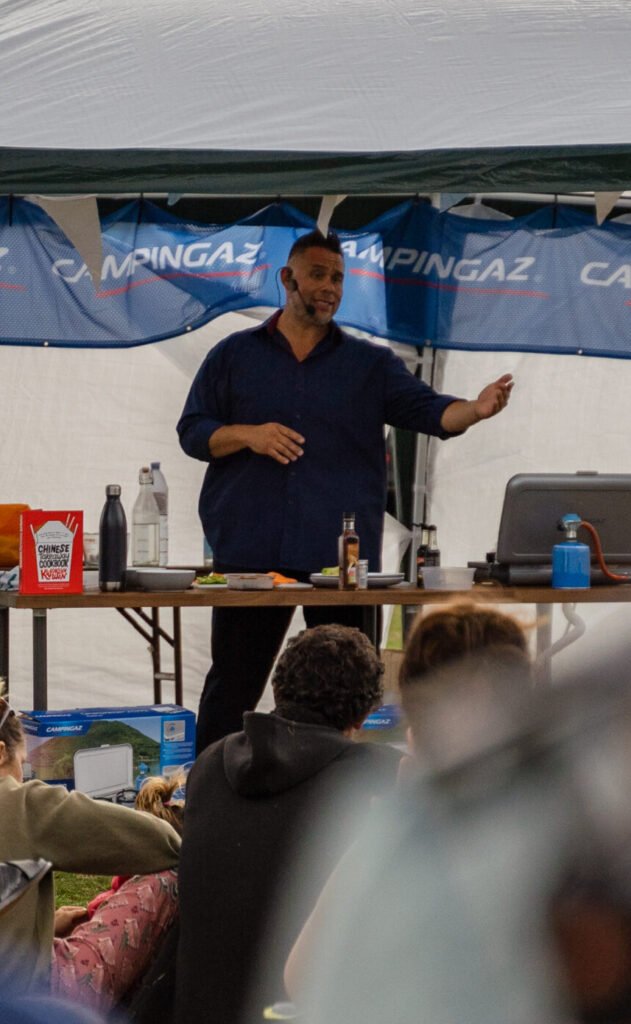
It doesnt always have to be rice and in Northenr India you would eat a curry with a bread instead. Here is a link to our flat bread recipe that we made at the AMAZING festival Camp Quirky.

Question For You..

What is your favoute curry? We will make it! Let us know in the comments :)

campervan curry

Best Indian Curry Paste – 1 paste for 100 curry recipes

Vanlife Eats
Vegan, Vegetarian
This simple curry paste recipe is perfect for campervan cooking. It is made with a few basic ingredients that can be easily stored and transported. The paste can be used to make a variety of Indian dishes, such as curries, stir-fries, and soups.
This recipe makes 4 batches of curry paste to be frozen and stored. Each batch is a per person measurement. ie. If you are making a curry for 2 people use 2 batches.
5 from 1 vote
10 Ingredients or less – Leftovers – One-pan – Prep ahead – Quick cook
Prep Time 5 minutes
Cook Time 10 minutes
Course Dips / Sauces
Servings 4 Batches (per person)
Diet Vegan, Vegetarian

Equipment

  • 1 Blender Optional. We use our Zyliss Easy Pull
  • 1 Large Ice Cube Container Or small containers to batch freeze

Ingredients
  

  • 2 Red Onion Medium
  • 4 tbsp Passata Medium
  • 2 Garlic Clove
  • 1 tsp Fresh Ginger
  • 1 tsp Turmeric
  • 2 tsp Red Chilli Powder
  • 1 tbsp Cumin Powder
  • 2 tbsp Oil Any of your choice
  • 2 tbsp Corriander Powder

Instructions
 

Prep

  • Finely chop your red onion. The finer you can chop the better. Alternatively this can be pureed or blitzed in a blender. We use our Zyliss easy pull.
  • Finely chop your tomatoes. As above, the finer the better and use the blender if preffered.
  • Combine and finely chop the garlic and ginger. Use a splash of water to blend/chop/mash into a paste.

Method

  • Add a splash of oil of your choice to a good quality pan. (not a cheap thin based pan!) We like to use Ghee. Heat to a medium heat.
  • Add the onion paste along with the ginger and garlic paste. Mix well for about 3-4 minutes until it starts to lightly brown.
  • Add 1 tbsp of corriander powder, 1/2 tbsp cumin powder, 1/2 tsp tummeric powder and 1 tsp of red chilli powder. Mix well and cook for about 1 minute and add a splash of water to loosen it up.
  • Add the 2 tbsp of passata and give everything a good mix and cook for 5 minutes until the mixture thickens.
  • Take off the pan and make sure the paste cools thoroughly before decanting into large ice cube containers and then frozen.
  • Use a base for just about any type of curry you choose.

Video

Nutrition

Calories: 110kcalCarbohydrates: 10gProtein: 2gFat: 8gSaturated Fat: 1gPolyunsaturated Fat: 2gMonounsaturated Fat: 5gTrans Fat: 0.03gSodium: 27mgPotassium: 249mgFiber: 3gSugar: 3gVitamin A: 398IUVitamin C: 7mgCalcium: 54mgIron: 2mg
Keyword Curry, Paste
Tried this recipe?Let us know how it was!

Pasta la Vista, Baby: Whipping Up Vanlife’s Best Pesto

Why Pesto Pasta is a Vanlife Staple

Pesto pasta is a staple for us vanlifers. Why? Because it’s the trifecta of perfection: affordable, simple, and ready in a snap (15 minutes, to be exact). However, there’s a vast difference between a mundane jar of store-bought pesto and a vibrant, homemade version bursting with fresh basil, garlic, and those precious toasted pine nuts. Plus, let’s not forget a generous helping of parmesan and a good glug of peppery olive oil.

Pesto in a jar

The Italian Secret to Perfect Pesto

In Italy, making pesto is almost a sacred art, complete with rules and traditions, including the correct way to use your pestle and mortar. The name ‘pesto’ itself comes from the Italian for ‘pounded’, and in its full glory, it’s known as ‘pesto alla Genovese’, hailing from Genoa. The traditional recipe features a medley of local ingredients: basil (preferably Genovese, kissed by the sea air), Vessalico garlic, top-notch extra-virgin olive oil, parmesan, and Sardinian pecorino.

In the UK, while you might not get your hands on all these specific ingredients without breaking the bank, the key lies in quality. Choose a fine bottle of extra-virgin olive oil, toast your pine nuts to avoid the stale pre-toasted variety, and use only the freshest basil. As for the cheese, go for a blend of two-thirds parmigiano reggiano and one-third pecorino romano – a perfect mix of sweet complexity and sharp saltiness.

To Pound or to Whizz?

When it comes to making pesto, you’ve got two choices: the traditional pestle and mortar or the modern food processor. If you’re not in a rush, try the old-school way. It’s not just about authenticity; there’s something almost meditative about crushing and grinding the ingredients by hand. But, let’s be real, we all love the convenience of a food processor and especially our favourite vanlife gadget the Zyliss manual food processor. Just remember to add your basil later in the process and drizzle in the oil gradually.

pesto in a manual blender
pesto in a blender

Cooking Pesto? No Way!

Here’s a golden rule: never cook your pesto. The magic of pesto lies in its raw, vibrant flavors. Once your pasta is cooked, let it cool for a bit before mixing in the pesto. This keeps the flavors intact without turning your dish into a flavorless mush.

The Perfect Pasta Shape

Now, about pasta shapes. Forget about penne; it’s just too mundane for a sublime sauce like pesto. Instead, look for Ligurian trofie – short, thin, and twisted, perfect for holding onto every bit of that pesto goodness. Can’t find trofie? No worries, try casarecce, strozzapreti, or fusilli – they all do a fine job.

Ligurian trofie pasta

Elevating Pesto Pasta

Pesto and pasta alone are fantastic, but why not jazz it up a bit? A traditional addition is green beans and potatoes, creating a dish known as pasta alla Liguria. This not only adds texture but also a satisfying starchiness. No potatoes? Try white beans like cannellini or butter beans. And if you’re deviating from tradition, frozen peas can be a great substitute for green beans.

The Bottom Line

We have a few pesto pasta recipes and every one is a winner for any vanlife foodie. It’s all about balancing simplicity with quality ingredients. Whether you’re a stickler for tradition or a fan of the food processor, the end goal is a delicious, easy-to-make dish that brings a touch of Italian flair to your vanlife kitchen adventures.

Checkout some of our pesto recipes here

MeShell’s Diner Tamalè Pie

0

Tamalè Pie combines the heartiness of traditional tamales with the ease of a pie. Ideal for vanlife cooking, this recipe layers cornbread with a savoury filling of spiced meat and cheese, baked together until bubbly and golden. Prepare the cornbread from scratch or use ready-made for convenience. The filling, customisable with your choice of meat or vegetarian options, simmers to perfection on a portable stove. Topped with melted cheese, this Tamalè Pie is a comforting, one-dish meal perfect after a day of adventures, easily cooked and enjoyed in the cosy confines of your campervan.

Serve with your choice of my guacamole dip or sour cream, re-fried beans or even a green salad if your feeling healthy. Quick instructions are:Make a batch of your favourite chilli, pour into a baking dish or Omnia, top with grated cheddar cheese and my cornbread recipe. Bake at about 180c until cornbread is brown & done. (When a knife comes out clean after poking)That’s it! Hope you like and enjoy. Please leave a comment if you try this recipe.

Click here for MeShells Chilli recipe
Click here for MeShells Cornbread recipe
Click here for Amerimanx_travels on Instagram

MeShell’s Diner Tamalè Pie

amerimanx_travels
Meat Based
This recipe is quick, easy and oh so tasty.
5 from 1 vote
Leftovers
Prep Time 25 minutes
Cook Time 1 hour
Total Time 1 hour 25 minutes
Course Baking, Brunch, Dinner, Lunch, Main Course
Servings 4 people
Diet Meat Based

Equipment

Ingredients
  

  • Chilli enough to fill baking dish ½ full
  • Grated Cheddar Cheese use your discretion
  • Cornbread recipe top chilli and cheese with enough mix to leave room for cornbread to rise and bake
  • Jalapeño to top if desired

Instructions
 

  • Make a batch of your favourite chili, pour into a baking dish or Omnia, top with grated cheddar cheese and my cornbread recipe. Bake at about 180c until cornbread is done…that’s it.
Keyword chilli, leftovers, pie
Tried this recipe?Let us know how it was!

MeShell’s Diner Tex-Mex Chilli con Carne

0

“MeShell’s Diner Tex-Mex Chilli con Carne” is a hearty and flavorful dish perfect for campervan cooking. This recipe is perfect for those craving a hearty, flavorful dish while on the road. Packed with rich spices, tender meat, and a variety of beans, it’s a one-pot wonder that’s easy to whip up in a campervan kitchen. The blend of Tex-Mex flavors ensures each bite is bursting with taste, making it an ideal meal for chilly evenings or a comforting lunch. Serve this chili with a side of cornbread or over rice, and you’ve got a satisfying meal that brings a touch of home wherever your travels take you.

Be sure to check out: Amerimanx_travels

MeShell's Diner Tex-Mex Chilli con Carne

MeShell’s Diner Tex-Mex Chilli con Carne

amerimanx_travels
Meat Based
Chilli con Carne means chilli with meat. You can use stewing steak, ground beef mince, ground turkey, ground pork, or ground chicken.
5 from 1 vote
Stove top meal
Prep Time 5 minutes
Cook Time 2 hours
Total Time 2 hours 5 minutes
Course Dinner
Servings 4 Vanlifers
Diet Meat Based

Equipment

  • 1 Dutch oven/soup pot
  • 1 Stove top/gas ring
  • 1 Measuring spoons
  • 1 Measuring cup
  • 1 Stirring spoon
  • 1 Ladle

Ingredients
  

  • 2 tbsp Vegetable Oil
  • 1 tsp Salt To taste
  • 1 tsp Pepper
  • 500 g Beef Mince
  • 1 Yellow Onion Medium in size
  • 1 Bell Pepper
  • 2 Garlic Cloves Minced
  • 2 tsp Ground Cumin
  • 2 tsp Smoked Paprika
  • 1 tsp Marjoram
  • 1/4 tsp Cayenne Pepper
  • 1 tbsp Cocoa Powder Unsweetened
  • 3 cups Beef Broth
  • 2 Bay Leaves
  • 400 g Tomatoes Crushed
  • 400 g Red Kidney beans Drained and rinsed

Instructions
 

  • Heat the vegetable oil in a large Dutch Oven or pot over medium-high heat.
  • Add the beef to the pot and brown in batches so as not to overcrowd the pot.
  • Once browned, add the onion and bell pepper, stirring and cooking until they are soft.
  • Reduce the heat to low and add the garlic, chili powder, ground cumin, smoked paprika, cocoa powder, marjoram, and cayenne pepper.
  • Cook for 1 minute while stirring constantly.
  • Add the beef broth and bay leaves, cover, and simmer for about one hour.
  • Add the can tomatoes, red kidney/ black beans, Cover and simmer for about 2 more hours or until desired consistency. Make sure to stir often to avoid sticking to bottom of pan.
  • Ladle into bowls and garnish with sour cream, minced jalapeno, and cheddar cheese.

Nutrition

Calories: 507kcalCarbohydrates: 34gProtein: 34gFat: 27gSaturated Fat: 10gPolyunsaturated Fat: 1gMonounsaturated Fat: 11gTrans Fat: 2gCholesterol: 89mgSodium: 1347mgPotassium: 1253mgFiber: 11gSugar: 6gVitamin A: 2330IUVitamin C: 56mgCalcium: 99mgIron: 7mg
Keyword beans, beef, chilli, no oven, Slow cooked
Tried this recipe?Let us know how it was!

Kashmiri banana curry

1

Big Picnic Demo dish

This kashmiri banana curry was demonstrated at the 2023 Vanlife Eats big picnic. The Kashmiri banana curry was demonstrated by Shelley of you.trition. Shelley has worked hard to create an amazing recipe book, In celebration of food. This recipe book has 30 incredible recipes (including this curry!). It has a range of dishes to suit most dietary requirements and tastes. Meals range from a quick 20 minute dish, to a showstopper if you have the time. The main thing is that it celebrates the joy that food can bring. If you would like to buy a copy of Shelley’s recipe book (and let’s face it – who wouldn’t?!) you can buy it from here.

In the meantime, if you have overripe bananas that need using up, give the banana bread a miss and make this beauty instead!

Kashmiri banana curry

Kashmiri style banana and chickpea curry

@you.trition
Vegetarian
This kashmiri style curry uses an ingredient most of us wouldn't consider putting in a curry. Banana! Enjoy with paratha or rice
5 from 3 votes
30 minute meal – One-pan
Prep Time 5 minutes
Cook Time 25 minutes
Total Time 30 minutes
Course Dinner
Servings 2
Diet Vegetarian

Ingredients
  

  • 1 Large white onion
  • 2 cloves Garlic
  • 1/2 Green chilli
  • 1 tbsp Ghee
  • 1 tsp Tumeric
  • 1 tsp Cumin seeds
  • 2 tsp Curry powder
  • 2 Very ripe bananas
  • 200 ml Coconut milk
  • 1 tin Chickpeas
  • 1 tsp Garam masala
  • 1 handful toasted flaked almonds
  • Salt to taste
  • Freshly chopped coriander to serve

Instructions
 

  • Peel and dice the onion. Crush or finely dice the garlic. Finely dice the green chilli. Peel and thinly slice the bananas. Drain the chickpeas.
  • In a frying pan, fry the onions in the ghee over a medium heat for 8-10 minutes, stirring regularly, until soft and slightly browned. Add the garlic and green chilli and fry for a further minute. Add the cumin seeds and fry for 2 minutes. Add the turmeric and curry powder and fry for a further minute, adding a drop of water to loosen if needed.
  • Add the sliced bananas to the spices and stir to coat. Cook for 4-6 minutes until they have broken down into the sauce. Add the coconut milk, ½ tin water and chickpeas and cook for 10-15 minutes, until the chickpeas have softened slightly and the sauce has thickened.
  • Remove from the heat, then stir through the garam masala and salt to taste. To serve, scatter with the toasted flaked almonds, green chilli and freshly chopped coriander.

Notes

Be sure to use super ripe bananas in this dish – the ones that are going brown on the kitchen counter are perfect! These are much sweeter than yellow bananas and give the curry its moreish flavour and silky texture

Nutrition

Calories: 491kcalCarbohydrates: 42gProtein: 8gFat: 37gSaturated Fat: 24gPolyunsaturated Fat: 3gMonounsaturated Fat: 8gTrans Fat: 0.01gCholesterol: 19mgSodium: 20mgPotassium: 911mgFiber: 7gSugar: 18gVitamin A: 110IUVitamin C: 17mgCalcium: 103mgIron: 6mg
Keyword banana, chickpea, Curry, dinner, one pan, vegetarian
Tried this recipe?Let us know how it was!

Ligurian Stockfish stew

0

This Ligurian stockfish stew is a simple one pot dish, making it ideal for vanlife. Liguria is a region in North-West Italy. Liguria is the birthplace of pesto. Stockfish is usually made from cod, but can be other kinds of white fish also.

In Liguria this stew is called Stoccafisso Accomodato Alla Ligurie. You can find our other recipes here.

Ligurian fish stew

Liquria stockfish stew

vwt4_furbone
Pescatarian
A Fish-based recipe, which is very simple to prepare
5 from 1 vote
One-pan – Stove top meal
Prep Time 20 minutes
Cook Time 40 minutes
Total Time 1 hour
Course Dinner, Lunch
Servings 4 people
Diet Pescatarian

Equipment

  • Deep Pan

Ingredients
  

  • 600 g Stockfish
  • 50 g Black olives
  • 50 Green Olives
  • 50 g Pine nuts
  • 1 Carrot
  • 1 stick Celery
  • 500 g potatoes
  • 1 clove Garlic
  • 400 ml Passata

Instructions
 

  • Begin by chopping the vegetables into cubes.
  • Add the celery, carrot, garlic, pine nuts, potatoes and olives into a deep pan
  • Remove the bones from the fish and cut the fish into chunks.
  • Keep stirring and after around 10 minutes, add the passata.
  • Put the lid on and cook over a lot heat for around 30 minutes

Nutrition

Calories: 443kcalCarbohydrates: 37gProtein: 34gFat: 20gSaturated Fat: 2gPolyunsaturated Fat: 6gMonounsaturated Fat: 10gCholesterol: 65mgSodium: 1112mgPotassium: 1788mgFiber: 8gSugar: 8gVitamin A: 3443IUVitamin C: 39mgCalcium: 103mgIron: 5mg
Keyword cod, Fish, italian, one pot, Stew
Tried this recipe?Let us know how it was!

Tagliatelle Carbonara

0

Vanlife is all about embracing the simple joys of life on the road, and that includes enjoying delicious homemade meals from the comfort of your campervan.

Simplicity

One of the key appeals of cooking in a campervan is the simplicity it brings to your culinary adventures. Limited space and resources can inspire creativity, and the Tagliatelle Carbonara is a perfect example of how a few quality ingredients can come together to create something truly remarkable.

Minimal Ingredients, Maximum Flavor

With just a handful of key ingredients – pasta, eggs, pancetta, Parmesan cheese, and black pepper – you can create a dish that bursts with flavour. This simplicity not only makes it easy to prepare in the compact kitchen of your campervan but also allows you to fully appreciate the quality of each component.

Time-Efficient Cooking

When you’re on the road, time is often of the essence. The Tagliatelle Carbonara recipe is a blessing for vanlife enthusiasts because it’s quick to prepare. In under 15 minutes, you can have a steaming plate of creamy pasta ready to enjoy by the campfire or under the stars.

The Ultimate Comfort Food

Campervan living can be both adventurous and exhausting, and sometimes all you crave is a comforting, hearty meal. Tagliatelle Carbonara fits the bill perfectly. Its rich and creamy sauce combined with the satisfying chew of fresh pasta makes it the ultimate comfort food, helping you recharge after a day of exploration.

Embracing Authenticity

While campervan cooking often involves making do with what you have, there’s something special about treating yourself to an authentic dish like Tagliatelle Carbonara. It’s a reminder that even in the simplicity of vanlife, you can savor the tastes of distant places and cultures.

Tagliatelle Carbonara is the perfect addition to your vanlife menu. Its simplicity, quick preparation, and comforting appeal make it an ideal choice for campervan cooking. So, as you embark on your next adventure, don’t forget to pack those essential ingredients and savor a taste of Italy while living the vanlife dream.

Tagliatelle Carbonara recipe

Tagliatelle Carbonara

Meat Based
Indulge in the rustic charm of Italian cuisine on the road with our authentic Tagliatelle Carbonara. Cooked to perfection in the cozy confines of a campervan kitchen, this classic dish combines creamy egg, crispy pancetta, and al dente pasta for a taste of Italy wherever your adventure takes you.
5 from 1 vote
10 Ingredients or less – 30 minute meal – 5 ingredients or less – Family friendly – Less washing-up – One-pan – Quick cook – Stove top meal
Prep Time 2 minutes
Cook Time 12 minutes
Course Dinner
Servings 2 Vanlifers
Diet Meat Based

Equipment

Ingredients
  

  • 200 grams Tagliatelle Dried
  • 3 Eggs Medium
  • 125 grams Pancetta
  • 1 cup Parmigiano Reggiano Cheese
  • 1 tsp Black Pepper
  • 1 tbsp Olive Oil

Instructions
 

  • Bring a pan of water to a rolling boil.
  • Add the dried pasta and cook for 6-7 minutes until the pasta is aldente.
  • Pour the pasta including the water into the large bowl.
  • Using the hot pan add a tbsp of Extra Virgin Olive Oil.
  • Add 125g of Pancetta and cook for 3 minutes. Meanwhile…
  • Mix up 2 full eggs and an extra egg yolk into a small bowl along with some salt and pepper.
  • When the fat on the meat starts to brown add the pasta back to the pan. Include a little splash of the pasta water too loosen it all up.
  • Take the pan off the heat and allow to cool a little.
  • Add the egg mix and coat the pasta in the glossy sauce.
  • Serve on two plates with a huge pile of Parmigiano Reggiano Cheese!

Video

Nutrition

Calories: 999kcalCarbohydrates: 75gProtein: 48gFat: 55gSaturated Fat: 21gPolyunsaturated Fat: 8gMonounsaturated Fat: 23gTrans Fat: 0.2gCholesterol: 405mgSodium: 1330mgPotassium: 518mgFiber: 4gSugar: 3gVitamin A: 837IUCalcium: 672mgIron: 4mg
Keyword Easy, italian, pasta, quick
Tried this recipe?Let us know how it was!

Vanlife Eats Big Picnic 2023

0

Yet another Vanlife Eats Big Picnic passes and the new ideas are already flooding our minds for our 2024 event!

This year we had incredible cooking demos, frustratingly inspiring vanlife adventure tales, priceless social media tips, legendary van build advice as well as pet activities, a hand picked craft market, an awesome variety of caterers, the LARGEST fire pit in Vanlife history, the LARGEST vanlife banquet in history, the LARGEST vanlife picnic in history, dance lessons from around the world, incredibly talented music acts all set on the beautiful farmland in the rolling hills of Hampshire.

We have been flooded with emails stating that it was their favourite vanlife event of the year yet again. 😊 But we wont take all that credit, its the amazing vanlife community that make it. Amazing people, inspirational vans and a deep respect for one another. ❤️

Here are some photos of the event to relive the fun..

Want to know when tickets go on sale for 2024?

We owe a HUGE thank you to everyone who helped make this year so amazing as well as to you guys who attended. You are all so incredible and make the whole Vanlife community just the best!

Lots of Love
Sophie & Mark
XX

The ultimate campsite gnocchi

0

Big Picnic Demo dish

This ultimate gnocchi was a cooking demo by @lifeinthebricklane at the big picnic 2023.

The ultimate campsite gnocchi is the perfect dish for when you want something warming and satisfying but really don’t want the dishes that come along with a vancooked meal! It’s one pot, uses minimal tools and can be ready in about half an hour. This ultimate gnocchi is one of our favourites for using up leftover vegetables and it uses so much cheese that it’s a great way to get children to eat their greens! You can switch it up to make it vegetarian friendly or it works for a group of meat eaters and vegetarians. You can also switch out the vegetables depending on what you have in your fridge or what you need to use up – gnocchi keeps well in the fridge so you can have this recipe on the backburner for a night towards the end of a trip when you’re not sure what you’re going to have to hand.

The ultimate campsite gnocchi

The Ultimate Campsite Gnocchi

@lifeinthebricklane
Meat Based
All you need is a decent frying pan (a cast iron pan is our favourite) and a wooden spoon, some gnocchi, parmesan and spare veg and you’ve got yourself a winning campsite supper.
5 from 1 vote
Family friendly – Leftovers – Stove top meal
Prep Time 5 minutes
Cook Time 30 minutes
Total Time 35 minutes
Course Dinner
Servings 2 people
Diet Meat Based

Equipment

Ingredients
  

Ingredients (serves two, scale up for more people):

  • Olive oil
  • 250 g gnocchi shop bought is absolutely fine
  • 6 rashers smoked streaky bacon ignore if vegetarian!
  • 2 cloves garlic
  • 2 shallots
  • 1 bunch fresh thyme
  • 3 medium sized tomatoes the fresher the better; or switch out the medium sized tomatoes for a good handful of cherry tomatoes
  • 1 courgette
  • Chicken stock a stock pot or cube is fine
  • Water
  • 50 g Parmesan a small handful is just right
  • 150 g Spinach
  • 125 g mozzarella (1 ball)
  • 1 sprinkle Chilli flakes
  • Salt and pepper to taste

Instructions
 

  • This looks like lots of stages, but it’s very easy…
  • The first stage depends on whether you’re cooking for meateaters or vegetarians or both. If you’re cooking for vegetarians, skip to stage 2! If you’re solely cooking for meateaters, start by splashing some olive/rapeseed oil into your frying pan, let it heat through slowly and chop your bacon into 1cm cubes. Fry the bacon in the pan until it’s crispy. Remove and set aside. (If you’re cooking for a combination, do the bacon in a separate pan at the same time as step 2.)
  • If you’re cooking for vegetarians, the first stage will be softening your shallots. Add your oil, shallots and a sprinkle of salt, but don’t be too generous with the salt as the later ingredients are quite salty. Finely chop the shallots and cook slowly on a low heat, for 5-7 minutes or until translucent.
  • Finely chop your garlic and add it to the pan. Rustic chopping is fine – we are in a most likely to be in a field, after all!
  • After a minute or two, when the garlic is fragrant, add some fresh thyme leaves and cook for a few seconds.
  • Chop your tomatoes as the garlic is cooking and add them to the pan. They can be fairly chunky, as they’re going to cook down as you move through the recipe.
  • As the tomatoes are cooking, chop your courgette into 2-3cm chunks and fry it off so it’s slightly golden. You’ll want to turn the heat up to medium for this stage. It will soften as you continue to cook, so if it’s any smaller it will start to disintegrate and you’ll lose the fresh courgette flavour in the finished dish.
  • Once you’ve got your golden courgette (don’t cook for any longer than 5 minutes!) add your gnocchi. Make sure you stir well but also allow the gnocchi to brown and crisp slightly. This will add some fun texture to the gnocchi for later.
  • If you’ve cooked bacon, add half of your cooked bacon to the pan and stir in with the gnocchi. If you haven’t – ignore this step…
  • When your gnocchi is starting to turn golden (after 3-5 minutes), add your stock cube and enough water to cover the ingredients in the pan by about 2/3s. Bring to the boil quickly before bringing to a simmer and then turn right down.
  • Add your spinach. Stir well, so the spinach wilts in the pan. It will look like you’re adding way too much spinach to start, but wait until it’s wilted and then you’ll have the perfect balance.
  • Grate in your parmesan. Mix well as you’re grating it in and you will see the parmesan melt and the sauce start to thicken.
  • Rip the mozzarella into small balls and push into the gnocchi mix. Try to spread it out around the pan.
  • Simmer on a low heat for a few minutes, as the mozzarella melts and does its gooey mozzarella thing in the pan. Check for seasoning and add more salt if it requires.
  • Finish by sprinkling some chilli flakes, black pepper and fresh thyme on top.
  • Serve, and enjoy! If you’re cooking for a group, add a fresh green salad and some French baguette to keep it simple but tasty.

Notes

If you don’t quite have the same ingredients but want to try something similar, use the following guidelines to adapt the recipe:
• If you have firm vegetables, fry them off before you add the gnocchi – at the same stage as the courgette.
• If you have leafy veg, add them at the same stage as the courgette.
• If you don’t have bacon but have sausages, take the sausages out of their skin and follow the same steps above with the sausage meat as with the bacon.
Essential tip:
Don’t forget the Parmesan!😉

Nutrition

Calories: 855kcalCarbohydrates: 66gProtein: 42gFat: 49gSaturated Fat: 22gPolyunsaturated Fat: 5gMonounsaturated Fat: 18gTrans Fat: 0.1gCholesterol: 110mgSodium: 1733mgPotassium: 1420mgFiber: 9gSugar: 10gVitamin A: 9504IUVitamin C: 70mgCalcium: 771mgIron: 9mg
Keyword cheese, comfort food, gnocchi, italian
Tried this recipe?Let us know how it was!

MeShell’s Kick A** Guacamole

0

I love mexican food and cooking it. MeShell’s kick a** guacamole is a great edition to any mexican meal. This guacamole is chunky, and perfect for dipping tortilla chips into.

The beloved Tex-Mex starter or side dish originated with the Aztecs. It is hard to pinpoint the exact birth date for guacamole but there are records that it has existed for over half a millennium. During the 1500s, Spaniards were introduced to avocado mixtures that appeared to be extremely similar to guacamole during their explorations of the new world from the Aztecs. The Spaniards thought that the creation would be a huge hit back home, so they brought the concept back to Spain.

The mixture originally included avocados, tomatoes, and chili’s since those ingredients were native to the Americas. Over the years, Spaniards started adding their own ingredients and spin on the recipe, like onions, cilantro, and lime juice.

MeShell's kick ass guacamole

MeShell’s Kick A** Guacamole

amerimanx_travels
Vegan
I love to cook and eat Mexican food. This guacamole is the perfect side dish. Tip – I add the Avocados last as I like my Guacamole a bit chunky and not to pureed.
5 from 1 vote
Family friendly – Less washing-up – No cook – Prep ahead
Prep Time 25 minutes
Total Time 25 minutes
Course Appetizer, Dips / Sauces, Outdoor, Side Dish
Servings 4 people
Diet Vegan

Equipment

Ingredients
  

  • 4 – 6 ripe Avocados
  • 1 -2 limes
  • 1 large ripe tomato
  • Several spring onions or one small red onion
  • 1-2 garlic cloves
  • Handful of fresh chopped Coriander leaves
  • 1 medium Jalapeño
  • Salt and Pepper

Instructions
 

  • All ingredients are to taste and preference, add to mixing bowl after each step
  • Dice several stalks of spring onions (no green bits)
  • Cut tomato and scoop out all the seeds, dice into small bits
  • Finely mince garlic or use a garlic press
  • Remove Coriander leaves from stalks, finely chop
  • Cut open jalapeño and remove all the seeds. Test heat on tongue.
  • Finely dice pepper, add a bit at a time to taste
  • Zest one lime
  • Cut Avocados and dice into bowl
  • Cut lime and squeeze over mixture
  • Stir well
  • Salt and pepper to taste
  • Just remember that flavour develops over time. Less is more and can be added additionally.
  • Cover with cling film
  • Refrigerate until ready to serve with tortillas chips and a lime slice on the side

Nutrition

Calories: 334kcalCarbohydrates: 21gProtein: 4gFat: 30gSaturated Fat: 4gPolyunsaturated Fat: 4gMonounsaturated Fat: 20gSodium: 79mgPotassium: 1075mgFiber: 14gSugar: 3gVitamin A: 622IUVitamin C: 30mgCalcium: 35mgIron: 1mg
Keyword avocado, dip, no cook, Outdoor, picnic, side dish
Tried this recipe?Let us know how it was!