Transport yourself to Northern Africa and make yourself some Moroccan Msemen Flaky Pancakes.
These flaky, golden pancakes are a perfect alternative to traditional pancakes yet they also work as a delicious alternative to flat breads. The crispy flaky layers are ready to soak up all the sweet or savoury goodness you desire.
This ain’t your average pancake. Msemen has a unique texture, crispy and flaky on the outside and impossibly light within, thanks to a special folding technique that traps sprinkles of semolina between each layer.
If you’ve ever been to Morocco you will see this popular street food in every food market. It is classically served with a butter, honey and lemon syrup and served as a popular breakfast or as a snack.
Sweet or savoury? The world is your oyster (or, well, pancake). Drizzle msemen with honey, or go full-on wanderlust with a dollop of harissa and a sprinkle of za’atar. Feeling adventurous? Stuff your pancakes with spiced lamb, creamy avocado, or tangy olives – the possibilities are endless.
Msemen Moroccan Pancakes
Vegan, Vegetarian
These authentic Moroccan streetfood snacks are a must try! Fluffy, flaky pancakes cooked to golden perfection, ready to be dipped in honey, drizzled with melted butter, or stuffed with any sweet or savory delight you can think up.
5 from 1 vote
10 Ingredients or less – Less washing-up – One-pan – Prep ahead – Quick cook
4tbspSunflower OilFor the pan and for the rolling surface
4tbspExtra Semolina FlourTo sprinkle in between folds
1/4tspBaking Powder
Instructions
Mix the plain flour, semolina flour, salt, sugar and yeast in bowl.
3/4 cup Fine Semolina Flour, 1/4 tsp Dry Active Yeast, 1/2 tsp Salt, 1 tsp Sugar, 1 cup Plain Flour
Gradually mix in the water. Be very careful here as you do not want the dough to be sticky. I mix with a spoon until the dough has formed and then I can start kneading with my hands. If it ends up being sticky then add a little more flour.
1.25 cup Warm Water
Lightly flour your work surface and start kneading the dough for a good 5 minutes. The dough should feel smooth, soft and springy.
Extra Flour
Divide the dough into 6 balls and leave to prove on a lightly oiled surface for 30 minutes. Cover with a damp tea towl to stop the dough drying out.
4 tbsp Sunflower Oil
Mix the small amount of baking powder into a little bowl of semolina. This is to sprinkle in between layers and is the key to getting flakey layers in your pancakes.
4 tbsp Extra Semolina Flour, 1/4 tsp Baking Powder
The dough should have slighly increased in size and now you can take each ball at a time and on a lighly oiled surface press or roll it into a super thin rectangle.
4 tbsp Sunflower Oil
Spot a little butter onto the surface. (about 6 spots each the size of a pea).
2 tbsp Butter
Lightly sprinkle on a small amount of the semolina and baking powder mix.
1/4 tsp Baking Powder, 4 tbsp Extra Semolina Flour
Fold the top long side to the middle of the shape and then fold the bottom longside so that it overlaps the middle. It should look like an envelope.
Sprinkle with some more semolina.
4 tbsp Extra Semolina Flour, 1/4 tsp Baking Powder
Fold in the first side so that it covers to half way and then fold in the other side so that it layers over the top. You should have a small square parcel.
Repeat this process for each ball of dough until you have a pile of 6 parcels. Cover to keep them from drying out.
Heat a pan to medium heat and add a splash of oil.
Take one parcel at a time, and on a lightly oiled surface press it out to form a larger pan sized square. Sprinkle the last of the semolina over the top.
1/4 tsp Baking Powder, 4 tbsp Extra Semolina Flour
Fry on one side for 2 minutes and then flip and fry the other side for 2 minutes. I often flip these again so they get an extra minute on each side. They should puff up and go golden on the top. Keep an eye on them so they do not burn!
4 tbsp Sunflower Oil
Repeat the process for each pancake until you have your stack of crispy, flaky, layered pancakes.
Traditionally these are served with a butter and honey syrup but you will find that they go with just about anything.
As 2024 begins so does veganuary, we have lots of exciting vegan recipes for veganuary. Vegan cooking doesn’t have to be bland and boring. The vegan recipes in this article are packed full of flavour and colour. Veganuary can be a great opportunity to try new meals and ingredients you may not have tried before. Let’s delve into these exciting vegan recipes then!
1. West African peanut stew
This vegan West African peanut stew is hearty and delicious, with a little heat from the chilli and the tang of the lemon. The sauce is so good you will definitely want to mop it up with some bread. We serve ours with some flatbreads, you could also serve it with some rice which would mop it up beautifully too! The great thing is that it can be cooked in one pan, reducing the washing up. A blender is needed for the curry paste, a great tip is to make this in bulk and freeze it.
2. Spiced red lentil mini burgers
These mini lentil burgers are great for making ahead of time. They are perfect for making ahead and reheating when required, and can be a great snack or as part of a main meal. They can be cooked in an oven or a frying pan, making them a versatile vanlife dish.
3. Raw chocolate & peppermint tarts
What better vegan dish for vanlife, than one that doesn’t require cooking?! These raw chocolate & peppermint tarts are incredible. This recipe requires a blender or food processor for the base, as well as a fridge for it to set. If you have these in your van then this is a recipe you will not regret trying it.
4. Everything tofu sauce
Ready to get saucy? This tofu sauce is a great recipe to try this veganuary. You can serve it with pasta, use it in a lasagna or even use it as a dip! It’s versatile and super, super easy! You don’t even need to cook it. You do need a blender though, so if you don’t have one, this recipe may be the inspiration you need to buy one.
5. Butternut squash, apricot, chickpea and chard curry
The next exciting vegan recipe for veganuary is another delicious curry! Curry is a vanlife staple for many so we just had to have 2 on the list. This butternut squash curry is full of colour and flavour and can be cooked in just one pan. Less washing up is always a winner in our van, especially when you get a delicious meal at the end of it.
6. Bejewelled couscous salad
What could be better than a couscous salad? A bejewelled couscous salad of course! As with some other vegan recipes featured here this recipe is no-cook. All you need is a kettle. Another great thing about this recipe is that it is delicious warm or cold. This is great if you want to make a big batch and have leftovers the next day. It’s also good for taking on picnics, hikes etc.
7. Orange Omnia cake
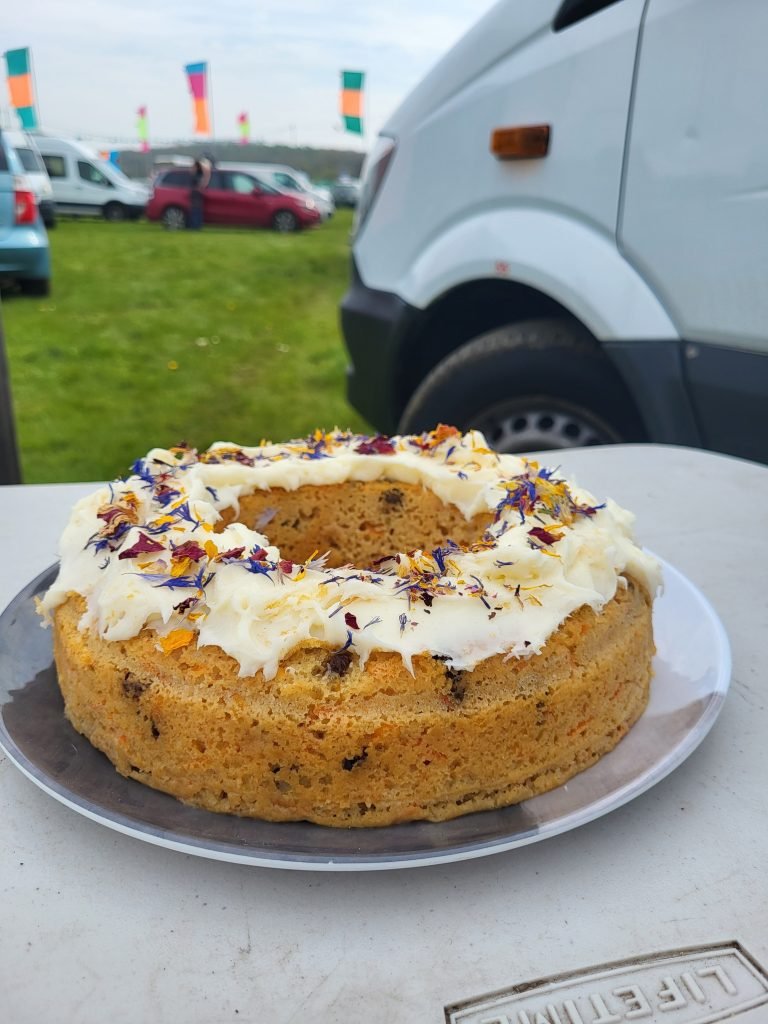
We have to finish this round-up of exciting vegan recipes with this orange Omnia cake. We do not have an oven in our van, and I couldn’t give up baking. So baking in my Omnia stove top oven has meant we can still have cake on the menu. I actually prefer baking vegan cakes now as I find they come out perfectly every time!
Well vanlifers, there we have it. 7 exciting vegan recipes for you to try this veganuary. Let us know in the comments which one you want to try. You can find more vegan recipes here. If you want to share your own vegan recipe you can do that right here and share what you like to cook in your van with others.
Please note this article contains affiliate links. This means any purchases you make through these links will provide us with a small commission with no extra charge to you. This helps us cover the running costs of the website and keeping the content coming. Thank you
Italy is a beautiful country with an outstanding cuisine, and a haven for cheese lovers. Among the plethora of Italian cheeses, some stand out for their unique flavors, textures, and rich histories. So, if you’re planning to roam the Italian streets in awe of culinary delights, make sure to keep an eye out for these eight remarkable Italian cheeses. Trust me, they’re worth every bit of fridge space!
1. Caciocavallo: The Hanging Cheese
Origin: Southern Italy
Caciocavallo is a peculiar sight in Italian markets, often seen hanging in pairs like saddlebags. This cheese has a smooth, hard rind and a firm texture. When young, it’s mild and milky, but with age, it develops a sharper taste. It’s perfect for slicing over a simple bruschetta or grilling. This cheese earns its nickname “hanging cheese” from its unique aging process. The name “Caciocavallo” literally translates to “cheese on horseback,” which is a nod to the traditional method of hanging the cheese during its aging phase.
2. Burrata
Origin: Apulia
Burrata might look like mozzarella at first glance, but inside, it’s a whole different story. This cheese is filled with cream and stracciatella (shreds of mozzarella), offering a rich, buttery flavor. Spread it on crusty bread or pair it with fresh tomatoes for an indulgent snack. Dont be shy to eat a whole one… I do!
3. Robiola
Origin: Piedmont and Lombardy
Robiola is a soft, creamy cheese that can be made from cow, sheep, or goat milk, or a blend of all three. It has a tangy, slightly sweet flavor and a smooth texture. It’s fantastic spread on crackers or melted into a risotto, adding a luxurious and decadent touch to your dish.
4. Scamorza
Origin: Central and Southern Italy
Scamorza is similar to mozzarella but with a twist – it’s often smoked, giving it a distinctive flavor. This pear-shaped cheese has a chewy texture and is excellent for melting. Try it in your campervan grilled sandwiches or sliced on top of a fresh salad for a smoky kick.
5. Fontina
Origin: Valle d’Aosta
Fontina, produced in the Italian Alps, is a semi-soft cheese with a strong, nutty flavor and a hint of honey. It melts beautifully, making it perfect for a quick fonduta (Italian fondue) or as a topping on your polenta.
6. Stracchino
Origin: Lombardy
Stracchino is a soft cheese with a mild, slightly acidic flavor. Its creamy texture spreads easily, making it a great addition to a sandwich or as a base for some creative pizza toppings. It’s a cheese that proves simplicity often wins the flavor game.
7. Caprino
Origin: All over Italy
Caprino, made from goat’s milk, varies from soft and spreadable to firm and tangy, depending on the aging. It’s perfect for a cheese board or crumbled over a salad. Plus, its distinct flavor can elevate even the most straightforward pasta dish.
I LOVE this cheese! Provolone Valpadana is a semi-hard cheese from Northern Italy comes in two varieties: Dolce (sweet) and Piccante (sharp). Whether you’re slicing it for a sandwich, grating it over pizza, or snacking on it with some fruit, Provolone Valpadana adds a delightful Italian twist to your meal.
These eight unique Italian cheeses are a must try during a journey across Italy. Each cheese tells a story of regional traditions and artisanal craftsmanship. As you travel, indulge in these cheesy delights and remember, every cheese you taste is a part of Italy’s rich culinary history!
Transform traditional lasagne by replacing pasta with tortillas, infusing each layer with bold Mexican flavors. This dish is a perfect blend of convenience and taste, ideal for vanlife cooking. It layers soft tortillas with a rich mixture of seasoned ground meat, beans, corn, and a blend of cheeses, all topped with a zesty tomato sauce.
Thanks to most supermarkets, you can easily find a plethora of spices that bring Indian dishes to life. Staples like cumin, coriander, turmeric, cloves, cinnamon, cardamom, nutmeg, black pepper, bay leaves, ginger, paprika, and cayenne pepper are usually on the shelves. For more exotic spices, a quick trip to an Indian or Pakistani grocery store or a simple online search will do the trick.
Whole Spices or Jarred Spices?
Whilst not essential buying whole spices can be a smart move, especially when you’re limited on space and resources. Whole spices last longer when stored in cool, dry places away from light. Plus, grinding them fresh right before cooking unlocks an aroma and flavor that pre-ground spices can’t match. You can use a handy electric grinder or go old school with a pestle and mortar.
Don’t have a spice grinder or pestle and mortar? There is nothing wrong with jarred herbs and spices at all. We use them often and the taste difference is minimal. However, once the spices are ground down they do tend to lose flavour quickly. Also be aware that jarred herbs and spices do not seem to last that long and its always that day you go to use them that you notice something is out of date!
Remember, when you transfer spices from plastic packets to jars, labeling is crucial. This is especially true for spices bought from ethnic groceries – you don’t want to mistake ground cumin for coriander!
The Four Classic Heroes of Indian Cooking: Cumin, Coriander, Turmeric, and Chili Powder
Indian cuisine, renowned for its vibrant flavors and aromatic spices, often hinges on four key players: cumin, coriander, turmeric, and chili powder. These spices are the foundation of countless Indian dishes, each bringing its unique characteristics to the table. Understanding how to use these “four classic heroes” is essential for any campervan chef looking to infuse their meals with authentic Indian flavors.
1. Cumin: The Flavor Powerhouse
Cumin seeds, known for their distinctive earthy and slightly bitter taste, are a cornerstone in Indian spice blends. This spice brings a depth of flavor that is unmistakable and irreplaceable.
Usage Tips: Toast the seeds to release their aromatic oils before grinding them into a fine powder. Cumin is versatile – use it in curries, lentil soups, and vegetable dishes. It pairs exceptionally well with pulses and root vegetables.
2. Coriander: The Fresh Balancer
Coriander, often used in its seed form, offers a sweet, floral, and citrusy flavor. It’s the perfect counterbalance to the robustness of cumin and is essential in many spice blends, including garam masala.
Usage Tips: Like cumin, toasting coriander seeds before grinding them can enhance their flavor. Coriander powder is a staple in marinades, gravies, and vegetable dishes. It’s also sprinkled in at the end of cooking for a burst of fresh flavor.
3. Turmeric: The Golden Healer
Turmeric is famed not just for its culinary uses but also for its medicinal properties. It imparts a warm, mildly aromatic flavor and a characteristic golden hue to dishes.
Usage Tips: A little goes a long way with turmeric. It’s used primarily for its color and health benefits, so use it sparingly to avoid overpowering other flavors. Turmeric is a staple in almost all curry preparations, lentil dishes, and rice.
4. Chili Powder: The Heat Element
Chili powder adds the quintessential heat that Indian cuisine is famous for. It can range from mildly spicy to intensely hot, depending on the type of chili powder used.
Usage Tips: Adjust the amount of chili powder according to your heat tolerance. It’s used in curries, meat dishes, and even in some spice-infused drinks. Remember, the heat of chili powder can intensify during cooking, so it’s best to start with less and add more if needed.
These four spices – cumin, coriander, turmeric, and chili powder – form the backbone of many Indian dishes. They each have unique flavors and properties that, when combined, create a symphony of taste. In a campervan kitchen, mastering these spices means you can bring the essence of Indian cuisine to your mobile dining experience. Experiment with these heroes of Indian cooking, and watch as they transform simple ingredients into exotic and flavorful meals.
Refining the Balance: Double Coriander to Cumin
In the harmony of spices, coriander often takes a lead role, with cumin providing a supportive base. The 2:1 ratio of coriander to cumin is a classic in Indian cooking, creating a balanced, rounded flavor profile in dishes.
Refined Tips for Using Cumin and Coriander:
Use Twice as Much Coriander: For every part of cumin, use two parts of coriander. This ratio ensures that the citrusy, sweet notes of coriander soften the intense, earthy flavor of cumin.
Adjust According to the Dish: While the 2:1 ratio works well in most cases, feel free to tweak it based on the specific requirements of the dish or your personal taste preferences.
Taste and Adjust: As always, the key to perfect seasoning is tasting and adjusting as you cook. Depending on factors like the freshness of your spices and the other ingredients in your dish, you might find that slightly altering this ratio works better for you.
The 2:1 ratio of coriander to cumin is a tried and true guideline in Indian cooking, offering a well-rounded flavor profile. In your campervan kitchen, embracing this ratio can elevate your cooking, bringing a touch of traditional Indian culinary wisdom to your mobile dining experiences. Remember, cooking is as much an art as it is a science, so don’t hesitate to experiment and find the balance that works best for your palate.
Garlic and Ginger: That deep curry base flavour
Garlic and ginger are more than just ingredients; they’re the deep flavour at the heart of many curry bases. These two components, often used together, are fundamental in creating the depth and complexity that characterizes Indian curries. Their relationship in Indian cuisine is akin to that of salt and pepper in Western cooking – essential and transformative.
Garlic
Garlic, with its pungent and robust flavor, is a cornerstone in Indian cooking. It adds a depth of flavor that is both earthy and aromatic. In curry bases, garlic is often the first layer of flavor, setting the stage for spices and other ingredients.
Usage Tips: To mellow its intensity and bring out its sweetness, garlic is usually finely chopped or crushed into a paste and then sautéed. It’s important to cook garlic just right – undercooking leaves it raw and overpowering, while overcooking can make it bitter.
Ginger
Ginger offers a sharp, slightly biting flavor with a hint of lemony sweetness. In curries, it complements garlic by adding its own unique deep warmth and zest.
Usage Tips: Fresh ginger is typically peeled, minced, or grated into a paste. It’s often added to the pan shortly after the garlic, allowing its flavor to meld with the garlic and other spices.
The Garlic-Ginger Paste: A Curry Essential
In many Indian recipes, garlic and ginger are used together in the form of a paste. This paste forms the backbone of numerous curry bases, imparting a rich and layered flavor profile.
How to Make Garlic-Ginger Paste: Combine equal parts of garlic and ginger with a little water and grind them to a smooth paste. You can make this in bulk and store it in the refrigerator for ease of use.
Versatility in Use: Garlic-ginger paste is used in marinades, as a base for sautéing onions and spices, and as a flavor enhancer in sauces and gravies. It infuses dishes with a distinctive aroma and taste that is quintessentially Indian.
Garlic and ginger are not just ingredients but the essence of Indian curry bases. They create a harmonious blend that serves as a foundation for building complex flavors. For chefs, mastering the use of this dynamic duo can significantly elevate the quality of their Indian dishes. It allows for an exploration into the depths of Indian culinary traditions, bringing authentic tastes and aromas right into your kitchen. Its imperitive that you do not mask the flavour of the garlic and ginger by adding too much spice to your dish. Experiment with this powerful combination, and discover how they can transform simple ingredients into extraordinary Indian curries.
This potent resin, traditionally from Afghanistan and Western Kashmir, has a unique smell that has been compared to truffles. It’s a powerful digestive aid used in minuscule amounts. Asafoetida can be a bit hard to find, so feel free to skip it in recipes or buy a small quantity if you do find it.
Cardamom (Elaichi)
Cardamom pods, found in white or green, are treasure chests of aromatic seeds. The white ones are bleached and less flavorful than the green. Use them whole for flavor and aroma, but don’t eat them – they’re like bay leaves.
Cayenne Pepper (Pisi hui lal mirch)
A key ingredient in Indian cooking, cayenne pepper can be adjusted to taste. Kashmiri chili powder is a great alternative with its vibrant color and flavor.
Fresh, Hot, Green Chillies (Hari mirch)
These vitamin-rich chillies add a unique flavor to Indian dishes. If you can’t find them, increase the cayenne pepper slightly in your recipe. Store them unwashed and wrapped in the fridge, and handle with care.
Whole, Dried, Hot, Red Chillies (Sabut lal mirch)
Used for their skin’s flavor, these chillies are fried in oil until they puff up. Be cautious when handling them, and remove seeds if you want less heat.
Cinnamon (Dar cheeni)
Cinnamon sticks are a staple in many meat and rice dishes, used for flavor and not typically consumed.
Cloves, Whole (Long)
Like cinnamon, whole cloves add flavor and aroma to dishes but aren’t meant to be eaten.
Fresh Grated Coconut (Nariyal)
A fresh coconut should be heavy with liquid and crack-free. Use the grated flesh in Indian dishes for a burst of flavor.
Fresh Green Coriander (Hara dhania or kothmir)
A favorite Indian herb, it’s used for both flavor and garnish. Store it in a container with water, like flowers, in the fridge.
Coriander, Seeds and Ground (Dhania, sabut and pisa)
These seeds are widely used in Indian cooking. Freshly ground coriander seeds have a more potent flavor than pre-ground versions.
Cumin, Seeds and Ground (Zeera, sabut and pisa)
A staple in Indian cuisine, cumin is used in both whole and ground forms. Whole seeds retain flavor longer and can be easily ground.
Fennel Seeds (Sonf)
These seeds have a milder, liquorice-like flavor compared to anise seeds. They’re great in meat and vegetable dishes.
Garam Masala
A blend of warming spices like cardamom, cinnamon, cloves, and nutmeg. This mixture adds a final aromatic touch to dishes. Homemade blends often surpass store-bought in flavor.
Ginger, Dried and Fresh
Dried ginger is used in sweet dishes while fresh ginger adds a pungent flavor to many Indian recipes. Fresh ginger should be stored in a cool, airy place or in the fridge.
Mustard Oil (Sarson ka tel)
Distinctly pungent when raw and sweet when heated, mustard oil is used for cooking vegetables and fish, especially in Bengal and Kashmir.
Mustard Seeds, Whole Black (Sarson)
These seeds add a nutty flavor when cooked in oil. They’re a staple in many Indian dishes.
Nigella (Kalonji)
These teardrop-shaped seeds have a unique, earthy aroma and are used in vegetable, fish dishes, and pickling.
Nutmeg (Jaiphal)
Buy whole for the freshest flavor. Nutmeg is soft and easily broken for use in recipes.
Saffron (Zaafraan or kesar)
This expensive spice adds color and aroma to festive dishes. For a cheaper alternative, a pinch of turmeric can substitute, though it lacks the distinct saffron flavor.
Sesame Seeds (Til)
Unhulled sesame seeds, particularly roasted, add a nutty flavor to dishes.
Silver Leaf (Vark)
Used for garnishing sweets and festive dishes, this edible silver tissue should be stored carefully to avoid tarnishing.
Turmeric (Haldi)
A key spice in Indian cooking, turmeric adds color and an earthy flavor. It’s also known for its digestive and antiseptic properties.
Incorporating these spices into your Indian cooking routine can transform simple ingredients into vibrant, flavor-packed dishes. Remember, the key is to start with small quantities and adjust to your taste. So, fire up that campervan stove and let the magic of Indian spices elevate your meals to a whole new level!
This Omnia vegan orange cake was demonstrated by me (Sophie) at Vanlife Eats 2023. This vegan orange cake is moist and packed full of flavour. The vinegar mixes with the baking soda to help the cake rise beautifully. Being as we do not have an oven in the van we always bake in the Omnia but this can be made in a conventional oven too.
When using non-dairy milk in the van we love to use Overherd powdered oat milk. Being powdered means it stores well in the van. You can make up what you need so there’s no waste. It’s really easy to mix up too! We love it.
Please rate this recipe if you try it, and feel free to leave a comment too. We would love to know if you like it 🙏
Omnia vegan orange cake
Vegan
This delicious vegan orange cake was a demo dish at Vanlife Eats 2023. Baked in the Omnia oven. Not only is it tasty, but it's moist and fluffy too!
Orange zestof one orange (save some for the frosting)
For the icing
1tubVanilla flavour frosting
1tspOrange extract
Orange zest
Instructions
For the cake
If you like to pre-heat your Omnia, now is a good time to do that. Leave the silicone mould out of the oven.
In a large bowl add the dry ingredients and mix together.
If using powdered milk mix this with your water now following the instructions on the packet.
Zest the orange
Pour in the milk, oil, vinegar, vanilla extract and orange extract to the dry ingredients. Mix through but do not over-mix or you will knock out the air from the vinegar and baking soda combination.
Gently mix the orange zest through the batter.
Pour into the silicone mould and place into the Omnia oven over a low/medium flame.
Bake for 30 minutes or until cooked through
Leave to cool for a couple of hours in the mould.
Mix in the orange extract & orange zest to the tub of frosting. When the cake is cool, remove from the mould and add the frosting on top of the cake.
Notes
If you are using a conventional oven bake at gas mark 4 (180c).You can bake using 2 8 inch round cake tins.
Our unique Lemon Mascarpone Mince Pies offer a delightful twist on the classic holiday treat. These pies add a new layer of zesty lemon infused mascarpone cheese to sit above the fruity mincemeat layer, creating a unique flavor profile that’s both refreshing and indulgent.
Ideal for campervan cooking, this recipe is designed for simplicity and convenience with a mass of decadance. The mincemeat, paired with a lemon infused mascarpone topping, sits inside a buttery, flaky crust, making each bite a perfect balance of tart, sweet, and creamy textures.
Perfect for festive gatherings or cozy nights in your campervan, these pies will be a memorable addition to your holiday spread.
Lemon Mascarpone Mince Pies
Vegetarian
Enjoy the unique blend of zesty lemon and creamy mascarpone in these easy-to-make Lemon Mascarpone Mince Pies, perfect for campervan cooking at Christmas.
Begin by preparing the pastry. Rub the butter into the flour, then stir in the golden caster sugar and a pinch of salt until well combined.
Form the mixture into a ball. There's no need to add any liquid. The dough should be quite solid, resembling the texture of shortbread. It's ready to use immediately, but you can also refrigerate it for later use.
Instead of heating an oven, set up your Omnia stove top oven ring on the hob. Shape the dough into small, walnut-sized balls and press them into the holes of your Omnia muffin mould to form the base of the pies. They are quite deep pies these! Oh and dont forget to save some dough for the lids!
Create smaller balls of dough, flatten them between your palms to form lids that are just large enough to cover the pies.
Filling
In a small bowl mix together the Mascarpone, the Lemon Curd and grate in the rind of 1 Lemon.
Fill each pastry base with a layer of mincemeat and a layer of cheese.
Place the lids on the pies, gently pressing the edges together to seal, they will naturally adhere.
Break and beat an egg into a bowl or cup and brush each pie. This will add a golden finish to the pie.
Omnia Cooking
They Omnia should be preheated for 5 minutes prior to cooking but briefly turn off the gas so that the flame doesnt burn you through the centre hole!
Add the fully loaded muffin ring to the Omnia, place the lid on top and turn the flame back on to a low heat. The flame should be contained in the centre of the Omnia and not burning over the outer ring.
Cook for 40 minutes until the tops look golden. Serve warm or cold!
Have you ever been put off frying in a campervan? When you see all those trending recipes on TikTok and Insta they often involve frying and naturally you wouldnt want it to stink out your van. There is nothing worse that the smell of fried food on your clothes and worse of all in your bed sheets!
Lucky for you we’ve learnt the hard way and we’ve done some experiments for you. We’ve even found an awesome vanlife hack! I am going to talk about our go-to pan, managing those pesky frying smells, and ensuring a safe and enjoyable cooking experience.
First things first, let’s talk about the equipment we use. During our vanlife journey, we’ve tried various pans, but one has become our favourite – the Flavorstone Pan. This pan replaced at least 3 pans in our limited space van cupboards; our frying pan, a saucepan, our deep pan and our wok. It’s also incredibly light in weight. Its deep sides make it ideal for both shallow and deep frying, and the included frying basket is awesome for frying! I dont mean to make this a sales pitch but this pan really is one we rave about and everyone we have recomended it to has thanked us.
Tackling Frying Smells in a Confined Space
Now, let’s address the elephant in the room – frying smells. We all love the aroma of frying bacon or onions, but in a confined campervan space, it can quickly become overwhelming. Our solution? Proper ventilation.
We highly recommend installing a ventilation fan that pulls clean air in and extracts the stale air out. This ensures perfect air circulation, keeping your van smelling fresh.
It is also beneficial for your health as well as for climate control to keep a clean circulation of air. An essential consideration when planning your van build.
Choosing the Right Ventilation Fan
When selecting a ventilation fan, consider one with variable speed settings. This way, you can control the airflow based on your cooking needs and they can be quite noisy on full power. The known brand is Maxxair who make AMAZING fans but they can be quite expensive. For our van build we have installed a generic one from Amazon and its perfect for us. The only downside is that you can not have it running when it is raining – unlinke the Maxxair.
Vanlife Hack
This is a know kitchen hack and and perfect for a campervan. Its that magic dust Baking Soda! This stuff seems to have a multitude of uses and soaking up odars is one!
Baking soda works well for removing bad smells because it’s a basic substance that reacts with the acids in the odors. This reaction changes the smelly stuff, making it less stinky. It’s a handy and simple way to keep your van smelling nice, thanks to a bit of science!
We use these small muslin bags and fill them with baking soda and scatter them around the van. They are small and descreet and they help in nuturalising the odors in the van.
Frying Techniques and Tips
Heat Management
In a campervan, managing your energy resources is crucial. When frying, start with a medium heat to warm up your Flavorstone pan. This gradual heating helps in energy conservation. Plus, it gives you better control over the cooking process.
Oil Choices
Selecting the right oil is another key aspect. We prefer oils with a high smoke point, like canola, sunflower or peanut oil. These oils can handle the heat without burning, ensuring a tasty and non-toxic meal. Olive oil is ok for shallow frying but it can be expensive to use in a deeper fry! Personally I like to use avocado oil but again it can be expensive so sunflower is an ideal oil.
Safety First
Frying in a small space requires caution. Safety should always be your top priority!
Water is often a reason that oil starts to spit and can cause an accident such as burns or even the pan catching on fire. Make sure your utensils are all clean and dry and ensure there is adiquate space around your cooking area should an accident happen. Having a damp towel to hand is useful so that you can cover the pan and cut off the oxygen should the pan catch fire.
Make sure you do not pour that hot oil down the sink! The best way to deal with the pan of oil is to let it cool completely. Place the lid on the pan and remove the handle or twist it out of the way so it can not be knocked. When the oil is cool, pour it into a sturdy, sealable container, like an old jar or a milk jug. It’s a smart and safe way to store used oil, especially on the move. If you can, recycle the oil at a designated disposal site, or use it for another round of cooking if it’s still clean. Remember, disposing of oil correctly is not only eco-friendly but also keeps your van’s plumbing from clogging up.
Wrap-Up
Frying in a campervan doesn’t have to be a concern and certainly shouldnt be avoided. There are so many quick, easy and delicious fried food recipes to cook in your campervan. With the right equipment, techniques, and a bit of practice, you can whip up delicious fried meals wherever your travels take you.
Like we do often, are you craving a quick and tasty snack during your vanlife adventures? This Easy Onion Ring recipe is just perfect! Made with minimal ingredients and requiring just a simple campervan kitchen setup, they’re surprisingly simple to whip up. All you need are onions, a simple batter, and oil for frying.
These Easy Onion Rings come out crispy and delicious, ideal for an evening snack by the campfire or a fun side dish with your meals. This recipe is a surefire way to add some extra crunch and flavor to your vanlife cooking repertoire.
Easy Onion Rings
Vegetarian
These onion rings are a fantastic way to indulge in some classic comfort food while on the road. Enjoy them as a standalone snack or as an accompaniment to your main dishes. Happy cooking!
5 from 1 vote
10 Ingredients or less – Leftovers – No water – One-pan – Quick cook – Solo travel
1CupSunflower Oilor any alternive oil of your choice
1 1/4CupPlain Flour
1tspBaking Powder
1tspSalt
1CupMilk
1EggLarge
3/4CupBreadcrumbs
Instructions
Begin by slicing your onion into 1/4-inch-thick rings. This size is perfect for getting that ideal balance of onion and crispy coating.
Heat your oil in a deep-fryer until it looks seriously hot!
Set up your breading station with three shallow dishes. In the first, whisk together flour, baking powder, and salt. In the second, blend the milk and egg. Place the bread crumbs in the third.
Coat each onion ring in the flour mixture, ensuring it's fully covered. Then, dip it into the egg mixture, letting the excess drip off. Finally, coat it well in the bread crumbs.
Fry the onion rings in batches of 3-4 at a time until they're golden brown, which should take about 2-3 minutes. Drain them on paper towels.Finish by sprinkling with seasoned salt to taste.
We use cookies to ensure that we give you the best experience on our website. If you continue to use this site you are consenting to these cookies.OkPrivacy policy